In this tutorial, you will learn how to create re-directs using IIS ReWrite. Creating redirect rules is something most web developers will have to do throughout their careers. There are so many reasons why you need to implement a redirect. Marketing has done something silly and they need a quick fix, an SEO company advises you to remove all the sites trailing slashes to improve ranking, a new product has launched and a client-friendly URL is required, the list could go on and on. If you're like me, you'll do a basic redirect and then when you're asked again in a few months' time, you'll have forgotten what you need to do and Google it. If that's you, then this quick overview of re-directs will help you.
301 Redirects
The most common type of re-direct is the 301 redirect. This is where a URL needs to change. The old URL needs to redirect a user to a new location. With this type of redirect the URL in the user browser will change, e.g. if a user types in www.website.com, they will be redirected to a completely new URL. The redirect can be another page or file on your website, it can be an image, or it could be a link to another website. The main point is that it is a permanent redirect. It will stay like this forever!
The most common scenario where you will need to set up these redirects is during a website migration. Any good SEO company will tell you that you don't want to lose your precious search engine ranking when you upgrade your website. During a migration, it is likely the URL structure of the site will change. Creating a 301 redirect that maps the old URL structure to the new URL structure is an essential migration task.
Another common reason for this type of set-up is to force a visitor to work in a certain way. You might want to force all page URLs to only be available over HTTPS (read this article to learn how to do that), or, all URLs must use a WWW or non-WWW policy (read this article to learn how to do that). In these instances, a re-write rule will be structured like this:
The complex part of creating a redirect is usually the rule, the part where you need to add the regular expression. This is done within the <match> tag. To help clarify things, I'll give some examples of some different types of rules so you can see how a rule matches to a URL:
You might be wondering what all the strange characters in this rule mean, so here's a brief guide:
- ^: Match when the first page of your URL. after your domain matches
- $: Match only if the rule is at the end
- ?: An OR, to create an optional part within a rule
- .: Match based on a single character
- *\0-9 *: Matches on zero or more times
- +: Match on one or more times
- (.\A-*): Matches any character
- \.: Match anything with a literal dot in it. The literal dot can be replaced for, a-z etc...
- ([^.]*): Match anything except a literal dot
The redirect will kick in when the redirect rule is matched on an incoming URL.
Rewrite Rules
The other type of rule is a rewrite. A rewrite will not change the URL in a user's browser, instead, a rewrite will simply display content from a different location and make it look like it's coming from the original URL. If the redirect is internal and it is contained within your website, you could add the redirect as a routing rule within your sites route.config. Performing a rewrite at a higher level within IIS is usually a bit more efficient. A rewrite rule looks really similiar to a redirect rule. The main difference is that the action type is set to Rewrite:
Reverse Proxy
Up to this point, the rules are for pages contained within the same site. In some rare examples where you need to provide some pages from a legacy application, for example, you may need to create rewrites to assets on a different server as a reverse proxy. By default, IIS won't allow you to do a rewrite to a remote server for obvious security reasons.
To set up IIS as a reverse proxy, you will need to install Application Request Routing. For the security conscious out there, this is an official Microsoft product and not some third-party bolt-on. You can download ARR here.
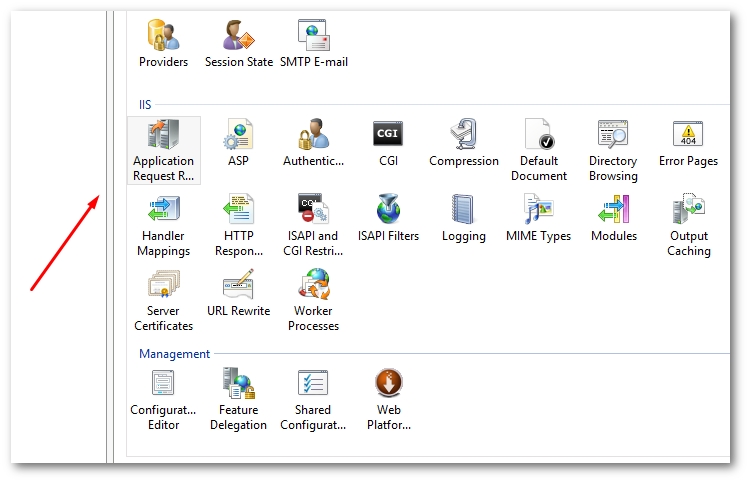
After installing ARR, you should be able to see it within IIS on the server level. Click on it.
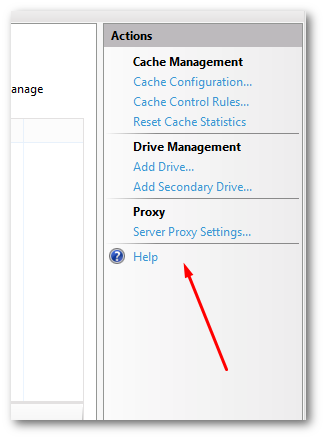
Click the server proxy settings button.

Enable the Enable proxy button. Doing this will now allow you to create Rewrite rules that point to pages on websites that don't live on your web server. If you do not enable, ARR and try to rewrite to a different domain, you will see a 404.4 error. Understanding this point can save you time. Speaking from personal experience, you can spend ages figuring out why your redirect rule isn't working, when in essence it is. Without ARR enabled the reason why the rule does not work is that because of will be an IIS security permission issue rather than a rule issue!

Whitelisting IP Addresses
Often, when you launch a new website, you may need to run your current website and your existing website in parallel. For example, you may want to run a beta version of the site on a different domain like beta.website.com for testing. If you want this domain to only be accessible by certain people, you will need a rule. There are a number of different techniques and approaches you can restrict access, one of which is whitelisting certain IP addresses. Restricting a site by IP is done like this:
This concludes most of the rules you will need to create within IIS. As you can see there are four main types you need to be aware of. With these examples, I am sure you can nail any situation! Happy Coding 🤘