In this guide, I'm going to cover all the code you'll need to start using NUnit. The actual writing of the unit test is usually pretty easy, the harder part is knowing how to make old code testable code, or how to write code that will be easy to maintain in the future. In this tutorial, we will ignore this complex non-sense and get to the anatomy of a unit test.
An NUnit Class
First, you'll need to add NUnit to your project, as always this is done via Nuget, either through the package manager console or in Visual Studio solution explorer, right-click on your solution and click Manage Nuget package.
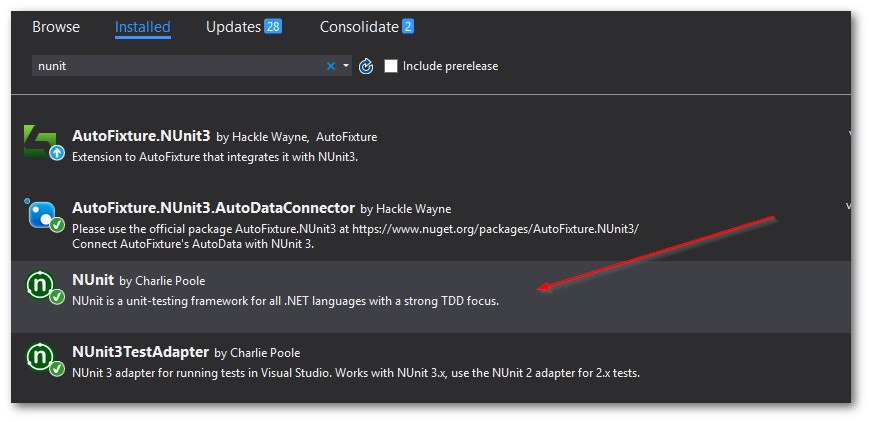
Find NUnit and install it. When it comes to structuring your test projects, my advice is to create a test class library for each project in your solution. If you have a project called, website.core, I'd have a matching project called website.core.tests. This is the project that needs NUnit access.
When writing tests, you should always separate your unit test code from your production code. You never want to deploy your unit test code to your production server. This is why tests need their own library! My second bit of advice is that your test library should follow the same folder structure as your class library. If you have a folder called repositories in your class library, create a folder called repositories in your test library. This convention also applies to the test file names. For each class in the main project, you want a corresponding file with the same name in the test library. Next up is the code, this is the simple bit:
To make your class get picked up by the NUnit test runner, you need to add the [TestFixture] attribute to the top of your class. In a test class, to set up any pre-requests and test data your tests might need, you do not use a constructor, instead, you create a normal method and decorate it with the[SetUp]. I usually call my tear up method Setup. To create a test, simply create a normal method and decorate it with the [Test] attribute. Easy! It does not need to take ant parameters, or return anything. Within that test, you can then call your code, mock any dependencies and perform any asserts on the result.
Installing and using NUnit in your project is simple. Creating an NUnit class really boils down to three attributes that things that you need to decorate your classes and methods with. Getting up and running with NUnit is really quick. I use to refer to the code snippet whenever I forget the syntax. I hope this reference helps someone out there. Happy Coding 🤘