In this tutorial, you will learn how to implement a donut caching strategy within an Episerver CMS powered website. In this post, you will get access to all the code required to implement this type of cache within Episerver. If you are reading this and have no idea what a donut caching strategy is and why it can be useful, read this and this first.
As there is a lot of code to cover, I have created a donut hole project you can clone and use to help implement donut hole caching. You can access this repo here. If you want to implement this type of cache, you could build everything from scratch, however, why re-invent the wheel when you do not need to. A website called DevTrends has created a really good open-source donut caching package that is a great starting place to create an Episerver version. I will be using this package as the basis of this tutorial.
The first thing we need to do is add the DevTrends package into your solution. Open up your solution and within Nuget, search for donut:
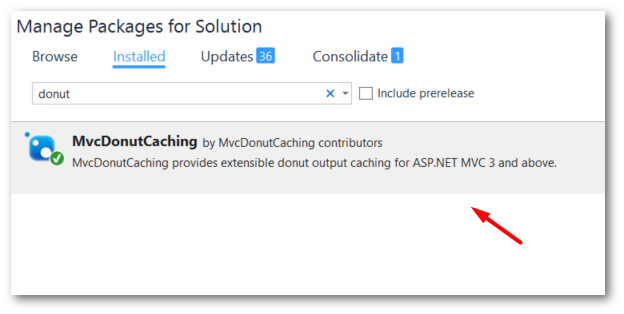
You should see the DevTrends MvcDonutCaching package, add it to your project 💥. The big limitation of the dev trends version when implementing it within Episerver is that it is based on the routing rules within a vanilla MVC website. The dev trends version creates unique cache keys based on the controller/action combo. To get donut caching to work in Episerver with blocks, we need an HTML helper that creates holes based on IContent and ContentAreas. We need unique cache keys based on serialized content references. Luckily, for you, I have done just that and the code is available from Nuget from here.
The EpiserverDonutCache package comes with an attribute, EpiserverDonutCacheAttribute. You will need to decorate your block controllers with the EpiserverDonutCacheAttribute attribute in order to mark them as donut holes within your page. Donut holes are created in views by using the provided HTML helpers. The HTML helper provided will work with either ContentAreas or items of type IContent, so you have some flexibility.
When the page is being processed and a hole is created, a donut comment is added to the HTML. The HTML comment has a content reference associated with it. After the page is rendered, this version with donut comment is added to the output cache. The next time a page request is made, the HTML that has been cached against the page (including the donut comments) is retrieved from the donut cache. Within the HTML helper a replacement is done via a regular expression on all the donut comments on the page. Using the ContentReference, this replacement directly calls the item (page, or, block) and renders it. This means we can cache a whole page and only load a part of the page in real-time when needed. These holes can also be additionally cached, within a short expiry time,if required!
Having this level of caching configuration is quite powerful. For example. you may cache the entire page for 24 hours, but, have the donut holes only cache for a maximum of 5 minutes. Having different cache times should reduce a lot of load off of your server as the CPU only has to re-build small parts of your page every now and again rather than the whole page every 5 minutes.
I admit this type of caching can be hard to get your head around. If you are struggling with this a bit, I would recommend checking out my Github project and playing around with it first! it has time to get to the code:
Pages: On all your top-level pages you need to add the EpiserverDonutCacheAttribute and a cache duration. The duration is measured in seconds. An example is shown below:
Blocks and Partials: Adding holes is done on a block level. To make a block work within the donut cache, you will need to decorate it with the ChildActionOnly attribute. If you forget to add this attribute, the donut hole will cache rather than make a call to live.
If you want the block to be rendered live on each request, this is all you need to do. If you want to cache your block for a period of time, you need to use the EpiserverDonutCache attribute. To cache a block for 60 seconds you would decorate its controller like this:
Holes Within Holes: In some instances, you may only want to create a donut hole within a child action. Say you have a carousel, you may want the carousel slides to be donut cached. If you want to have nested donut within your code, you need to use the OutputCacheOptions.ReplaceDonutsInChildActions attribute. Without this, the holes will cache instead of rendering live HTML:
HTML Helpers: To render a hole within a view you will use an HTML helper. You can either create a hole around a single IContent or a ContentArea. IContent is probably easier, so we'll cover that first.
Content Area: Next let us poke a whole around a ContentArea:
The HTML helper also contains an overload that will take the standard ContentArea additional parameters. This can be used like so:
That should be all you need to implement to get donut caching to work in your solution. As seen below, you now have a nice way to punch donut holes within your pages!
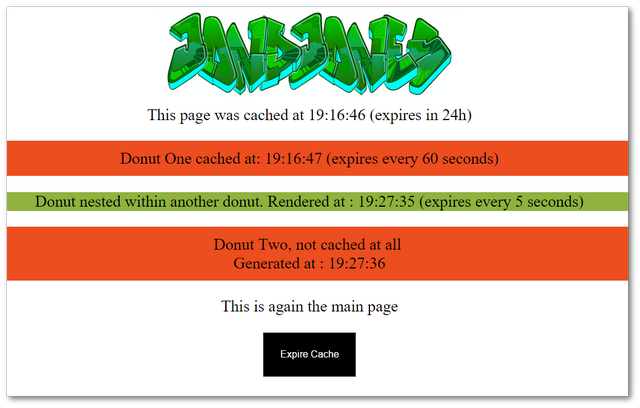
The key to implementing donut caching successfully is decorating your controllers correctly. On all your top-level pages you need to use the EpiserverDonutCache attribute. Within each child block controller, you need to use the ChildActionOnly attribute. If you want to create nested donuts you need to use the OutputCacheOptions.ReplaceDonutsInChildActions attribute. The duration is measured in seconds (not minutes) so be aware! Happy Coding 🤘
