In this tutorial, you will learn how to install the Episerver forms module. Episerver Forms is the latest and greatest forms module to allow content editors to create and add forms onto web pages without needing any development interference. This FREE module was recently released and it is a big improvement over the old XForms module. Today you will learn how to install Episerver Forms within Episerver CMS, as well as get some context as to why it's useful 🔥🔥🔥
If you have been using Episerver for a while, it is likely you will have bumped into the XForms module. XForms used to do a good job in providing forms functionality within Episerver, however, times change and it was getting a bit out-of-date. The new Episerver Forms modules allow the content editor to create forms using blocks within the CMS. The good thing with a block-based approach is that forms can be versioned, personalised via visitor groups, indexed for searching, as well as the ability to force form creation within a workflow. Forms also work with HTML5 which is great news. Forms are not rendered within tables anymore. Front-end developers can now build forms responsive and use modern-day markup 💥
How To Install and Test Episerver Forms
Episerver Forks works with Episerver 9+ onwards. You can install Episerver Forms within Visual Studio via NuGet. To install Episerver Forms, open up the Nuget Package Manager. Make sure you have added the Episerver NuGet feed. In Nuget explorer, search the Episerver repository for Forms and you should see an Episerver Forms package:
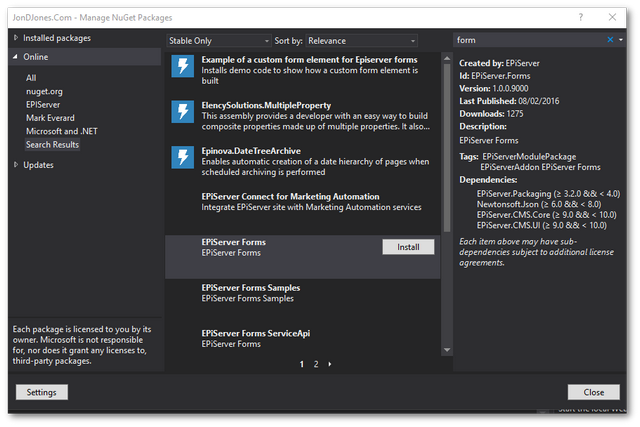
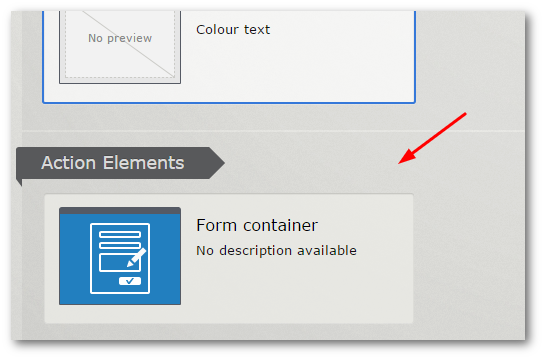
Click install, sit back and wait for Forms to install. After Forms has successfully been installed, build your project and then open up the Episerver editor. Navigate to a page on your website that has a content area. Click on the Add Block option and you should be presented with a list of blocks you can create. You should now see a Forms Container, select that:
 '
'
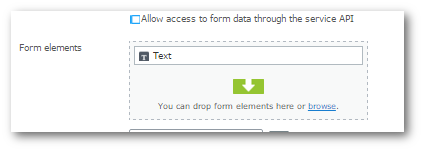
Before the block is created, you will be asked to fill in a number of properties about the form including title, description, confirmation message after submission, confirmation message, allow anonymous submissions, and allow multiple submissions from the same IP/cookies. After you have created a form container, you can start to add form elements inside of it. YOu have a number f elements you can add including text box, captcha, etc...To add elements, on the form container block, you should see a content area called Form elements. In here, click add new block:
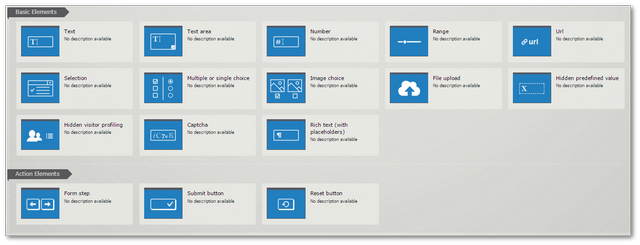
Within the form element selection content area, you will see a number of different elements that you can add to a form. As you can see below there are a lot of options:
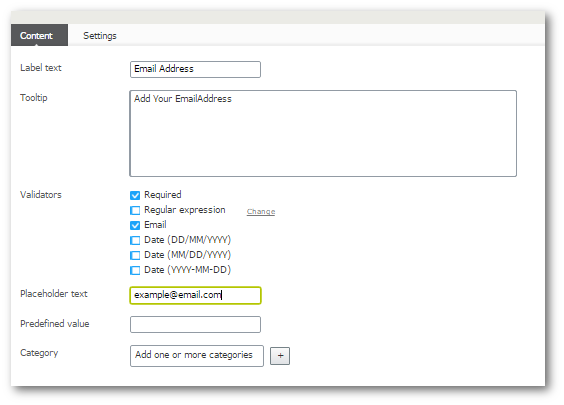
In this tutorial, I will create a simple form that contains a single textbox and a submit button. I configured the textbox element with a label, a required field property, and an email validator:
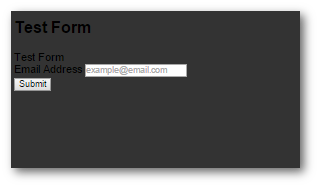
To add the submit button to the form repeat this process. After you have added both elements to the form, you should now be able to publish the form to the site. Go to your site and access the form. On my site with no CSS, the form looks like this. If you inspect the form elements, you will notice that the form is not being rendered as a table. This is a big improvement over the previous module!
It is a good idea to test your form at this stage. Fill in the form and submit it. To test the form is working go back into the Episerver editor and open the form container block. From the top right-hand side in the select view, you should be able to open up a Forms Submission View:
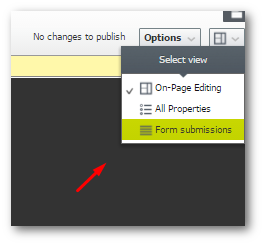
From this screen, you can access all the form submission data, how many forms have been posted per day and a whole load of other useful analytics:

You now know how to start using Episerver Forms. You should be able to create a very simple form using this handy plug-in. The forms module has a lot more functionality than I've covered in this overview, however, I'm hoping you now have a good flavour of how easy it is to add forms without having to do any coding yourself. If you have been using XForms you can still use the two plug-ins in parallel. At the minute, there is no way to import your XForms data into the new Forms data structure so you may need some parallel running when migrating. Happy Coding 🤘
