In today's tutorial, I'm going to give you a simple step-by-step guide on how to install Hangfire with Episerver. You will learn how to use Hangfire as a replacement for Episerver scheduled tasks. Out-of-the-box, Episerver provides a scheduled service solution to cater for any reoccurring tasks that you may need to perform. Examples from my checkered past include sending emails, seeding a cache, and getting news items from a third party service. More information on Episerver scheduled tasks can be found here.
The scheduled service was written quite a long time ago and since then there's a new FREE kid on the block called Hangfire. Hangfire provides a similar function as the Episerver scheduled task manager does, except it contains a lot more functionality. It's like the Episerver scheduled task provider on steroids.. it even comes with a nice web UI portal to manage the scheduled tasks! Hangfire is free and it can be installed within your website within an hour. Hangfire also creates persistent tasks (by way of the database) so you can schedule jobs weeks or months in the future and be confident that they will run. If using Hangfire sounds like something that would benefit your project, then read on!
Adding Hangfire Into Your Project
Like most things .NET nowadays, Hangfire is installed via NuGet:
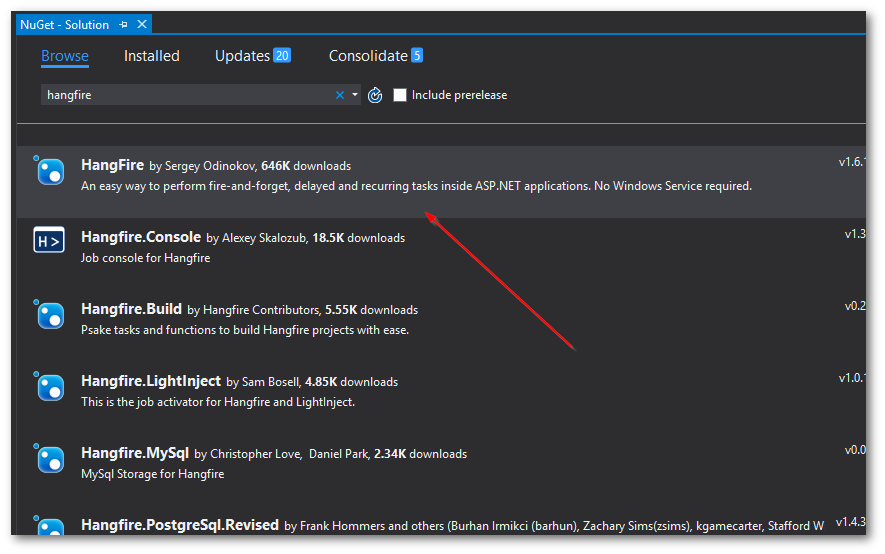
Simply, open package manager, search for Hangfire, install it. If you try and load your website straight after installing HangFire, you'll more than likely see this error:
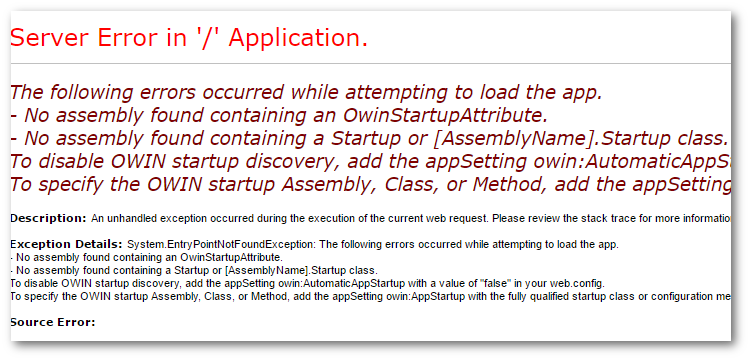
The following errors occurred while attempting to load the app. - No assembly found containing an OwinStartupAttribute.
Hangfire requires some slight configuration in order for it to work. First, you will need to create a Startup class (assuming you have not already created one!). Create a Startup.cs file in the root of your website and add the following code:
Note the assembly attribute creates a reference to itself, typeof(Startup). This is on purpose and it's needed. In your app.setting or web.config, you will need to make sure you have the following setting:
Hangfire creates persistent tasks.. this is done via SQL. As we're using Episerver we can use the Episerver database and the existing connection string for this. You can use another database if you want, this is the easy option!
To configure Hangfire to use the Episerver database, you need to configure it with a connection string, this can be done with the code above:
Next, we need to enable Hangfire when the application starts, this is done using the snippet above:
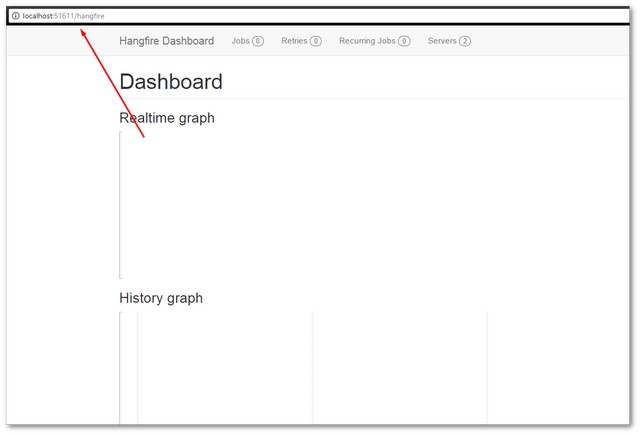
If you followed all the steps, Hangfire should work. You can load Hangfire (for now) using www.website.com/hangfire. The more astute of you will probably be thinking security. Any unauthenticated user can see the portal by adding 'hangfire' onto the address.... this is where the Episerver side of configuration comes in.
Locking Hangfire Using Episerver
We have two requirements to make Hangfire more secure:
- Restrict the dashboard to Episerver admins
- A more secure Url
Hangfire will allow you to apply authorization filters to configure Hangfire. This means you can write some custom code to secure Hangfire. I recommend locking access to the Hangfire dashboard down by Episerver administrator access only. This can be done following this process:
In the Startup class, inject IAppBuilder. This means Startup now looks like this:
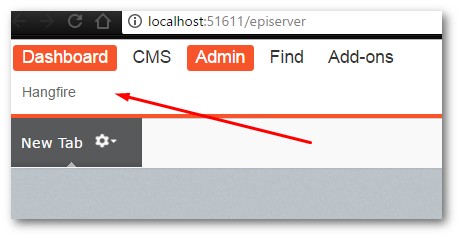
Finally, you want to access your Hangfire dashboard from within the Episerver UI. You can use this class to add an 'Admin' tab with the CMS that contains a link to the Hangfire dashboard.
Boom! When you load Episerver you should now see something similar to this:
Following the steps above, you now have a lot more secure Url to access Hangfire, you've restricted to only Episerver admins and you've now got a handy link in your CMS menu. Enjoy! Happy Coding 🤘
