In this tutorial, I'm going to cover everything you need to install Hangfire within Umbraco. We will lock the Hangfire dashboard down so non-authorized visitors can access it. We will also configure Umbraco so that the dashboard can be accessed from within the Umbraco backend. Often on a website build, you'll need a way to manage background tasks. If you have a need to do things like scheduling orders, sending emails, refreshing data from an external feed, you will need to run recurring tasks. In older days, when websites were hosted on servers, in order to create a scheduled task, you would need a Windows service. As most sites are now hosted in the cloud we need new ways of handling recurring tasks... this is where HangFire comes in.
Hangfire is a free and open-source framework that will allow you to easily perform background processing of .NET and .NET Core applications. Hangfire removes the need for a backend Windows service to be created. Hangfire requires a SQL database to work. The Hangfire queue is stored within this database. This means you can do an IIS reset within your web application and not lose the order and the tasks contained within that scheduled queue! If you need to use a scheduler and you are using .NET, I'm hoping I've convinced you that Hangfire is a good option.
How To Install Hangfire Within Umbraco
Getting Hangfire integrated within your Umbraco website is easy. You can install Hangfire via the NuGet Package Manager in Visual Studio:
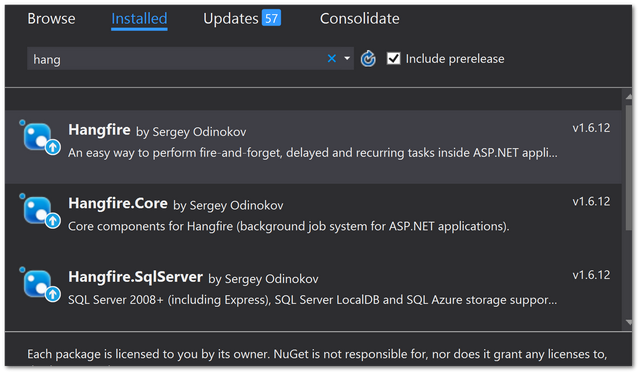
On your web project, right-click and select:
Manage Nuget Packages ➡ type in Hangfire ➡Install
As Hangfire relies on a database, you need to point it to a valid SQL database so it can install the tables and SPROCs it requires when it first launches. As we're using Umbraco, we can simply use the default Umbraco connection string found in the web.config. This will mean the HangFire tables will be created within the same database as the CMS scehma. In general, this is an acceptable approach, however, if you want to use a different database then you can by creating a new connection string and database.
The next step to get Hangfire up and running is modifying your Startup.cs file. Within this file, you will need to provide the necessary connection string and routing information to HangFire. As you're using Umbraco you may have to create the Start.cs yourself, so don't be surprised if you don't have one in your solution. The code required to configure hangfire within Startup.cs is shown below:
The important takeaways from this code is.
The assembly attribute. The
typeof()needs to point to theStartupclass, this will be your websites assembly namespace.Inherit from
UmbracoDefaultOwinStartupGet access to the SQL database using
Umbraco.Core.ApplicationContext.Current.DatabaseContext.ConnectionStringDefine the route used to access HangFire within Umbraco. To get the dashboard to display in the Umbraco backend, the URL will need to be prefixed with
/Umbraco/backoffice/Plugins/otherwise the authentication will not work. This page should only be viewable by content editors! This is a Umbraco thing and not specific to Hangfire!The addition of
UmbracoAuthorizationFilteras a custom class (we'll define next)
Creating The IDashboardAuthorizationFilter
The authorization filter checks if the current user has a Umbraco Authorization token. If not the page should fail to load. If someone has successfully logged into Umbraco they should be able to access it.
Web.config Changes
Within the appSettings section of the web.config, make the following changes:
Open the web.config and make sure owin:appStartup is pointing to the right location:
Make Hangfire Display In Umbraco
That's It! HangFire should now be configured!
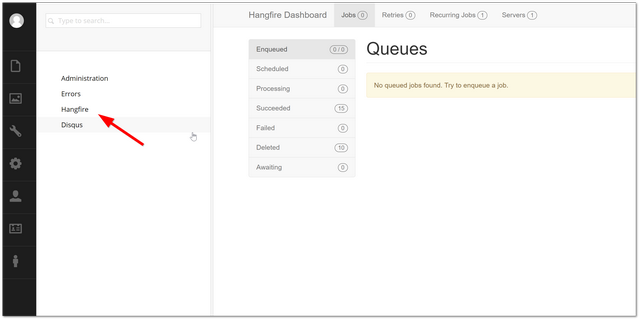
You should now see the HangFire option within your content section, called Event Handling with a node called Hangfire. On my website, I've used a custom section to make it easier to navigate. If you want to know how to do this, you can read 'How To Create a custom section in Umbraco 7' You should now have a cool scheduler that's available within your Umbraco backend!
When you open the dashboard for the first time, Hangfire should create all of its database tables for you. In your SQL database, you will see the following new tables, AggregatedCounter, Counter, Hash, Job, JobParameter, JobQueue, List, Schema, Server, Set, and State. This is how you can tell the HangFire scripts ran successfully!
Adding Jobs
The next step si to schedule something. Creating the code to create add a job to the HangFire queue can be done in two ways:
- A one-off fire-and-forget request in Hangfire, using
Enqueue():
- A regular reoccurring task, using the
RecurringJobclass, specifically with theAddOrUpdate()method:
With all this done you can now schedule tasks. Happy Coding 🤘
