In this tutorial, you will learn about the steps required to add a rendering onto a Sitecore page. One of the things that I didn't find intuitive when I started learning Sitecore was how to add components to a Sitecore page. I wasted more time than I want to admit staring at a blank page and wondering why my control wasn't showing. If this is happening to you, or, you simply want to learn more about Sitecore, this is the guide for you 🔥🔥🔥
This tutorial is purely focused on the steps that a content editor will need to follow. It does not go into detail about how to create a rendering in code. If you want a more technical guide, I recommend reading, How To Make Sitecore Use a MVC Controller, Controller Renderings Explained, and, How To Create A Sub Layout and Add It to a Page in Sitecore
Adding a control to a page is pretty simple when you know-how. Let us start 💥
How To Adding A Sitecore Rendering To A Page
Click on your chosen page, open the Presentation tab in the top ribbon. In the Layout section, click on the Details option. Here you should see the following dialogue box:
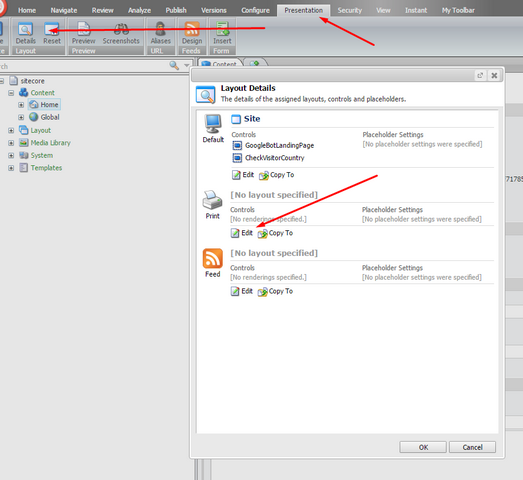
From the Device Editor, click the Controls section. Next, click Add. Select your rendering from the navigation tree:

That's all you need to do to add a rendering to the page.
How To Configure A Sitecore Rendering
Even though you have added a rendering to a page, you may still need to do several more configuration tweaks before it renders. To edit the control, open the page, and select thePresentation tab in the top ribbon. Go to the Layout section and click Details:
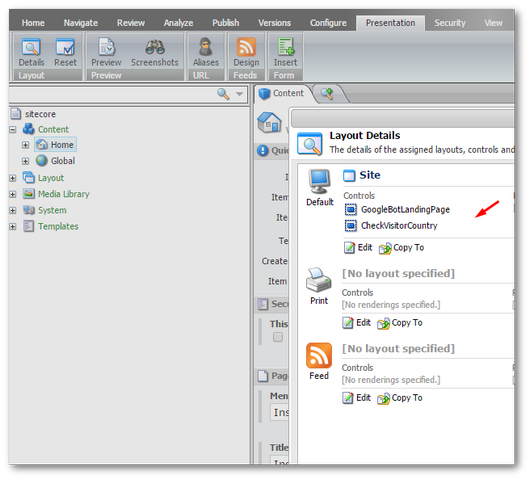
In Controls, click on the rendering you want to configure. A new Editing dialogue screen will appear. Here you have two main configuration options. First, the placeholder property defines which placeholder the rendering should appear within. You can either manually set this here. You can also add it from within the Page Editor.
The other important configuration option is the Data Source parameter. If you want your rendering to display specific data, you may need to tell it where to get that data from. A rendering works the same way as a Sitecore page does. The rendering defines what it will look like, however, it still needs its own template to define the data to display.

In most website builds, I usually create a folder called Blocks, Renderings, or Controls. Within this folder, I create a sub-folder for each rendering. Job done 💥
My Sitecore Rendering Isn't Appearing... Help!
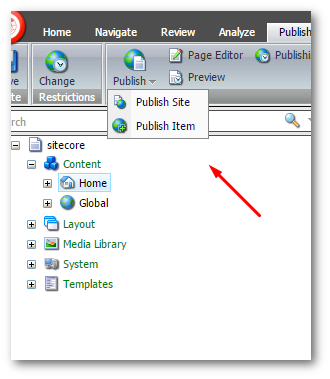
Ok, so adding the rendering was easy.. making it appear can be a little tougher. If you followed the tips above and your rendering is not visible, your first step is to make sure the rendering you have added to the page is published. Just like pages, a rendering needs to be published before it will be visible. Publishing a rendering follows the exact same process as a normal page. Click on the item, open the Publish section in the top ribbon, select:
Publish ➡ Publish Item
You should see this screen:
If you publish a rendering and it still doesn't display, it's sometimes a good idea to enable the Publish Related Items checkbox from the publish dialogue. This will make sure you haven't missed anything in the publish options 🤔.
You now know how to add and make sure a Sitecore rendering displays on your page. When I started using renderings as a content editor I didn't find the process that intuitive, however, after understanding a few key concepts it's pretty straightforward. Happy Coding 🤘