In this tutorial, you will learn how to add a custom button within the Sitecore editor ribbon. Creating custom ribbons are useful if you want to provide content editors with the ability to run some bespoke functionality that is not possible out-of-the-box. Some examples of these types of scenarios are importing content from WordPress, exporting content into RSS feeds and refreshing data generated from a third party system. Today you will get access to the code required to achieve this and you will learn how you can configure Sitecore to use it. If this sounds useful to you, read on 🔥🔥🔥
Creating A Custom Sitecore Strip In The Ribbon
Everyone who has used Sitecore for more than 5 minutes will be aware of the top ribbon:
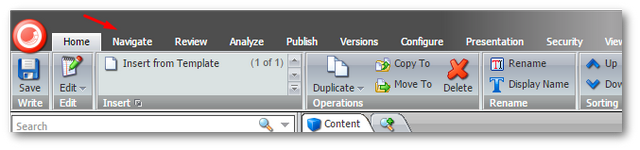
At the very top of the editor, you have a bunch of tabs, or, in Sitecore terminology Strips'. The out-of-the-box strips include Home, Navigate and Review. Creating a custom strip is very easy. First, you will need to switch to the Core database and open the content editor (if you do not know how to do this, I suggest you read this)
With the Core database open, navigate to:
Content ➡ Applications ➡ Content Editors ➡ Ribbons ➡ Strips
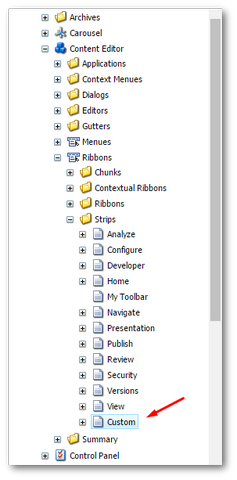
My usual trick as a quick-win is to right-click on existing strip, select Duplicate and fill in the details as needed. Doing this will create a new strip in the header, however, it will be empty:
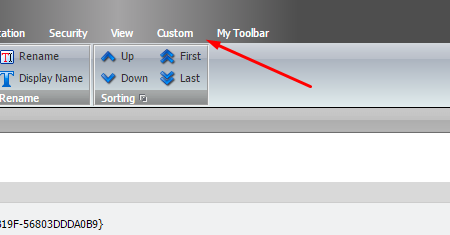
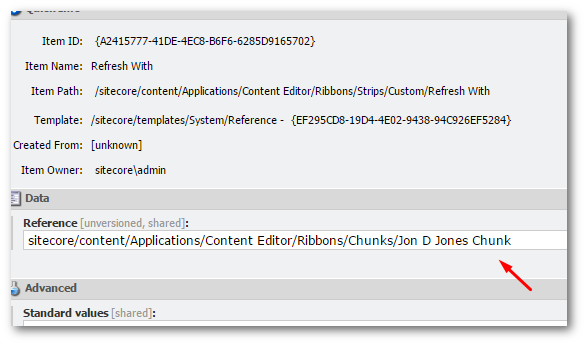
To configure the custom strip, you will need to link to one or more Chunks A chunk is a sub-tab. If you already have a chunk you want to use, create a new reference item under your custom strip and point it to the chunk you want to use. If you want to create a new chunk you will need to fill in the Reference template and the Template location, as shown below:
In the Data ➡ Reference field, you need to add a reference to the chunk you want to use:
Creating A Custom Sitecore Chunk
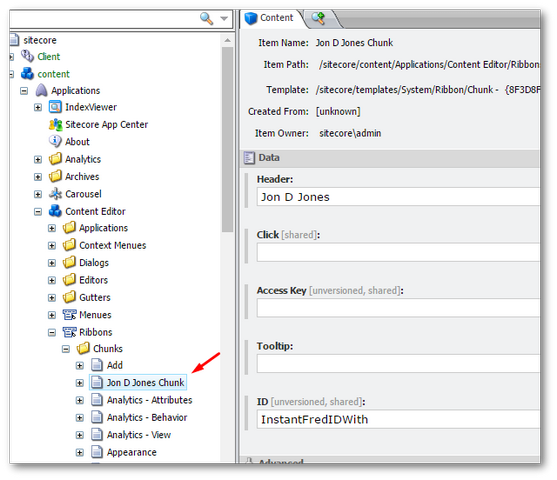
Creating a custom chunk is very similar to the steps above for creating a strip. Existing chunks can be found in the Core database in this location in the content tree:
Content ➡ Applications ➡ Content Editor ➡ Ribbons ➡ Chunks
To quickly create a custom chunk, I also just duplicate an existing one. If you prefer to create one from scratch, you can create a new one by using this template:
Sitecore ➡ templates ➡ System ➡ Ribbon ➡ Chunk
At its simplest-level, all you need to do is add in the Header field with the name you want to display and you are all set:
We are now slowly getting to a stage where we can do something useful! We have a custom strip with a custom chunk. The next step is to add a button to the chunk that will call our custom code.
Adding a Button To The Chunk
Adding a button is again very similar to the process above. To add buttons to a chunk, you simply need to create the buttons as child items under the chunk. To create a button, you can use any of the templates found in the Ribbon folder:
Sitecore ➡ templates ➡ System ➡ Ribbon
I recommend picking this template:
Sitecore ➡ templates ➡ System ➡ Ribbon ➡ Large Button
As seen here:
To create a new button, the two main fields you need to supply is the name you want to appear in the ribbon. This is found within the header field. You also need to define what code should be called when the button is triggered. This is done within the Click field. In the example above, I'm calling some code called jondjones:custom button. This isn't related to a class or method, instead, it relates to the Sitecore command it will read in the config found here:
App_Config ➡ commands.config
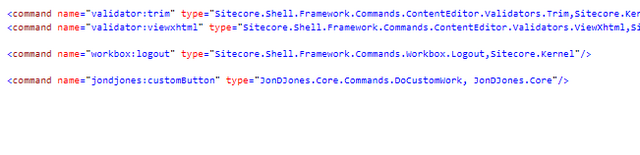
In my example, I created a new command with a key. In my example, it's called jonjones:customButton. The value needs to reference some code within your codebase. This value needs to map to the namespace and the class name within my codebase. You also need to follow this with a , comma and the assembly name, like so:
JonDJones.Core.Commands.DoCustomWork, JonDJones.Core
Writing The Custom Code
We've finally made it to the part where we need to write some code, eventually!
To create a Sitecore command you will need to create a new class and inherit from Sitecore.Shell.Framework.Commands.Command and override Execute(CommandContext context). You can put whatever custom code you like in here. In my example, I've added a Sitecore.Shell.Applications.Dialogs.ProgressBoxes.ProgressBox. This will show a basic progress bar while your custom code is executing. It is definitely not needed but looks pimp 👄😘👨❤️💋👨. If you are trying to implement some functionality like a data import that might take 10-60 seconds to run, then this is a good practice technique to use
You are now a custom Sitecore ribbon master. You can create custom ribbons items and buttons to your hearts desire ❤️. Happy Coding 🤘