In this tutorial, you will learn how to upgrade a Umbraco v9 website to v10 💥. Anyone who has worked within the CMS space for a while will know that upgrades can be notoriously painful. Luckily for us, the v9 to v10 upgrade path is relatively easy... phew 😌
There are no monumental framework, or, architectural changes between v9 and v10. The main change between the two versions is the support for ASP.NET 6. The great thing about ASP.NET 6 is that it runs about 40% quicker compared to ASP.NET 5. By upgrading to v10, your website will get some solid performance benefits without you having to write any code. The average page load time on this website improved around a second after I upgraded it to v10, so from my perspective the upgrade is definitely worth the investment of time 💥💥💥
In terms of the upgrade path, there are a few breaking changes between v9 and v10, however, these changes are minor and are easy to fix. Most of the breaking changes can be found within the more obscure areas of the Umbraco codebase, so the chances are high that your website will not be affected by them.
The biggest change within .NET 6 is with Program.cs and Startup.cs. Within .NET 6, startup.cs has been deprecated. In .NET 6 you only have Program.cs, however, as this is Microsoft Startup.cs is still supported. In terms of impact to you, this means you will probably need to make some changes within Program.cs before the upgrade is completed.
If you want to upgrade your site to v10 while avoiding the mistakes that I made, this guide has got you. After reading this guide, you will be able to perform v10 upgrades at breakneck speed 💨💨💨
Coincidentally, I've heard that if you are single and tell people how quickly you can upgrade Umbraco, you will instantly become more of a catch.... so if you want to be a Umbraco legend, read on 🔥🔥🔥
Bump Your Class Libraries To .NET 6
The first step on your upgrade journey is to bump your solution to use .NET 6. Without doing this, you will not be able to upgrade any of the NuGet packages. To upgrade your website to .NET 6 you will need to open up your website's .csproj file. For a .NET 5 site, the config within .csproj will look like this:
To upgrade your site to version 5, update it like this:
As well as converting your website project files to .NET 6 you will also need to do the same for all of your class libraries as well.
Bump your packages
After converting your project to .NET 6, the next step is to upgrade all of the Umbraco NuGet packages. I find upgrading packages way easier using NuGet package explorer compared to the terminal, but do what makes you happy. To successfully upgrade Umbraco you will need to bump the following packages to use a 10+ version:
When it comes to upgrading these packages, my advice is to upgrade things on a per-project basis. The alternative is to try and upgrade everything all at once at the solution level. This blaze of glory approach was the path I tried first and it didn't go well. I encountered lots of versioning conflicts. I found life to be way easier when I upgraded the smallest and least referenced class library first. After successfully upgrading one library, you can then rinse and repeat from the least used library to the most used. Finishing with your website application last🧼🧼🧼
Bump Your .NET Packages
After upgrading Umbraco, you will also need to do the same for a few base .NET packages. Within my solution, the two .NET packages that I needed to upgrade were:
If you forget to upgrade these packages, expect an appsettings.config related error and the site to fall over when you try to view it 🤪
Fix Broken Code
After upgrading all of the relevant Nuget packages build the solution. If you are lucky the site will compile OK. If you are not some of your code will break. The reason for this is that there are a few breaking changes in v10.
There is an official list created by Umbraco about all these the breaking changes that you can find here
On my project, I was using the ContentSchedule property on IContent. This property was deprecated in v10. To get the same information, I needed to inject the IContentService API and then use GetContentScheduleByContentId() method. This refactoring is shown below:
When compiling the solution, I also encountered duplicate file errors. This was because I included the Umbraco folder in my solution. To fix this issue I had to Exclude From Project my Umbraco folder within wwwroot
Progam/Startup
The biggest pain in the ass with the jump to .NET 6 is that Program.cs and Startup.cs has been merged. .NET 6 also uses something known as "minimal hosting" and "minimal APIs". This means that within Program.cs you do not add a namespace or class declaration. You can just write code. As a long-time .NET developer, this change feels very odd 🤪🤪
One good thing about Microsoft is that they always support legacy ways of working. To prove this point, try installing a Windows 3 application on Windows 10! Following this tradition, it is still possible to carry on using Startup.cs in .NET 6 and personally, I prefer this separation of concerns. Having one giant file is not as optimal, as being able to split my config down.
How this change will impact you, is that when you run your website, you will likely encounter this exception before your site boots-up:
System.ArgumentNullException: 'Value cannot be null. Arg_ParamName_Name'
To fix this issue, I left my Startup.cs untouched, however, I updated my Program.cs to look like this:
Upgrading The Database
After the solution builds, the next step is to upgrade the database. This is done by running the Umbraco upgrade wizard. To access the wizard, run your site in a browser and it should automatically load. You will be asked to log into Umbraco, log-in and click the upgrade button:
If the upgrade goes according to plan, the CMS should load. After you successfully log into the editor, you should do two things before testing your website works:
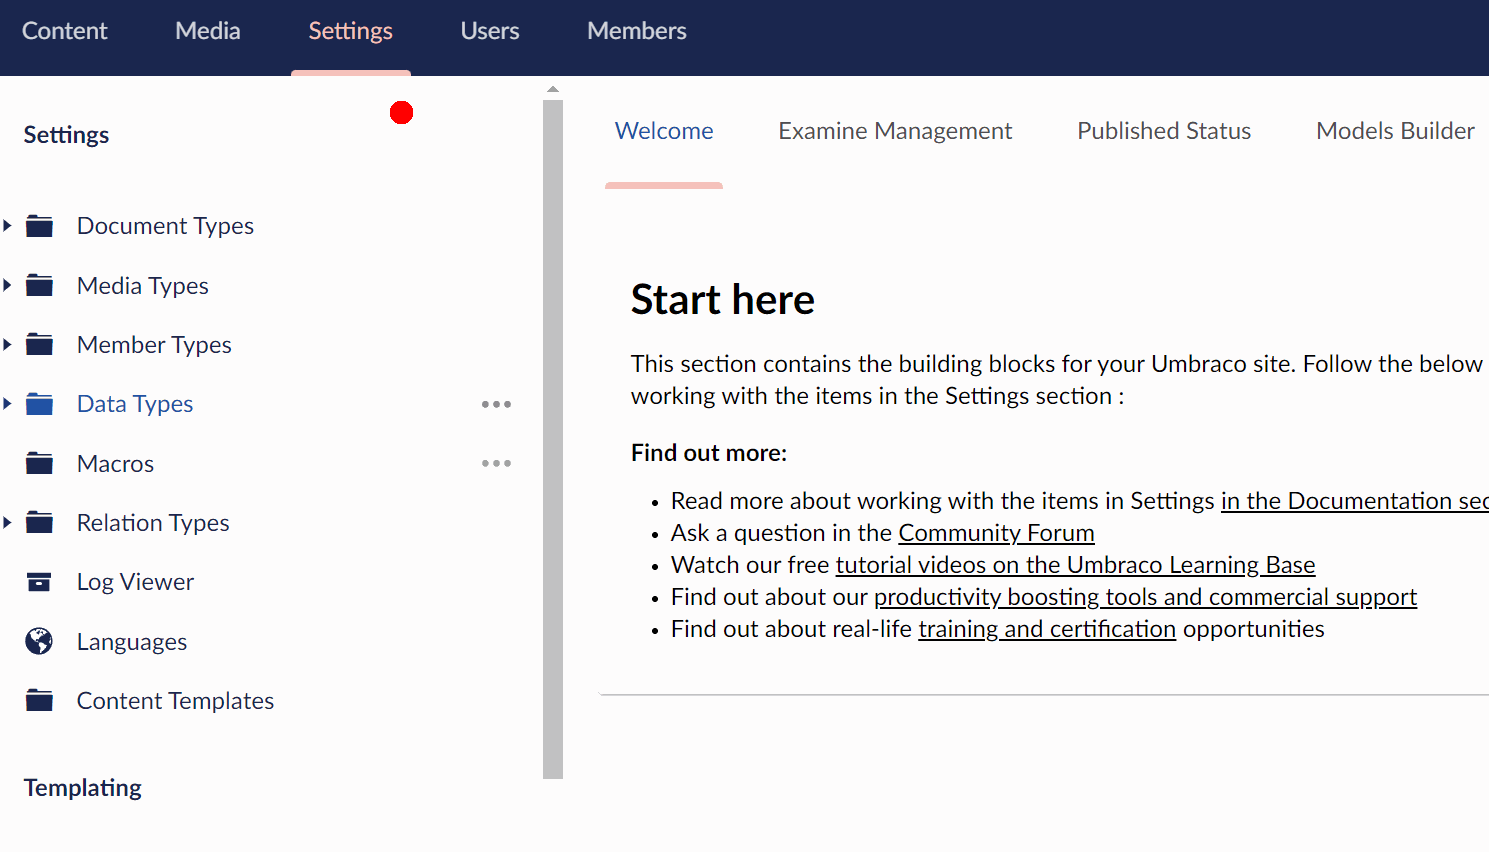
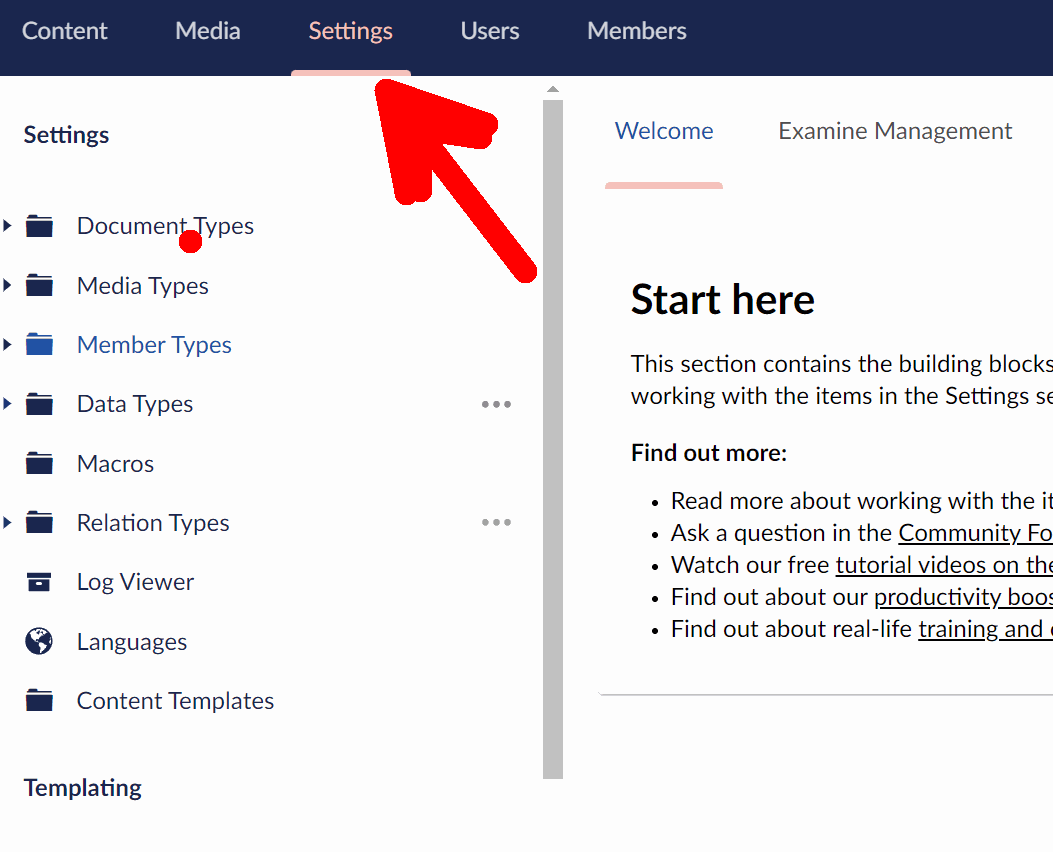
Regenerate the Umbraco model builder models: You should generate the Umbraco model builder models before running your site. This ensures the generation process is still working and that all the document types have the correct properties. To re-generate the models, log into the backend and go to this screen:
Settings ➡ Settings ➡ ModelsBuilder
Click the Generate button:
Regenerate Examine indexes: You should also regenerate your Examine indexes. Make sure you regenerate each of the default indexes:
- ExternalIndex
- InternalIndex
- MembersIndex
The upgrade process on this website took me a little longer than I thought, however, it was done and dusted in a few hours. The biggest pain points I encountered during the upgrade were the breaking changes and the change in Program.cs and Startup.cs. Asides from those everything was pretty easy. Good luck in your upgrade attempt and Happy Coding 🤘