This tutorial will teach you how to enable a multi-language website within Umbraco v9 and above. Its been proven that most site visitors prefer interacting with a brand when the website is written in their native language. If you are building a Umbraco website and the client is selling to a global market, to help them increase their sales you should suggest that they consider adding content in multiple languages.
The good news for developers who are building a multi-language website within Umbraco is that the steps that you will need to follow are pretty straightforward. A few of the steps are slightly unintuitive and this is where this guide swoops in to save the day 💥
If you want to create a kick-ass multi-language Umbraco website without any headaches, read on 🔥🔥🔥
Below gives a rough summary of the steps that you will need to follow to enable multi-language mode within Umbraco:
- Enable one or more languages within the CMS
- Update relevant document types to allow for multi-language mode on a page and property level
- Define your routing strategy. Each language page will need to have a unique URL
- Update code to allow for a country code
- Add and publish content
The majority of the actions contained within this list are configuration tasks to be performed inside of the CMS. Code-wise you may need to update a few APIs calls with an additional culture code. For example, calls to SetValue() when you enable a second language as you will not know which variation to update. Asides from updating these calls, you will also likely want to build a language switcher. After doing all these things, you should then have a kick-ass multi-lingual website.
Enable languages
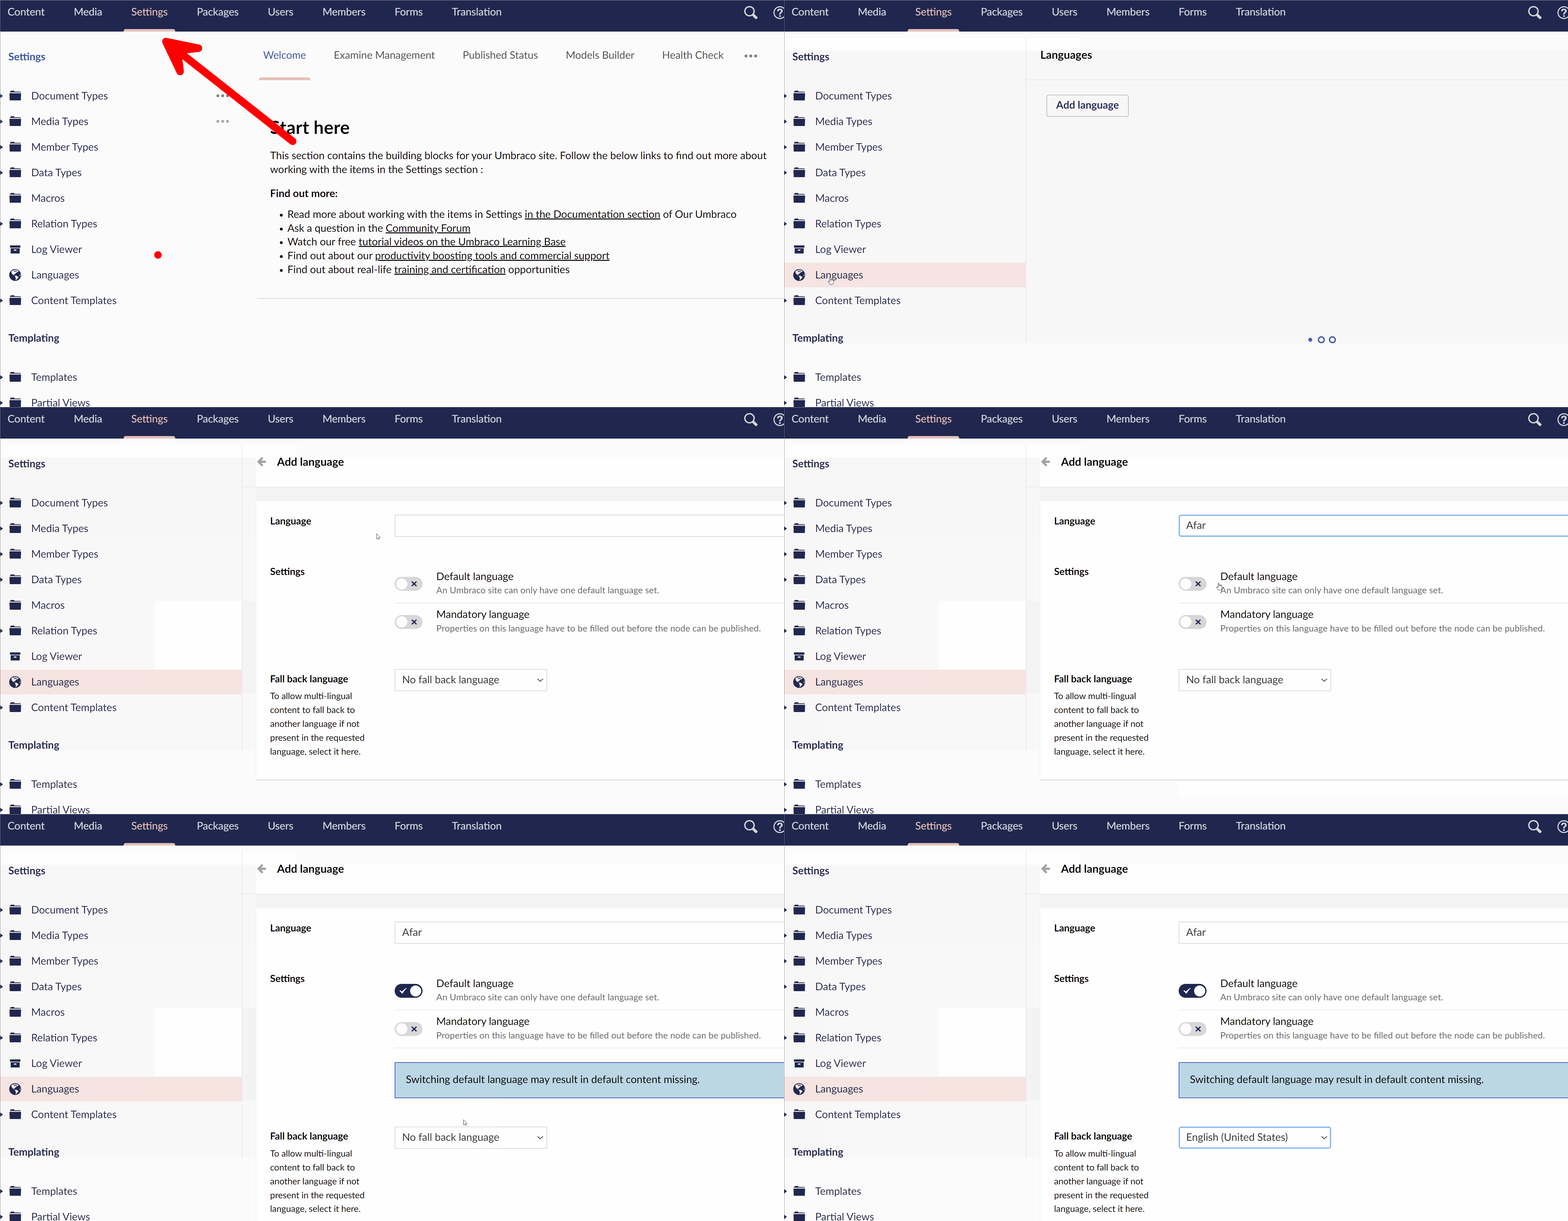
The first step is to enable all the additional languages that you want to enable on the site. By default, Umbraco is only enabled within a single language by default. Enabling alternative languages is done within the CMS from the Settings section:

Click on the Add language button, specify if the language is the primary language and if it is mandary. If not, you should then define a fallback language!
Update relevant document types
By default, any document type that you create within Umbraco is configured to work with a single language only. When working on a multi-language project, you need to ensure that on each document type, you enable multi-language mode. There are two steps to enabling. You need to enable on a document-type level and on a per-property level as well.
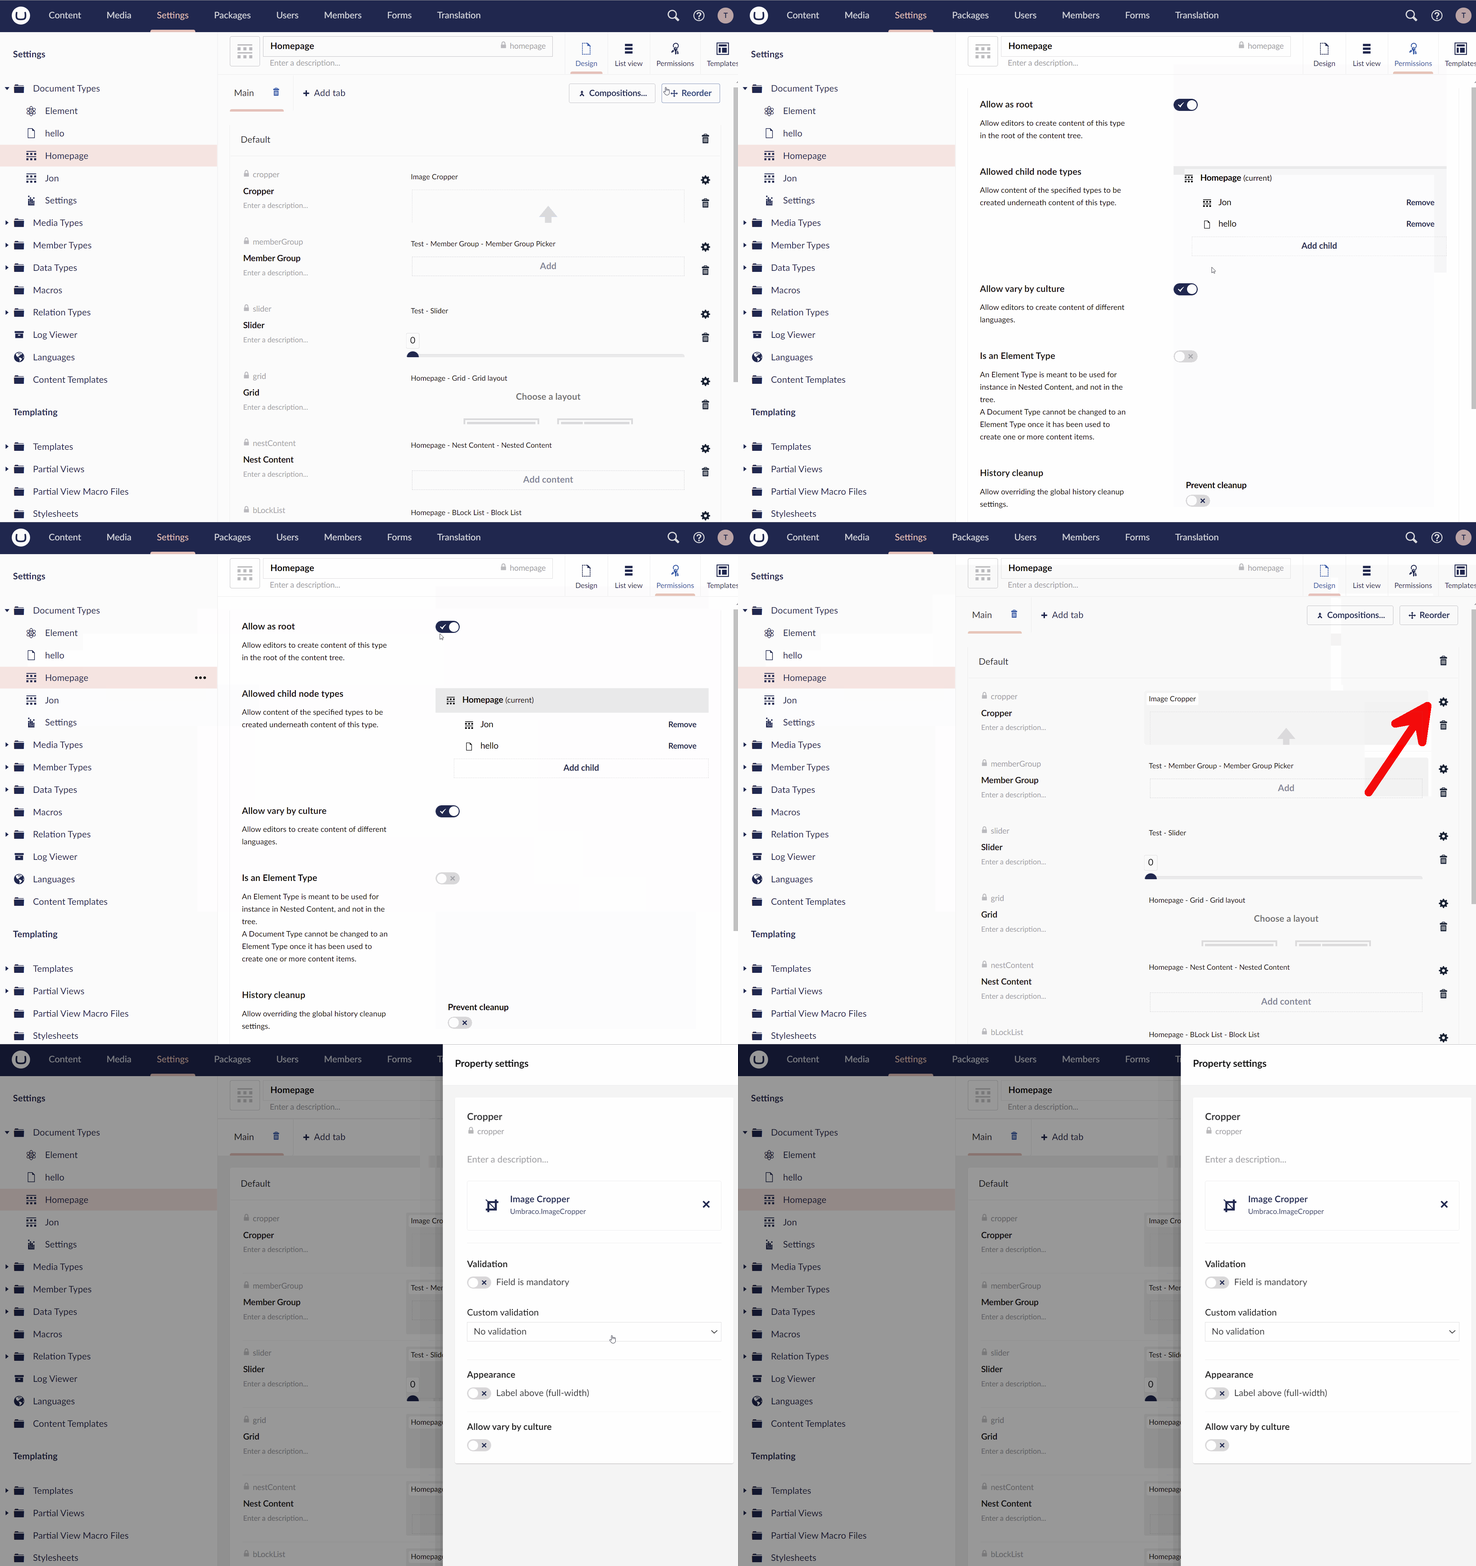
To enable multi-language mode on a document type level, within the Sections section, find the document-type that you would like to update:

Edit the document-type and within the permissions tab enable the vary by params checkbox. After doing this you also need to go to each property contained on that document-type and enable mulit-language mode. To do this click on the little cog icon next to each property and from the screen that pops-up, also enabled the vary by params checkbox!
Define the routing
When creating content within Umbraco you create a new page, also known as a node. When you add additional language content per page, you do not create a brand new node, instead you create a variation of that node. In order to render a page, regardless of its language type it will need a unique URL.
Before you pages will work you will need to configure Umbraco with a way so it can uniquely identify content. Typicalyl there are two ways of creating a language based URL to allow for this
Sub-domain strategy: Within this appraoch you append the language identifier to the start of the Url, e.g. uk.website.com or fr.website.com. To configure your website to work with sub-domains, you will need to add a new entry within your DNS provider for each-subdomain that you want to work with. Within your DNS provider, create a new A-record for each sub-domain and point the root to your web server.
Sub-directory strategy: The alternative Url strategy is to use sub-directories. The URL structure within a sub-directory strategy puts the language identfier at the end of Url like thiswww.website.com/uk or www.website.com/fr. As the language segment comes after the main domain name, DNS changes are not required.
Be conscious that if you go this route in a single-instance architecture, you may need to write a composer and a content finder to make the routing work. It should be possible to get this to work, without having to do this though!
After deciding on a URL strategy, the next step is to map your hostnames within Umbraco. This is done from the content tree within the Content section. As a starting point, open the Umbraco context menu on your homepage. From this menu, you should see an option called Culture and Hostnames.

If you do not see this menu item within your Umbraco instances context menu, you may need to update the content editor viewing permissions. To do this open the context menu again on the homepage and select Permissions. From this tab make sure the editors/admin role has the Culture and Hostnames ticked. The Culture and Hostnames page will allow you add one or more domains. For each domain you add, you need to map it to a language.
After mapping a domain to a language, whenever an incoming request is made to the server, the server will inspect the incoming URL and if a match is found the language will be automatically set for you. After Umbraco sets the language of the request, the APIs will automatically return content in the correct language for you. Remember, the primary language is important for fallback content!
Coding Changes
After adding in multiple languages, configuring the document-types and enabling a domain, content editors are free to add content everything should magically work. Depending on the changes you are making, will depend on what you need to do. When working with multiple language you will often need to get access to a language code:
If you notice that the CultureInfo API is not working as expected then you are missing some config. Within Startup.cs, you will need to add some code similar to the following:
Language Switcher
You will often need to implement a language switcher on your website. Creating a language switcher is fairly simple, all you need to do is access the current page object, get all its vulture variations
All you need to do is itermate through the pages languages variations, get the Url for each page and job done. A very simple content switcher!
Happy Coding 🤘

