In this tutorial, you will learn how to install uSync for Umbraco v6. uSync is a great tool for developers. uSync will allow you and your team to easily export the document types you create in one Umbraco instance and import them into another instance. Without uSync, you would often need to copy a whole database between servers, potentially risking losing content. The other alternative would be to manually re-create document types. Trust me when I say this, manually re-creating document types will waste lots of your time. Manually recreating the content modelling process on each one of your servers is also very error response and eventually, an accidental typo will lead to bugs appearing on your live site 😞
This is why is strongly recommend you use uSync as it will allow you to be a lot more productive. Getting uSync up and running in v6 can come with some challenges. If you want a guide to walk you through the process and help you debug any potential issues, this is the guide fo you 💥
I recommend you first try installing uSync via NuGet. This will be the easiest option. For most people, this will hopefully install smoothly. Unfortunately, when I tried installing uSync on my project via Nuget, it didn't work. If this happens to you, the next step is to install it manually.
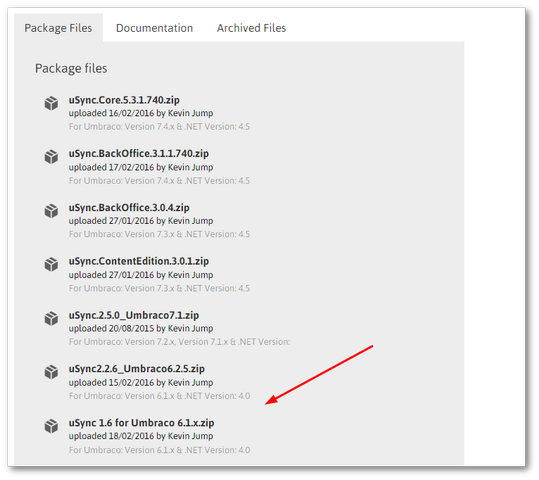
Head over to the uSync page here. Scroll down to the bottom of the page and you should see the packages download section. Within this section, locate the download file for your Umbraco version. In my case, this was Sync-1.6-for-Umbraco-6.1.x.zip:
Next, open your Umbraco back-end and head to the developer's section:
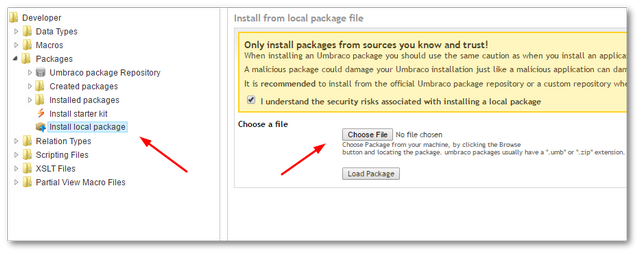
Open the install package page, which can be found here:
Packages ➡ Install local package
Tick the T&C's box, select the Zip file from your PC (you do not need to unzip it) and hit load package:
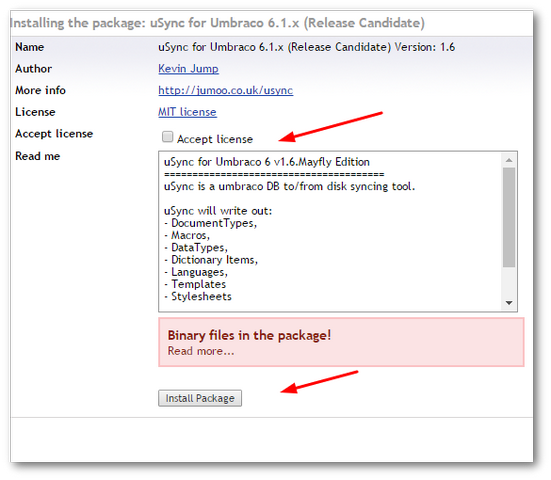
Do not be surprised if you see an error, detailing the package having .NET assemblies. Click the Accept License checkbox and click Install Package. After the installation finishes, if you refresh the page in the developer section, you should see a little uSync tab. Click on it and you should now have all the power of uSync at your hands. To test everything worked as expected, hit the Export button.
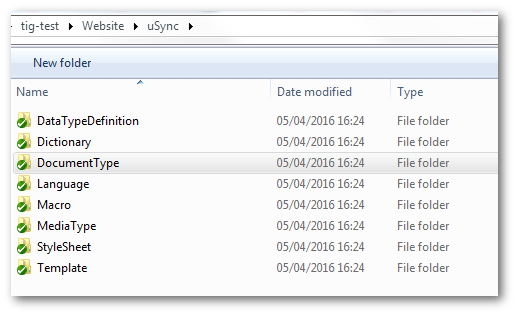
Within your website webroot, you should now see a folder called uSync. You should see a lot of XML files that contain all your document-type schemas. Using the import/export you can now move your data types between servers without having to manually re-add them in. Happy Coding 🤘
