In this tutorial, you will learn how to extend the Umbraco backend so you can create a custom admin page. There are many reasons why you might want to customise the Umbraco backend. I frequently add a custom content approval page, and a custom URL rewriting page within my projects. When it comes to Umbraco 7+ you have two options when it comes to displaying a custom page within the Umbraco backend. One approach is to use AngularJs to render the page. I am not an AngularJS whizz-kid. If you can't be bothered to learn AngularJS the good news is you can also use C#, MVC views and controllers to build these types of pages. In today's guide, I'm going to cover everything you need to make that happen 💥.
Displaying a custom MVC view within the Umbraco backend is unfortunately not as straightforward as you would first imagine. To display a custom page, first, you will need to decide where you want the page to appear within the backend. You can make the page available within a new custom section or you can render it under one of the defaults Umbraco sections. You can build the second by hooking into the page 'tree'. To do this you will need to create a link within the section that will open up your view. If you're struggling to get your head around the difference between a section and a tree then, hopefully, the diagram below will help:
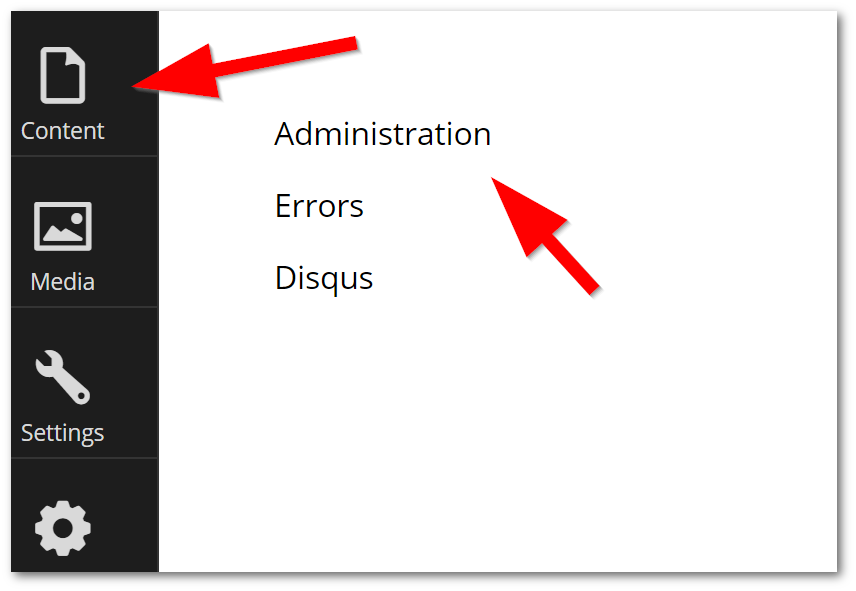
The section is the item that appears in the dark menu area. Umbraco sections include the 'Settings' and 'Content' areas. tree links can be seen as hyperlinks on the right-hand side. If you opt to create a new section within Umbraco read this guide to find a detailed set of instructions. Assuming you don't want to click that link, a quick recap of the code required to create a section is shown below:
Creating a new Umbraco section involved updating some config. Within the config folder you will see a file called applications.config, as seen below:
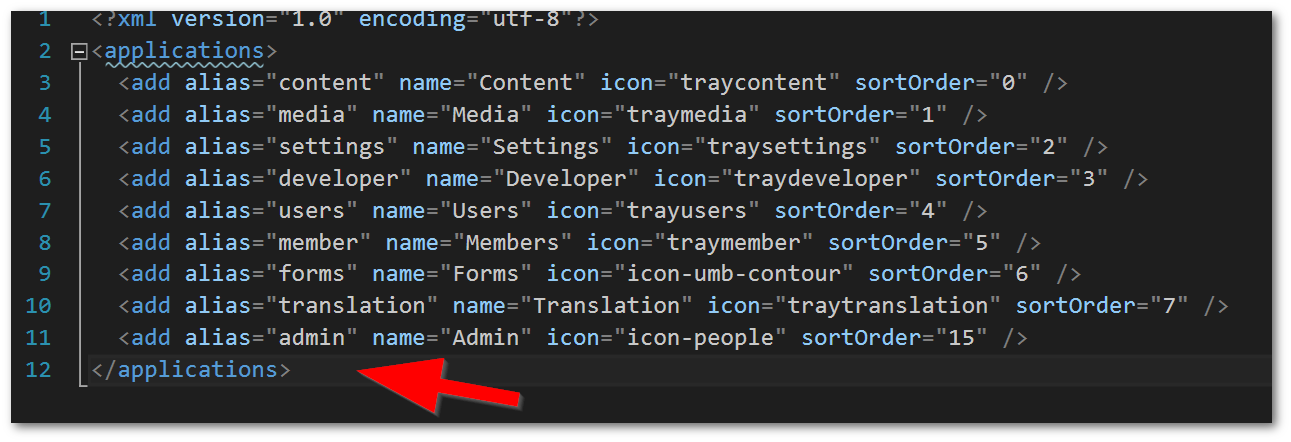
To create a new item, copy and paste from an existing one. The alias is important as you'll need to use this in your code later!
How To Create A Tree In Umbraco
Next, let us cover the code required to create a tree within Umbraco:
The class needs to inherit from umbraco.cms.presentation.Trees.BaseTree. The class will also need to be decorated with the [tree] attribute. This attribute will allow you to define the URL Umbraco will display:
The first parameter within the tree attribute is called customSection. This is the alias of the section, where you want the tree to live. Be careful when adding this alias as it needs to exactly match the section name (it will probably need to start with a lowercase letter) If you want to use a default Umbraco section, their alias names can be found following the advice above. If you have created a custom section, then you will have defined this yourself and you will need to use that.
The second parameter is the tree content. Tree is probably the least important parameter. This just defines the name of your section. In this tutorial, this value won't be displayed or used anywhere else, so you can call it whatever you want. The last parameter 'Content Admin Tools' is the name that will be shown within Umbraco.
Now you have defined all the parameters within the tree attribute, the next step is to create a node within the tree that will link to your view. In this example, I'm only creating one node, but you can create as many as you want. Before you can create a node, you will also need to define a root node. As you can see from the code, you will need to override two methods from the base class. One that creates the top-level root node:
The other method is the place where you need to define the node that will link to your controller/view:
I'll quickly talk you through the interesting bits of the code, NodeID, sets the sort order, e.g. the order the node will be displayed in the list. The text is the name of the link that will be displayed within Umbraco. The action is the link that will call the view. To make Umbraco call a controller/view we use some Javascript to open it.
I should also state now, that to work with a custom view within the Umbraco backend, it has to be accessible using this route umbraco/backoffice/plugin/ If you don't do this, you will get permission errors.
Route Config
When we work with a normal MVC view and controller within Umbraco, whether it be front-end or backend, we need to create an entry for it within your website's route config. As mentioned above, your route config needs to include Umbraco/back office/Plugins/ within its Url, otherwise, you will run into issues. This bit confused a lot of people, so don't say I didn't warn you. An example route can look like this:
MVC Controller
The last bit of the puzzle is the standard MVC stuff. The controller code looks like this:
The only difference in this controller code compared to a standard MVC one is that you inherit from UmbracoAuthorizedController. This will ensure that only authorized people who have signed into Umbraco can access your admin pages. After this, your view and view model will then act and behave the same as normal MVC.
That's it.. you now have all the code you need to display a custom controller/view within the Umbraco backend, enjoy! Happy Coding 🤘
