
In this guide, you will learn how to install Umbraco 8 and configure your Windows PC to allow you to code with full efficiency and productivity! The best way to develop a Umbraco website locally is to use IIS. This means that the first step on our journey will be to ensure that IIS is installed and configured correctly.
Install & Configure IIS
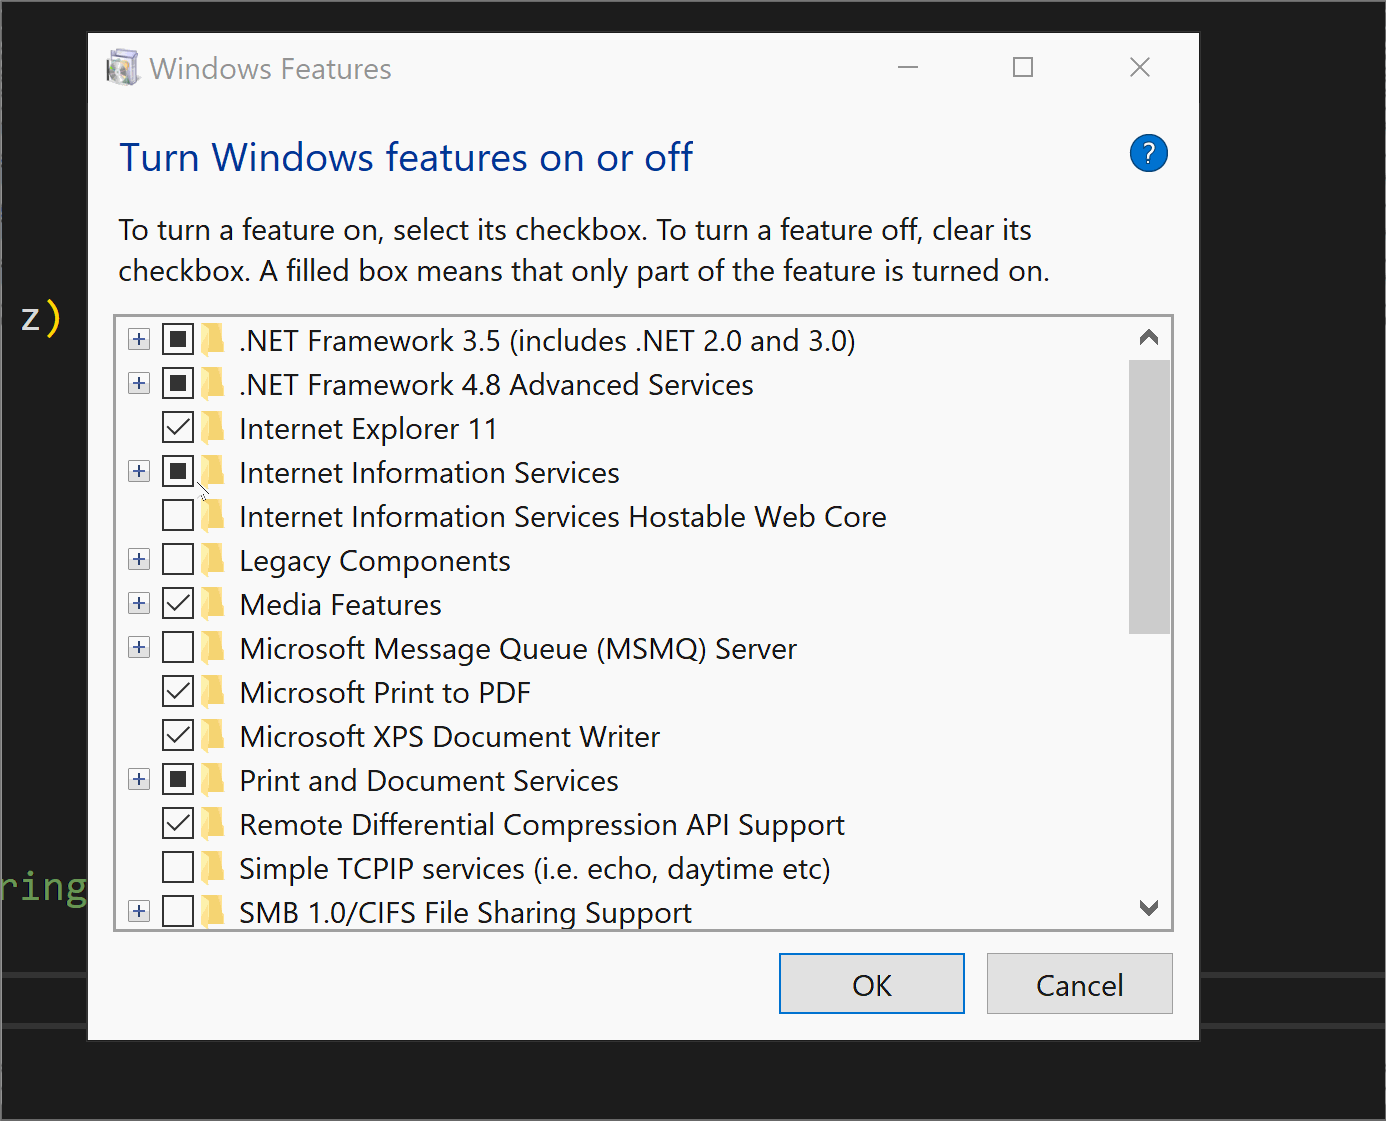
First, you will need to ensure IIS is enabled and that it has .NET 3.5 and 4.8 installed. I also recommend that you enabled the HTTP Redirection and the Application Initialization modules as well. This can be done from the 'Turn Windows Feature On or Off' screen, as seen below:
With IIS enabled, the next step is to create a website within IIS. This website entry is the thing that will allow you to view your local site in a browser. To use Umbraco optimally you should configure this website with a 'hostname'. The hostname will be a user-friendly name that you will use to access the site within a web browser. To create a hostname, you will need to add an entry within your host file. This file is located in C → Windows → System32 → Drivers → ETC → host. When you open this file within a text editor, ensure you load the editor using admin mode, otherwise, you will not be prevented from saving the host file!
Configure SQL
The next part of running Umbraco optimally is to use a SQL server to host the database. To do this you will need to:
Install SQL Express - Download Here
Install SQL Server Management Studio (SSMS) - Download Here
With SQL installed, you will need to configure it so that your Umbraco website can use a username and password to connect to SQL. This is done by:
Enabling 'mix moded' authentication
Ensure the 'sa' account is enabled and is active
NOTE When changing these items you will need to reset SQL Server before the changes will be enabled!
Visual Studio
To run and compile a Umbraco project you will need Visual Studio 2017 or 2019. You will need to ensure that your local Visual Studio meets all of Umbraco's pre-requisites. If your Visual Studio does not meet this criteria, the installer will fail and you will not be able to get Umbraco to work:
- Microsoft Visual Studio 2017 version 15.9.6+
- ASP.NET 4.7.2
- SQL Server 2012+ Hosting
- II8
- ASP.NET 4.7.2
Adding Useful Visual Studio Plug-ins
I recommend that you install ReAttach as it will make you a lot more efficient when debugging your Umbraco website. Other extensions I recommend can be found in this video.
Installing Umbraco
We are finally ready to install Umbraco! Within Visual Studio create a new ASP.NET MVC project. After the project has been created, open Nuget and search for and install the UmbracoCMS package. Installing the package will download all the files required to install Umbraco. The next bit is usually easy as long as you have followed the steps above. Run your project within Visual Studio, the easy way to do this is to press Cntrl + F5. This will launch the site and the Umbraco installer. Follow the instructions on the screen. For the installation type, choose the 'customize' installation option. This install path will allow you to install the database using the SQL server rather than using SQL compact, which as mentioned earlier will give you a better development experience.
If everything goes to plan Umbraco should install. Try to access the editor, this is done by adding ./umbraco to the end of your website's URL. Use the username/email and password you used in the installation process to get in. If you can log in, you are done. Congratulations you can now start building something cool! You should now point the website we created in IIS to the website's webroot. Doing this will mean you can access the site using the hostname we set up earlier. This is much better than having to launch the VS-debugger each time you want to view the site. Happy coding!
