In this tutorial, you will learn how to create different environments within ContentFul CMS. If you are working in a big team, just having one CMS instance will cause issues. Developers will need a workspace to build new features. The client will need a space to sign off work and try things out. Also, let us not forget the live site. Traditionally, when working with self-hosted CMS systems, setting up multiple environments was a pain. You might need to create a new server per environment or a new SQL database per environment. In general, ball ache! As ContentFul is a SASS based CMS there is nothing to install. You click a button and the CMS is created for you. This raises the question, how do we use the same environment workflow within Contentful. In this video and tutorial, I will show you how.
Create Multiple Environments
Creating a new environment and a new alias within Contentful is simple. The steps are shown below:
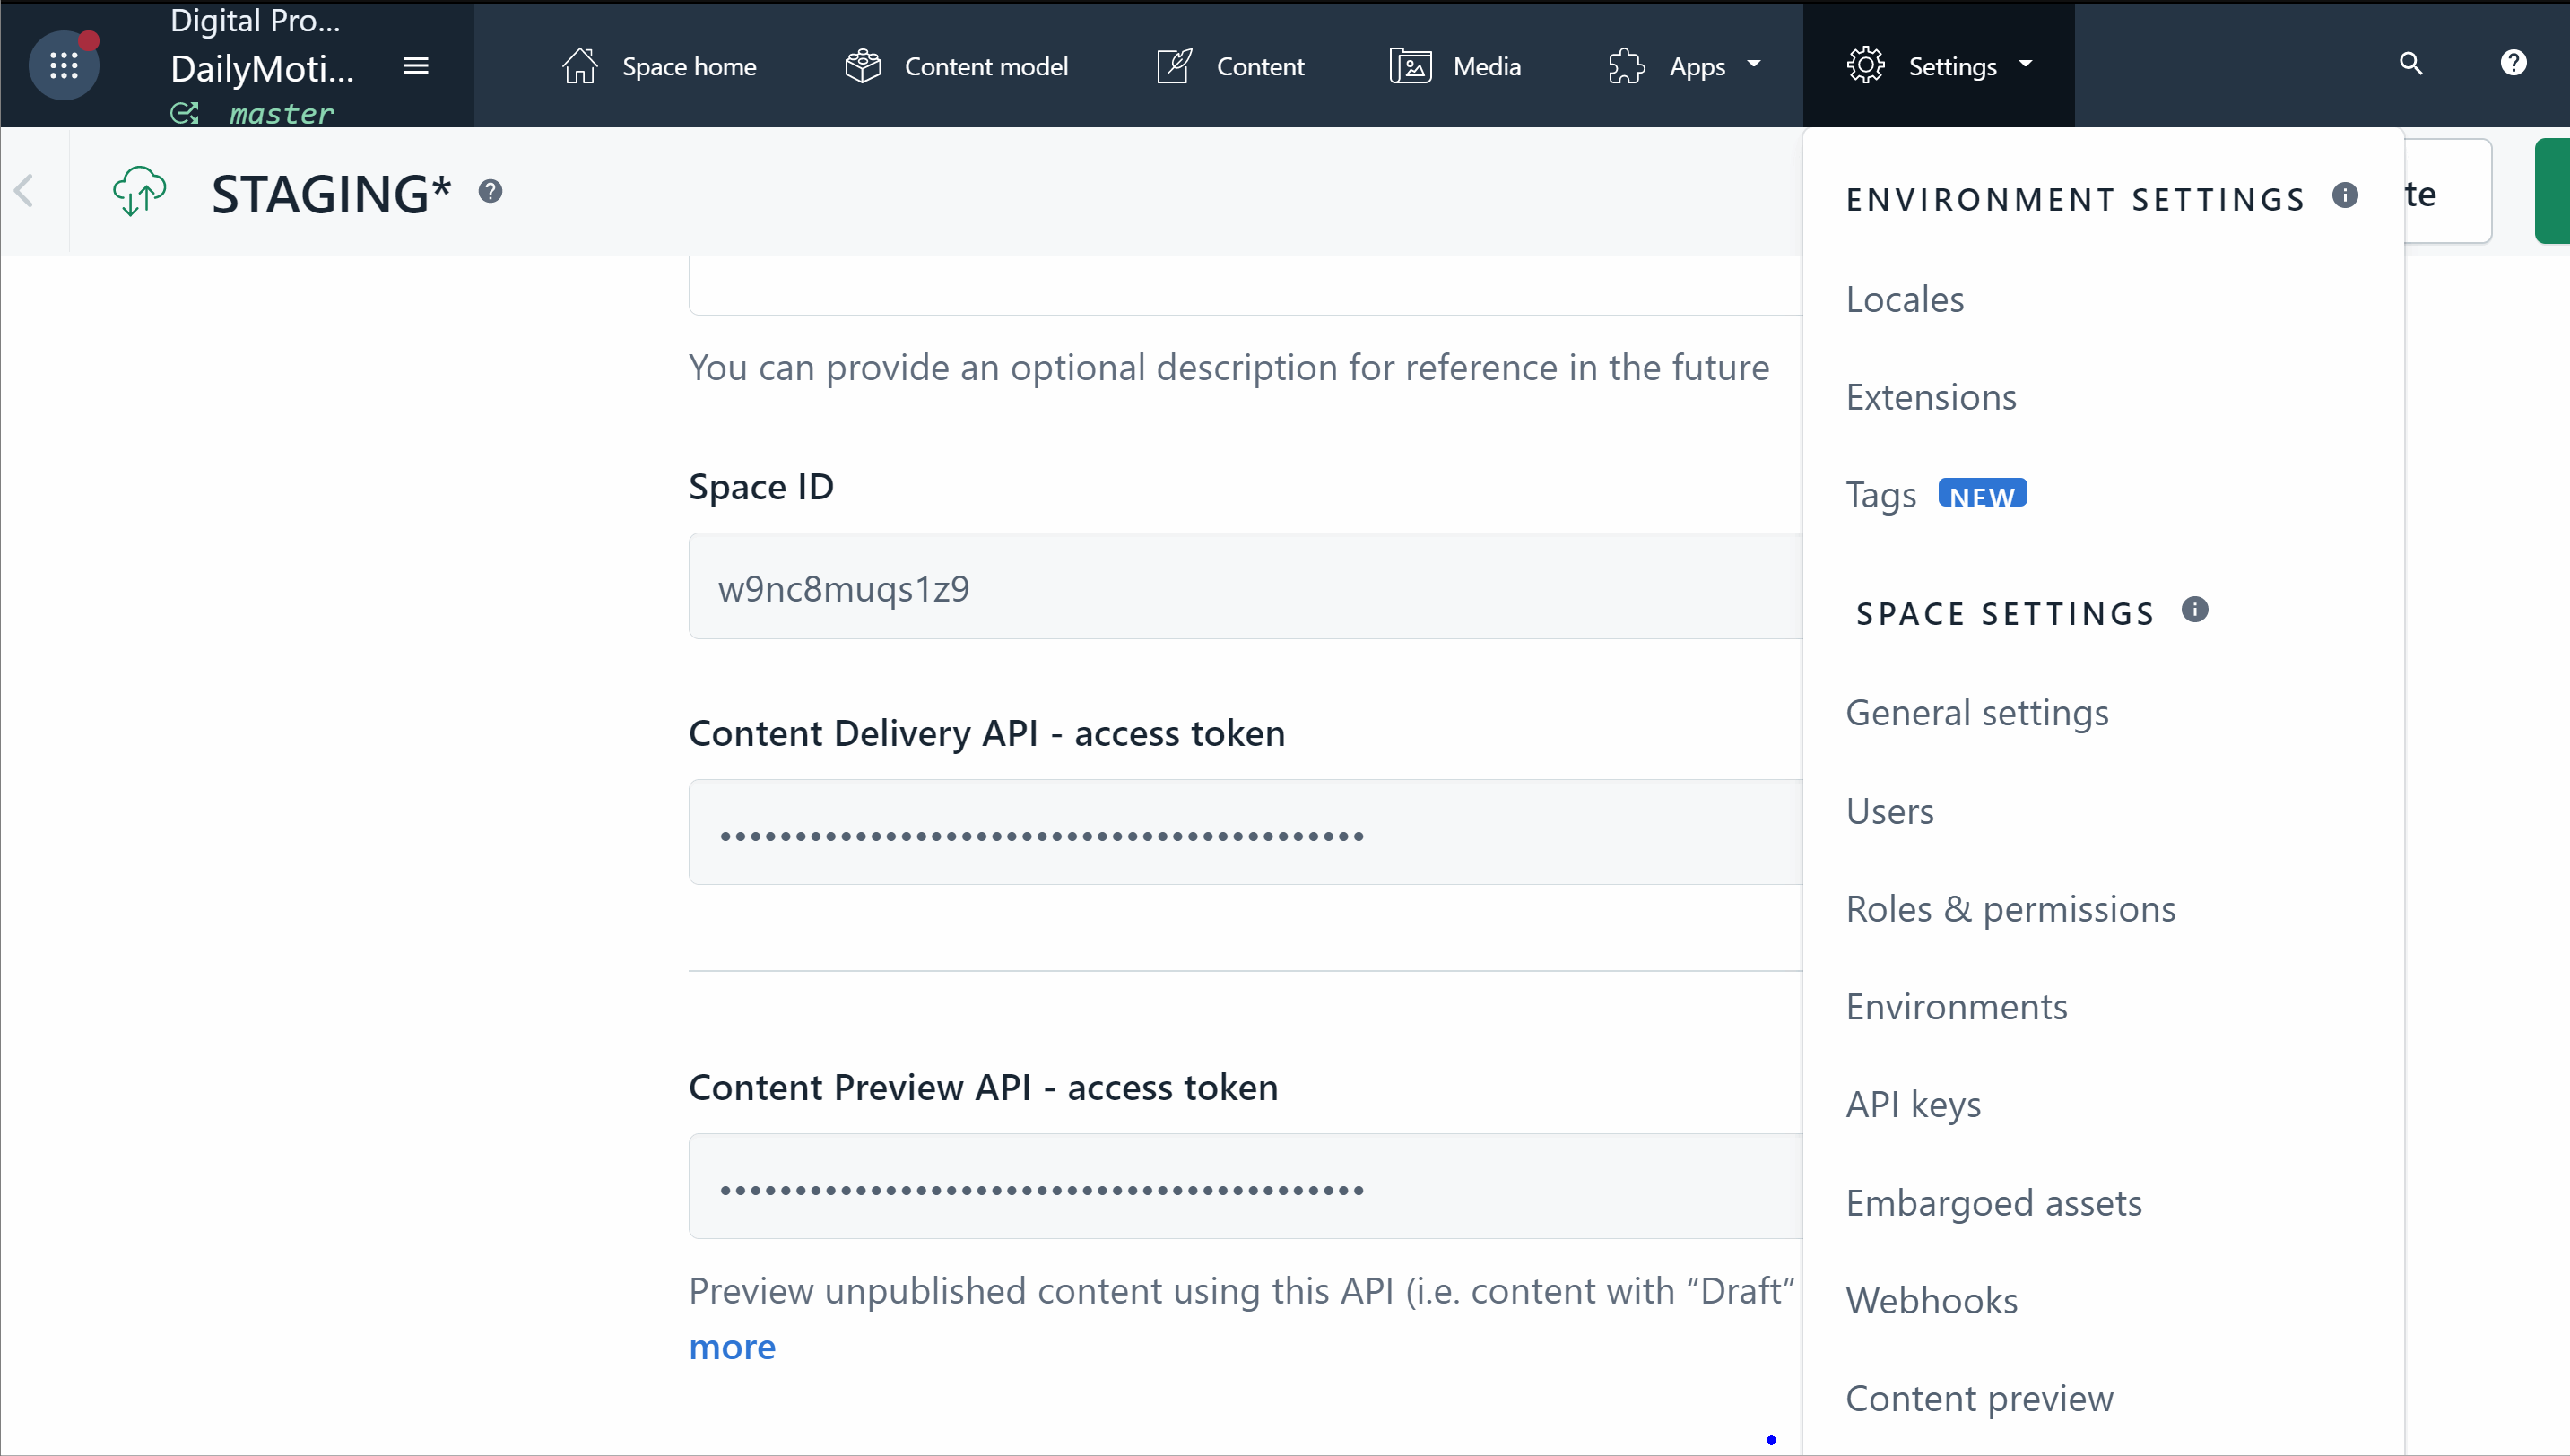
After creating an environment in the CMS, you will need to generate an API key. The API key is not one single thing, it is made up of a few parts. Each Contentful API key is bound to an environment or an alias. Each key will contain a space ID, an access token and a preview access token. You can use these references in your application to talk to ContentFul and get the data out of the environment that you wish to work with. The process of setting up a new API key is seen below:
![Creating An API Key in ContentFul]](/media/tjbhw31l/contentful-setting-enviroment-variable.gif)
With your API key created, you will have access to the space ID, the access token and the preview access token. Copy these values. The next step is to configure your application to use it. I tend to add this data into these apps within the .env file in this format:
With the access tokens and space ID accessible using code in your application, you can get data from ContentFul. As most projects tend to have multiple environments, I add the logic to pick which .env variables to use within a utility function. The added benefit of creating a utility function is that it's easy to unit test as well. I use the variable that I have named CONTENTFUL_ENVIRONMENT as the environment switch. I will use this variable within Netlify to configure which environment should be built.
To get access to content held within ContentFul you use the contentful package. If you want more information on how to hook-up NextJS, ContentFul and Netlify you can watch Learn How To Integrate ContentFul CMS Within A NextJS Application. Assuming you know how to hook everything up, you will likely have a utility file in your project that calls ContentFul. In the area of code where you call createClient(), use the code outlined below instead:
You now have a way to get different data from your application. Note how on Line 9, 10, and 11 I pass in the space Id, the environment name (this should match the name you set in ContentFul) and the access token. These are the three things that will allow you to switch between environments in code. You now have a way of switching between which ContentFul environment your application uses. In terms of infrastructure, assuming you are using Netlify, you can create a new application in Netlify and add the environment variable to configure the environment that you would like the website to use:
The steps outlined in this tutorial are all the steps you need to set up different environments, simples. The same works for the site preview. In the master branch, you will need a way for content editors to view their amends before they make any changes live. The simplest way to do this is to create a new environment in Netlify and set it to use the preview access token rather than the live site access token. Creating a preview environment is simple. Create a new site in Netlify and set the preview environment variable. Within the CMS you will need to set this URL. This is done like this:
NOTE: Remember to set the build trigger in Netlify to use the same GIT branch as the environment you want the preview to work with. You may also need to set up the same web-hooks in your Netlify configuration!
That's all there is to environments and previews. It's all about the keys baby! Happy Coding 🤘