In this tutorial, you will learn how to build a custom Episerver editor property using Dojo.Js. DojoJs is a bit of an evil word around most of the Episerver teams I've encountered. Mainly as no one knows it and no one is really interested in learning it! If you want to create custom Episerver properties, you need to know Dojo. With limited knowledge of Dojo and with a bit of persistence, you can write your own custom properties and funky editor functionality 🎨.
This tutorial will give you a step-by-step guide on how to create a dojo property that works via HTML files and attach it to a property. Most of the tutorials I've found on the subject seem to assume you have some competence with Dojo. I definitely do not, so hopefully, this tutorial will stop someone from having some of the same pains as I did. As an added bonus, there is fully working code sample included too 😉
Modules.config
If you want to include some UI files in the Episerver editor you need to know about modules.config. The modules.config is the config file where you can define and register new Dojo properties. The code to register a new Dojo module is shown below:
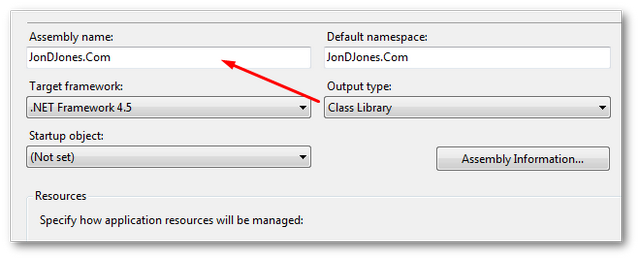
The first thing you need to do within modules.config is to define an assembly section. The value in here needs to map to the name of the assembly that contains your custom code. This value to be exact, so be aware of casing issues!
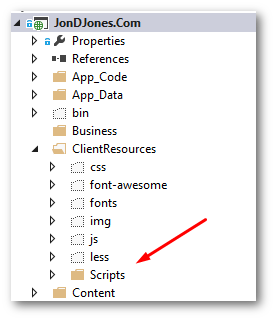
The Dojo module section points to the folder that will contain our dojo stuff. All these folders will need to live within the ClientResources folder and you can't change this. In this example, my webroot folder structure will look like this:
'jondjones' is an arbitrary namespace name that I've created for this example. This value doesn't need to match your solution name or anything like that. Use a value that makes you happy 😊... The Dojo modules namespace can be anything you want, however, it will have to exactly match the namespace define in your module. I'll cover this later, however, make sure these values map. If you make a typo in here the editor will throw a 404 when trying to load your Dojo definition js file
Creating Your Dojo files
Within your scripts folder, you need to create your Dojo file. For this tutorial, I have created a folder called CustomProperty:
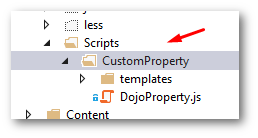
I named my Dojo files DojoProperty.jsh The contents of this files looks like this:
This is the very bare-bones structure you need to get a dojo property to work. The property definition defines the properties dependencies and parameter arguments. Notice on Line5, dojo/text!./templates/DojoProperty.html maps to the template. This is the line that tells Episerver which HTML file to load for the property.
In the declare function on Line13, we specify the Dojo widgets namespace jondjones.CustomProperty.DojoProperty. Let's break this line down. 'jondjones' is the namespace and must match exactly, otherwise, Episerver will not be able to find the file. CustomProperty defines the folder name under scripts that Episerver will look. DojoProperty' matches the filename without the file extension.
Within the declare, we also set thetemplateString to equal our template property. This is the part that tells Episerver where to find the view associated with this property.
The Dojo Code
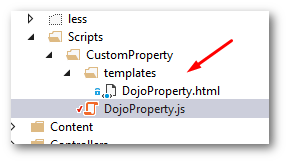
We defined the location of the Dojo view in dojo/text!./templates/DojoProperty.html. This path is related to the location of the file, so we need to create a folder called templates and a file called DojoProperty.html file within CustomProperty a well:
Our view will then looks like this:
For this demo, I'm just rendering text. To make interactive components things are more complex. The thing to note is that you have to enclose everything within a div tag. If you forget to wrap everything around a single container your control will not render correctly. That's all the configuration that is needed from the Javascript side of things. The next part is getting back to C♯ and creating an EditorDescriptor
The Backend Code
Create a new .Net class in your solution called DojoPropertyDescriptor and copy the code below.
The important thing here is the UiHint. This is the thing that will register the property to use our new Dojo widget. You also need to se the ClientEditingClass. This value needs to match the namespace we defined in the declare method in the Dojo code.
With the editor descriptor defined, you can create a property on a page type that uses it. This process is the same as adding any Episerver property, using UiHint:
To render the property from a view, you simply call the PropertyFor() helper as normal. You have to use PropertyFor() and not just call it directly via the model, otherwise, the inline editing will not work and the property may not render correctly.
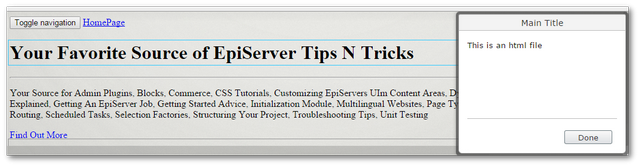
The final result should now look like this:
We've now gone step-by-step through everything you need to do to register and create a custom dojo property in Episerver. The example we've used was very basic, however, sometimes just getting something working can be one of the trickiest parts. I recommend starting simple and then building things up.
All the above code can be downloaded to a fully working website from my GitHub account here. Happy Coding 🤘
