In today's tutorial, I'm going to walk you through how you set up deploying to DXC via Octopus. Episerver also has a pretty good guide, available here, however, I struggled when following this guide so I thought I would share my experiences in a tutorial in case it helps someone!
Setting Up You DXC Account
The first thing you need to do is set up an Azure/DXC account in Octopus. You will need some information from Episerver managed services to do this. If you don't have a Client,ApplicationID,SubscriptionID,TenantID,PasswordandKey` then email the Episerver service desk and ask for them.
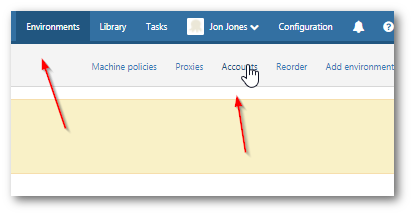
In Octopus, go to:
'Environments' ➡ 'Accounts', click ➡ 'Add' button.
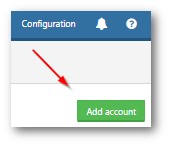
Click on Add Accounts located in the top right of the screen:
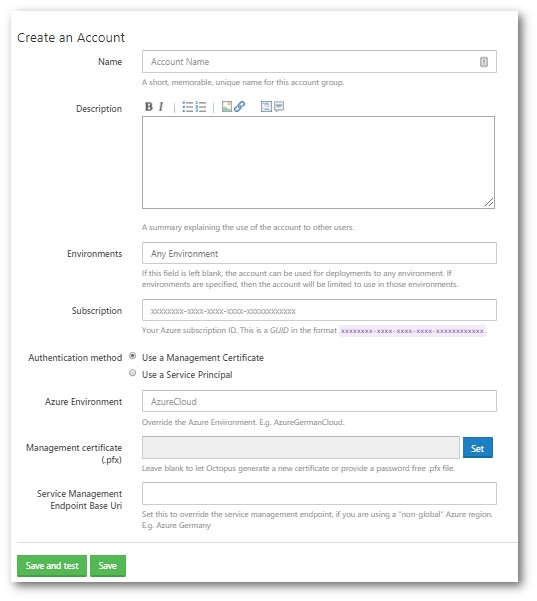
In the new account screen, set a name like 'DXC Integration' and add in your config details. You need to enabled 'Use a Service Principal', aside from that everything else should be pretty obvious. When you click save and test, Octopus will try and talk to Azure. The first time I tried this, the client that I was working for had a WAF (firewall) that blocked the request. So the test failed. I thought it was something I did and I wasted many hours figuring the WAF issue out. If you find yourself in a similar situation, check with your infrastructure team first to ensure the request is going outside of your network!
Setting Up The Environment
After you have an account set up, you need to create an environment. When you set up your Octopus project, you need to tell it where to push your files... that 'thing' is done by creating and configuring an Octopus environment.

In Octopus, click:
'Environments' ➡ 'Add environment'
Give it a name like 'DXC' and save it. When you look in your environments you should see your new entry in the list:
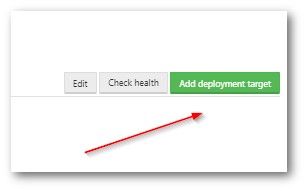
Click the 'Add deployment target' button next to your environment. This will configure the server/web app that you want to deploy to:
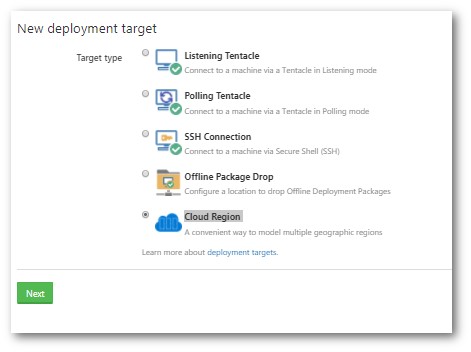
Select 'cloud region'. This is Octopus terminology for an Azure web app:
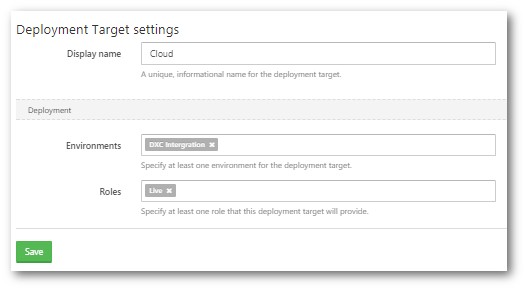
The environment should be pre-filled so all you need to do is add a name and a role.
Setting Up The Lifecycle
The next step is to define the lifecycle that Octopus will use. This is the container that will use the environment created above, to deploy to DXC.
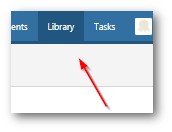
Click Library at the top and then lifecycle on the left-hand side.
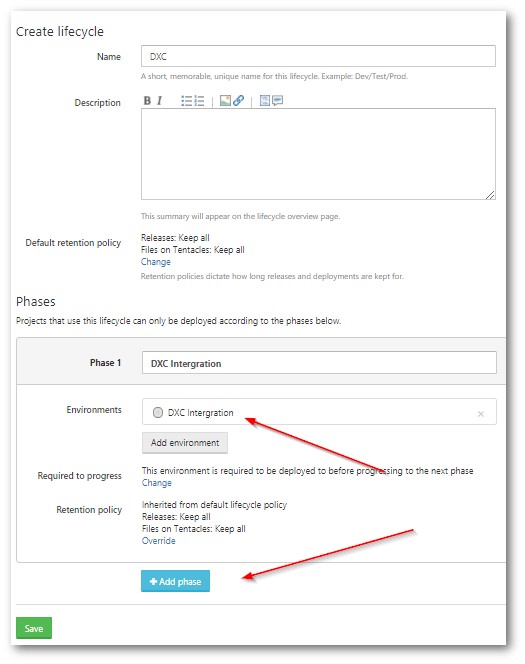
Give your lifecycle a name, click add phase and call it whatever. In the environment list, pick the environment we created in the step above. You have now done all the set-up tasks, configured an Azure account, created an environment to deploy to and then created a lifecycle that we'll use in the build process to deploy our code to. Next, is setting up the deployment process.
Deployment Time - Set up the deployment process
In this guide, I'm assuming you've already set up a project in Octopus. If not you need to create a new project. project creation is all standard Octopus stuff and isn't specific to Episerver or DXC so I will omit it here. In your project, let's look at deploys:
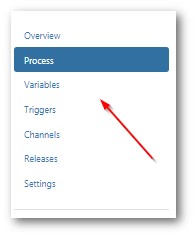
Select your project from the 'projects' tab at the top and select 'Process' on the left-hand menu:
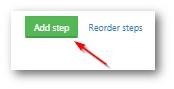
Click 'Add step':
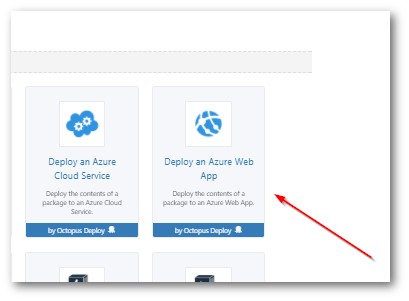
Click 'Deploy To Azure Web App':
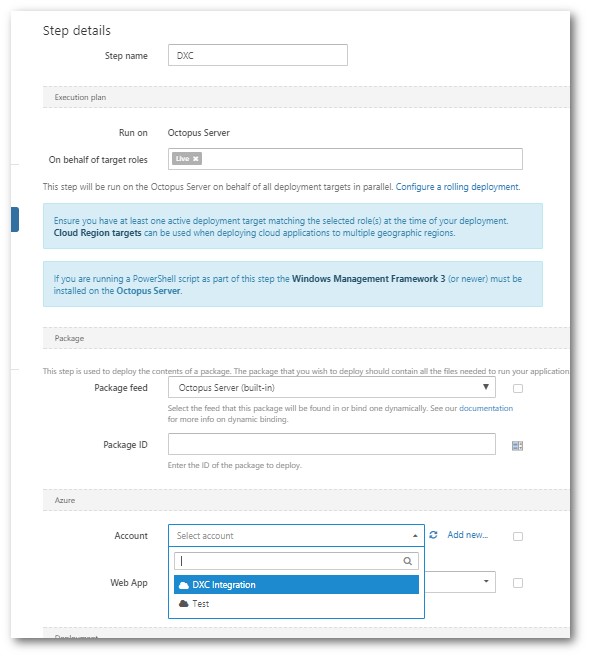
Add in a step name. Select your Azure account from the Azure section. Add in your package id (how the ID is generated isn't covered in this tutorial). The is the build number of the Nuget Package that will be generated after your code is built. The package is the thing that will get deployed to DXC. Add a `channel if you need one.
Deploy It
That's basically everything you need to do in Octopus. As everyone will have different project configurations, etc... the exact step you will follow will probably be slightly different to mine. The steps above give you everything you need to deploy to Azure. After you push to DXC, go to the URL provided in DXC Services for the Integration environment, to verify that the website is working. At the start getting all the variables to transform etc.. will take a lot of trial and error. I personally find build scripts very frustrating and if you're like me, then good luck.
Also, note if you have a WAF or Firewall, be aware this might block the request if you are working on-rem. In a lot of situations, if the process fails it might not necessarily be something wrong that you've done. When you come to setting up DXC I suggest you make sure someone on your infrastructure teams free and available!
Happy Coding 🤘
