In this tutorial, you will learn how to manually install Umbraco V7. You will learn all the required steps to install this great CMS manually. Afterwards, you will become an Umbaco installation ninja 🐱👤. This guide will not cover the simplest way to install Umbraco. If you are looking for that guide, I recommend you read this. This guide is for developers looking to configure the CMS for optimal developer experience. If you want a bit more control over the installation process like configuring IIS or SQL, read on 🔥🔥🔥
Download Umbraco
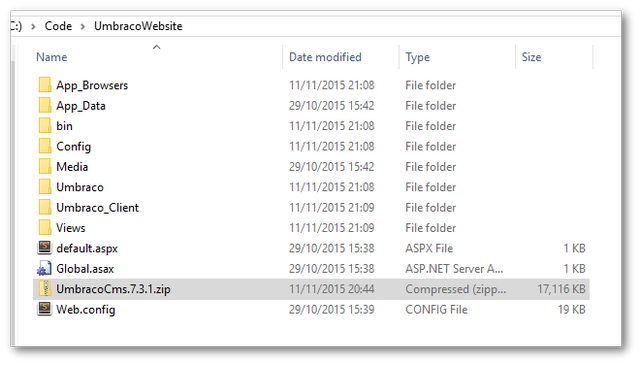
First, head over to the Umbraco download page and get the latest copy of Umbraco. After you have downloaded your Umbraco files, copy them somewhere on your computer. I usually put everything in inetpub in the C:/ drive:
Configure The Web Server
Next, you will need to set up a website in IIS in order to host your website. You want to host the site in IIS to make so you can access the CMS quickly. You do not want to have to wait for the VS debugger to launch every time you want to look at the site. SImply using the CS debugger to launch your site waste a lot of your time. Not good 😞.
Create a new website in IIS and point it to your extracted files that you just added within the inetpub folder:
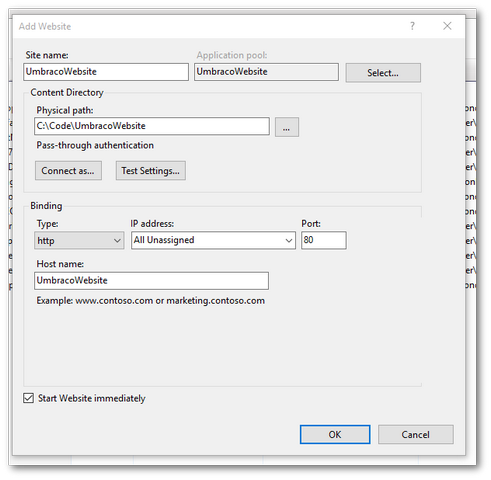
To create a website in IIS, you need to create a new entry from the IIS manager. You will need to add these configuration options:--
Name. The name can be anything you want as it won't be shown anywhereThe physical path: The location on your PC where the Umbraco files are hostedhostname: The name you will type in a web browser to access the site
In order for the hostname to resolve correctly, you need to create a mapping on your PC. When you type the hostname within your browser, by default it will call the internet rather than IIS. To make the browser call IIS instead, open up your host file and add a hostname entry. The hos file can be found here:
C ➡ Windows ➡ System32 ➡ drivers ➡ `etc'
Open the host file in a text editor. You will need to open the editor in administrator mode otherwise you won't be able to save it. Add an entry like this:
In my example, it would look like this:
With this configuration defined, when you type umbracowebsite into a browser, IIS should load.
Configure SQL Server
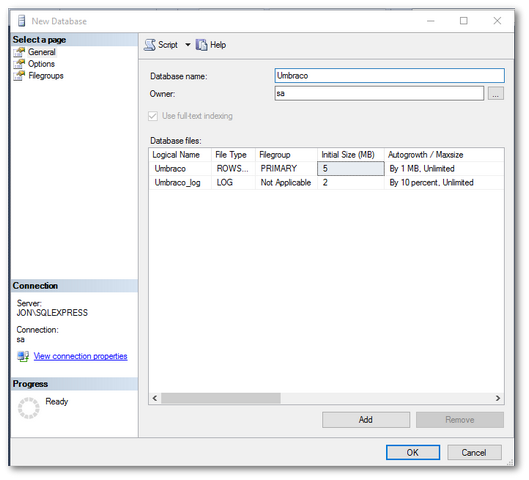
The next step is to create a database inside of SQL server. This is the database the Umbraco installer will use to create the Umbraco database. In order for your website to successfully talk to SQL you will need to use a database account. In SQL the admin account that has permissions to do everything is the sa account. I recommend you always use the 'SA' account to access the database locally. When installing Umbraco for production, never use the SA account. Create your own SQL user with correct read/write permissions to the database. When you install SQL server, the SA account can be disabled by default. Before installing Umbraco, log into SQL and check that you can log in successfully with this account first:
Install The CMS
With IIS, a hostname and SQL installed it is time to install Umbraco. Open a browser and type in the hostname you created for the website. Doing this should launch the Umbraco installation wizard 🧙 If nothing loads, check the hostname is mapped correctly, IIS points to the correct folder. A final tip is to make sure you have set the everyone permission set on the webroot folder:
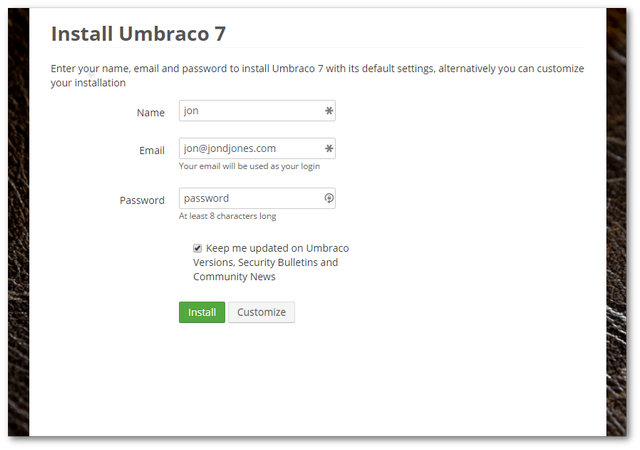
Next, enter your user account details that the site will use to access the CMS. You do this by clicking the Customize button:
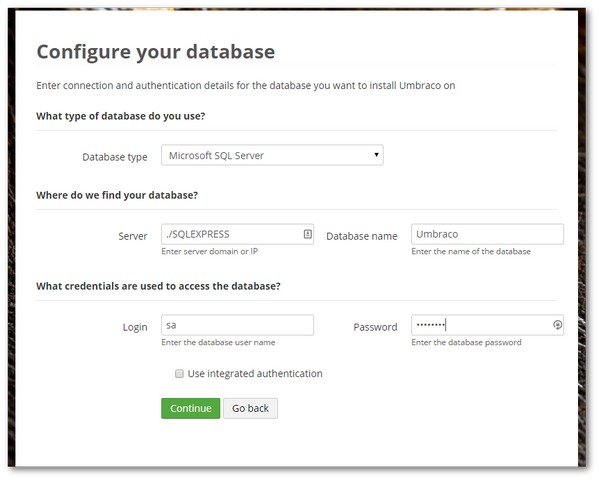
You need to add the SQL server, the database name we created previously and the username/password combo to access it. Click 'Next':
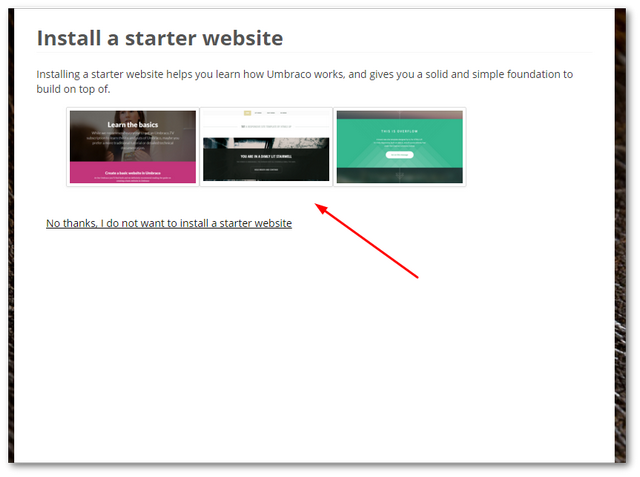
Next, select if you want a sample site to be installed as well. A sample site can make your development life easier as it will install a few web-pages to help you get started. Click Next and Umbraco will go off and do its thing. After a few minutes of waiting the installer will finish and Umbraco will launch. You are now ready to start developing! To access the editor simply add ./umbraco to the end of a URL.
You now know all the steps required to install Umbraco. The process is slightly more complex than the automatic method, however, on the flip-side, you get more control over the CMS. From a development point of view I would always recommend running and testing your project via IIS as this will be the same set-up as your production environment. Running a site in IIS will also turbocharge your productivity 💥. Happy Coding 🤘
