
In this tutorial, you will learn how to host an Optimizely CMS 12 powered website within a docker container. As the latest version of Optimizely uses .NET Core/ASP.NET 5, it is now possible to run your CMS within a container. It was kind of possible before, however, there were a lot of caveats and not everything worked. This is no longer the case 💥
In terms of your development workflow, there are a lot of efficiencies to be gained by moving from IIS to a container. Due to the nature of how ASP.NET 5 websites are now hosted, running your local development environment within IIS is not as useful as it used to be. Traditionally, I have always found that the most optimal way to build a CMS project locally is to be able to access my website in two ways. When making code changes you need to be easily able to see those changes quickly. The best way to accomplish this is to use the local debugging server from within Visual Studio.
During a project, you will often need to make changes in the CMS. When working as a content editor at the CMS level, having to launch the site within the local web server is a pain. Instead, hosting the site via a web server will give you quicker access to the CMS. Having a persistent way to access the CMS without needing to open up Visual Studio (or nowadays a terminal) and waiting for the debugger to launch will make you more productive. I am not a patient person in life, so having to wait really grinds my gears ⚙️⚙️⚙️
In the old world, creating a developer-friendly persistent website was easy. You could create a website in IIS and point it to your webroot. Unfortunately, this process within ASP.NET 5 no longer works the way is used to. In ASP.NET 5, you need to perform an MSBuild publish to get your final website file. First, having to build and publish each time you make a change adds an extra step that wastes more of your time. The second issue with this new way of working is synchronisation. Your new website will share the same database connection as your local development version, so no CMS data will be lost. The same is not true about files. If you uploaded some media within the CMS, this media will not be uploaded into your webroot. Instead, it will live within the published output folder. The next time you fire up your local debugging server your website could look funky as those files will not be within your webroot. If you want to add those files into source control, that is no longer possible. The fix is to manually copy the files from the website folder to the webroot. These two new steps will make you less productive, which is not ideal 😞
As hosting your local persistent website within IIS is not as optimal as it used to be when it comes to CMS 12 development, a better solution is to host your development environment in a docker container instead. Having your site hosted in docker will mean you will have persistent access to it. Using docker mounts it is possible to map the folder in your container to the corresponding folder in your webroot. Using a docker container will give you almost all the same benefits as the old work. The only caveat is building the docker file whenever you make a change. There are other benefits of using Docker around testing and deployments, however, the focus of this article is building a development environment that will allow you to work efficiently. As I hope you can now see, using docker is a better solution than using IIS for local development nowadays. This means we need to know how to build Optimizely CMS 12 compatible containers. If you want to learn how to do this, read on 🔥🔥🔥
Pre-requisites
Before we start creating an Optimizely CMS compatible docker file, let us first ensure you have all the prerequisites on your PC to get this working:
Enable SQL Server Access: Optimizely uses a database to store all the data added within the CMS. It is possible to work with Optimizely using a file-based database, however, when using containers it's a better idea to host your database within SQL-server. To allow for this capability, your container will need to talk to the SQL instance on your host machine. Localhost within your container will not point to localhost in the host system. Out-of-the-box, the type of access your container will need to talk to SQL is disabled, so you will need to enable some things 🤔
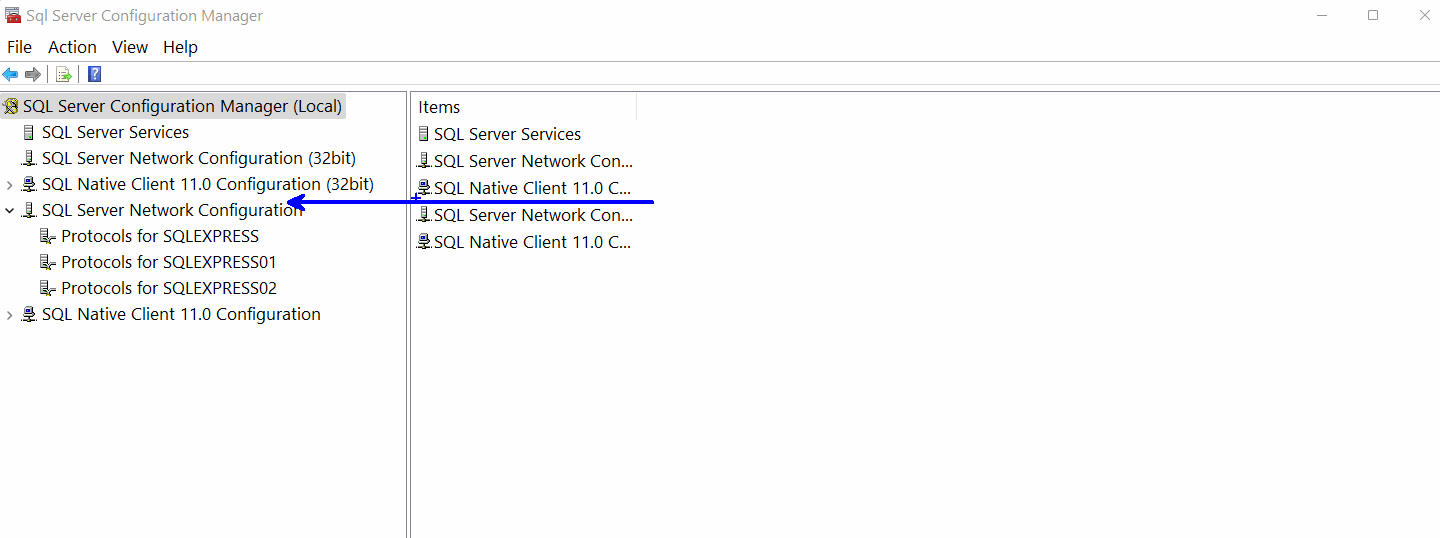
Getting a container to talk to a SQL instance can be fiddley. This is the reason why I recommend that you validate the connection works using SQL Manager first. You need to be able to access your SQL database using your machine's local IP address and the local port your SQL instance is running. To allow your SQL server to talk to docker, you will need to use a tool called SQL Server Configuration Manager. This tool should be installed on your PC already, however, it is pretty well hidden. You can not find it from the Start menu, it is in the Windows ➡ System32 folder. Assuming, you use SQL 18, you can find the config manager following the steps in the below video:
A list of which version of this tool you should use for your SQL instance can be found on the Microsoft website here. From within SQL Server Configuration Manager, you need to undertake these tasks:
- Ensure TCP/IP for your SQL instance is enabled
- Ensure
Listen Allis enabled - Get the IP and the Port number your instance is listening on
- Reset the server so the new changes are applied
Follow the steps in the video above for a guide on how to do all these steps:
After making these changes I recommend you fire up SQL manager and try to connect to your database manually. To test this connection, use your machine's internal IP address and the SQL port number. I found the port number my SQL server was running under in the IP Address tab in TCP Dynamic Ports field. If you struggle to find yours, try the default SQL port of 1433. To get your internal IP address, in a terminal run the ipconfig command. You can find your IP in one of the IPv4 Address fields. It should start with 192.
When testing your connection in SQL Manager, use the username and password that you define in your connection string. The format of your host is IP and port, separated by a comma, e.g.:
Use IP and port like this:
After you have successfully set up your container and got it talking to SQL, as a docker good practice you should be able to swap the IP and port within your connection string with this command gateway.docker.internal. Using gateway.docker.internal is a more robust approach to connection string management, however, for initial testing, focus on getting things working using the basics. After making this change, your connection string should look like this:
The easiest way to use this connection string within your container is to create an environment within Visual Studio and create an environment-specific version of appsettings.json. It is likely that you will need to configure some other bits and bobs in this file in order to configure your site to work optimally within a container. This is why I think an environment-specific config file is a nicer approach compared to passing variables into the docker container on start-up.
If you use environment-specific config files, you will also need to make sure your website is configured to read in the correct environment settings file. The code to do this should be defined within your Program.cs file. An example of how this file can be structured in order to read in an environment-specific file is shown below:
Permissions: To set up a container for development success, you will need to create a file mount. You will need to map folders in your docker container to the corresponding folders in your webroot. This way you can upload things in the container and get access to them in your webroot. This will allow for the dual running of your site in docker and in a debugger. It will also mean you can easily add newly created files into source control.
In order to make this work, you will need to set the correct file permissions on the corresponding folders that you would like to set up mounts to on your host machine. If you forget to do this, your docker container will fail to run and you can waste hours of your life figuring out why... trust me 😕. In your host machine, you need to ensure that all the folders you want to map have read/write access and are not read-only. For best practice, ensure the docker-user has read/write permission. As we are talking development environment and I am lazy, I simply tend to add the Everyone account with full permissions and replicate the permissions down the tree for simplicity 😉
Creating The Docker File
In order to host your website in a container, you need to create a docker configuration file. In this example, I am going to add my Optimizely CMS 12 starter kit into a container. You can clone this starter kit from my GitHub here. An important thing to note about this project is that it is structured so all the custom code has been added to an additional class library.
When setting up a new docker file, you need to copy all the folders that contain all of your class libraries used by your solution to the container's image. For my starter kit, I need to copy multiple folders so it makes sense to put the docker file within the root solution folder. If you only have a single website project, you could create the docker file in your webroot instead if that floats your boat. Creating a docker file is easy, create a new blank file called Dockerfile 💥
Within the docker file, you will add the instructions of what is to be included within the image. The first thing you need to do is define the base image that your container will use, as well as set the location where the files and folders will be created underneath. This is done using the FROM and WORKDIR commands, like so:
Next, you need to copy all the solution files you care about into the container. Within an Optimizely Dockerfile you will need to copy four main things:
NuGet.Config: You will need to make the container aware of the Episerver Nuget feed. To use docker you will need to create a NuGet.Config file and include the standard NuGet feed and the Episerver feed. The contents of this file should look like this:
License.config: For your development environment you will need a valid Episerver license file, otherwise you will get warnings and errors when trying to view the site. You can learn how to generate a developer license file here
Webroot and additional Class Libraries: You will also need to copy all folders within your solution that contains code to the image. You can do this by targeting all the .csproj files that your solution uses. For each project, you should also call dotnet restore to ensure that each of the class libraries within the image has access to all the dependencies it requires to run. In terms of structuring these commands, add the reference to your main website project last!
The next step is to build the app within the image:
After you have all of the files required for the website to run within the image, the second part of the Dockerfile is to add the instructions on how a container should be instantiated. You need to specify the base image and the working directory again. This time the working directory is app and not src. Note, I am also exposing port 80. I do this so we can access the website in the container via a web browser:
The main difference in this second section is the command to copy. This command outputs the result of the publish to a new location:
The final command is to start the container using ENTRYPOINT which takes two arguments. The first is the command. Running the site is done using the dotnet CLI command. The second is the file to launch, in this example, my starter kits website's main namespace is called Cms, so we need to launch Cmd.dll
With the Docker file created, you can now create a container 🔥🔥🔥
Build The Image
To create a container you use the docker build command:
When using this command you will need to specify the docker image to create the container from. When docker has finished creating your image, you can confirm the image has been successfully created using the docker images command. To create a container from an image you use the docker run command. In terms of powering up a container for optimal Umbraco development, the docker run command that you will need to run is quite complex:
Let us break down this command per flag so it is less confusing:
-d: Start the container as a background task. This prevents your terminal window from being locked up!-p: Maps a port on your machine to port in the container. When you are trying to access a website in a container, it is best to not use port80on the host machine as it is likely you will still want to use that port for accessing IIS. In this example, I am using port8081to access the site. You can use any port you want, as long as it is not already mapped to something else!- '--name': Specifies the container name. If you omit this docker will generate a random name for the container. It is a lot harder to know what the purpose of a container is when it is assigned a random name, so I recommend you always add this flag
- 'opti12starterkit`: The name of the image to build the container from
- '--env`: Pass any environment variables to the container
After running this command, you should have a working container that you should be able to access using localhost and port 8081:
Debugging why a container is not working can be annoying. If you find yourself in this situation, checking the file structure of a container can be very handy. The quick and easy way to do this is to copy the data out of the container onto your local machine. You can do this using docker cp, like this:
In this example, cms12 is the name of the container!
Persistent Data
One limitation with running an Optimizely CMS 12 powered website within a container is file persistence. If a content editor uploads some images in the CMS and the container is destroyed, all the uploaded images will also be deleted. The focus of this tutorial is on creating a developer environment. If you want to run your website within a container in production, I recommend that you consider using the CMS with a cloud-based storage provider, like Azure Blob Storage. Showing you how to set up a file provider in CMS 12 is an article in itself. The benefit of using a cloud file provider is that when content editors upload media it will be persisted.
As we are focusing on a development environment, the focus is efficiency. This is where the docker mount capability is great for development. Mount allows you to map a folder in the hsot machine to a folder in the container. This means you can automatically access files in your solution folder when they are uploaded to the container. Great!
Mounts are not the only way to deal with persistent data storage in docker. Docker also offers volumes. Volumes are considered better practice compared to mounts, however, with a volume you can not map folders to the host machine. In production, it is not very likely that you would want to map a folder to a folder on the server, however, in development, it is very useful. You can learn more about docker volumes here. Volumes will allow you to persist data and they can be shared across multiple containers. Volumes are still useful for some folders in development. For example, it makes more sense to map the log folder and the temp data folder as volumes rather than mounts. Using volumes means that your temp data and logs will not get destroyed, improving performance, plus aiding you while you are debugging.
You will start your container with a mix of volumes and mounts. The big question is what will you need to map? Below list the folders that I tend to add:
One limitation with running an Optimizely CMS 12 powered website within a container is file persistence. If a content editor uploads some images in the CMS and the container is destroyed, all the uploaded images will also be deleted. As the focus of this tutorial is on creating an optimal developer environment we do not want that to happen. If you want to run your website within a container in production, I recommend that you consider using the CMS with a cloud-based storage provider, like an S3 bucket, or, Azure Blob Storage. Showing you how to set up a file provider in CMS 12 is an article in itself. The benefit of using a cloud file provider is that when content editors upload media it will be persisted.
For your development environment, you will want to map certain folders within your container to the folders in your webroot. You can do this with the docker mount command. Mount allows you to map a folder in the host machine to a folder in the container. This means you can automatically access files in your solution when they are uploaded to the container 💥
Some developers do not consider mapping with a mount the best way to persist file storage in docker in production. Docker also offers volumes. Volumes are considered better practice compared to mounts, however, with a volume you can not map folders to the host machine. In production, it is not very likely that you would want to map a folder to a folder on the server, however, in development, it is very useful.
Volumes will allow you to persist data and the files within a volume can be shared across multiple containers. Volumes are still useful for some folders in development. For example, it makes more sense to map the log folder and the temp data folder as volumes rather than mounts. Using volumes means that your temp data and logs will not get destroyed, improving performance on container start-up, plus aiding you while you are debugging. You can learn more about docker volumes here.
I recommend you configure your container with a mix of volumes and mounts. The big question is what will you need to map? Below list the folders that I tend to add:
App_Data: Optimizely keeps a lot of data in the App_Data folder. In terms of this tutorial, the most important one is the blob folder. By default, whenever someone uploads images within the CMS, the image will be added within App_Data ➡ blobs. I recommend that you map the blob folder to your solution using the mount command.
Logs: Depending on how you manage your site's logs will determine if you want to persist the logs. I will cover logging in a future post, however, keep this in mind when setting this up.
Taking all these mappings into account, this is how I structure the docker run command to also include all the mounts and volumes needed to run the container optimally:
Running this command will start your container with the correct mappings. Now, whenever a content editor updates files within the CMS, you should get access to those updates in the solution folder in your host machine 💥
You now have the knowledge to host a CMS 12website within a container 💥. Using containers is going to make you super productive... or, at least as productive as you used to be. Through my test and trial approach to CMS 12, I have definitely found that containers are the way to go with Optimizely CMS 12 and onwards. Happy Coding 🤘
