In this tutorial, you will learn how to change the URL used to access the Umbraco backend. Changing the URL that your team uses to access the CMS is a good security practice to adopt on a project. When running any website powered by Umbraco, you do not want people outside of your business accessing the backend. If someone can access your CMS, they can cause havoc within your website. One of the most common website attacks is the classic brute-force password attack. A hacker finds the Umbraco admin URL and then runs a dictionary attack trying to get access to the site. A lot of hackers use automated tools to probe websites with common CMS login URLs. When the tool identifies a site, they start trying to hack into it. One simple way to make this type of attack harder is to change the default admin URL so these programs can't as easily determine that your site is powered by Umbraco. If you want to learn how to change your backend URL from 'Umbraco' to a URL of your choice, read on 🔥🔥🔥
Configuring Your Website
First, load up your projects web.config and look for the two app settings entries as seen below:
Change the values from Umbraco to the new Url segment that you want to use to access the backend. Remember, this value will make up a Url, so don't put invalid characters in there 🤪. My web.config now looks like this:
I think the easiest way to make sure that all requests now route to this new URL is to create a URL re-write rule. I recommend creating a rule using the IIS rewrite module. A quicker approach is to add a redirect rule using the Umbraco rewrite feature. The Umbraco rewrite tool is not great if I'm honest 😕Adding rules using this method can slow down the performance of your site. This is why I recommend you use the normal IIS module, however, for simplicity I will show you how to add a rule the Umbraco way. Within your webroot, you will need to add a rule within this file:
config ➡ urlrewriting.config
Within this file, add a rule like this:
WIth those two things. You should be good to go 💥
Alternative Approach
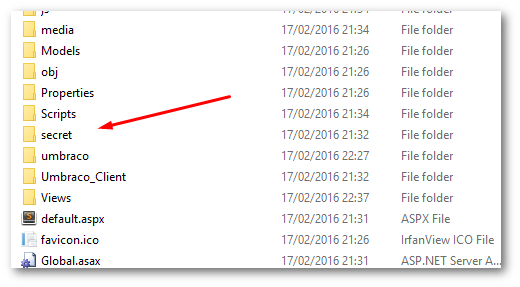
There is an alternative approach to creating a redirect rule, a more hacky way. Instead of creating a rule, you can rename the Umbraco folder, found within your webroot to the new segment name. I do not recommend this approach as it makes upgrading a pain, however, for completeness and your awareness of the option available to you. Using file explorer go to the umbraco folder, rename it to the new admin URL prefix:
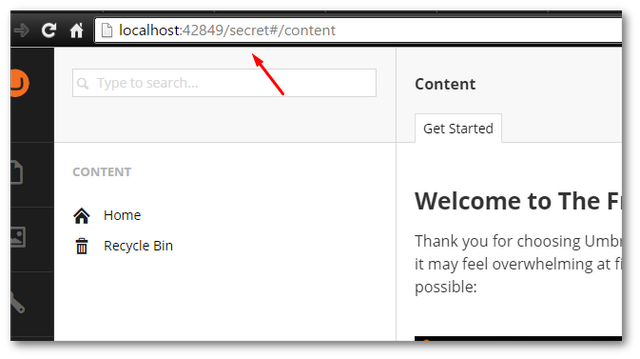
Load your website, add the new backend segment to the URL and the Umbraco admin back-end should now load💥
You now know of two ways to change the default Umbraco Url. This tweak will make your website more secure, so it is worth actioning. The recommended approach is the rewrite rule approach as it makes upgrading later less problematic, however, do what makes you happy 😊. Happy Coding 🤘
