If you haven't come across ELMAH yet, then you should definitely do some research on it. Elmah provides a nice UI so you can view your server errors from a web page rather than needing to log onto your server and looking within your App_Data folder. Out-of-the-box, Elmah is designed to work within a vanilla MVC website, however, with some small tweaks you can get it to run within Umbraco backend. The best part of Elmah is that like Umbraco, it's free. If you want to learn how to implement this cool feature within your Umbraco backend, then read on.
How To Install Elmah With Umbraco
Like all things.NET we install Elmah via Nuget, right-click on your project in Visual Studio ➡ Manage NuGet Packages and search for Elmah:
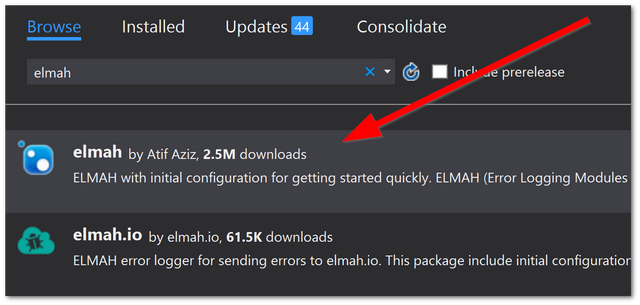
As you can see, you're in good company using Elmah as over 2.5 million people have installed it. If everything goes to plan, after installation you should see a few new entries within the applications web. config. If you re-compile your site and go to this URL, www.website.com/elmah.asx, you should be able to see the Elmah portal. It is pretty easy to get Elmah up and running, however, we have some issues:
- The URL isn't secure and anyone can view it
- The URL is a web forms URL... YUK.
- You can't access it via the Umbraco backend
Let's sort this mess out.
How To Configure Elmah With Umbraco
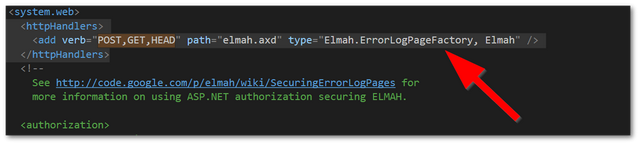
First, to get rid of the web forms URL, we need to remove the following sections from your web.config:
Or if a pretty picture helps:
and:

Next, we need to create an MVC controller so we have a route that we can use in the Umbraco backend and block unauthorised requests to it:
Let's quickly re-cap the code. We inherit from UmbracoAuthorizedController. This is the bit that will lock our view/the Elmah portal down to authorized Umbraco users. Next, we use a custom class ElmahResult to return the Elmah portal. That code looks like this:
I'll hold my hands up 🙌🙌 I found this code on the web and I do not claim it as mine! It works, so why re-invent the wheel. Next, we need to define a new route (think URL) for us to access the Elmah portal. I always use a separate RouteConfig.cs file to add my custom routes. You could just add them in global.ascx, however, I think this is less clean. If that statement confuses you, I'd recommend giving it a quick google. This stuff is basic MVC stuff so you don't need to panic. My Elmah route file looks like this:
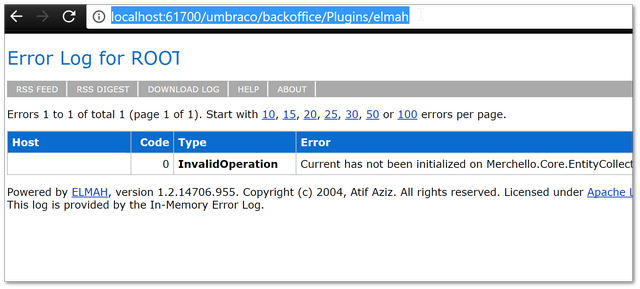
If you run your website, you should now be able to use this URL www.website.com/umbraco/backoffice/Plugins/elmah to access the Elmah portal:
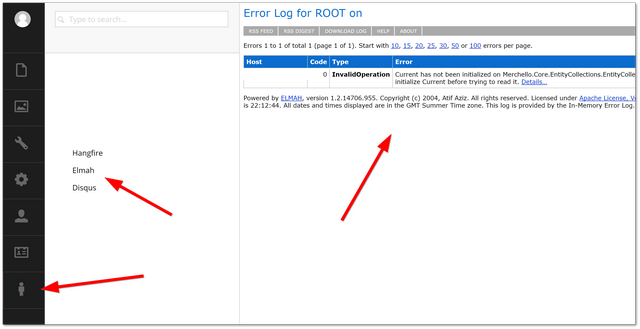
So far we've got an MVC friendly URL that only logged-in Umbraco users can access. The last part is to make the portal accessible from the Umbraco backend. I've covered how to do this before in, How To Display An MVC In The Umbraco Backend. So instead of giving any explanation I'll simply cover the code here:
First, we need to create a new section, then we create an XmlTreeNode:
With these bits of code, if everything has gone to plan when you load your Umbraco backend, you should see something similar to this:

Umbraco, Elmah and Azure
Everything above works great, assuming you can log onto the server and run the Umbraco back office locally. If you're running Umbraco within a web app within Azure, this won't work. If you find yourself in this situation, in your web.config, locate the Elmah section. Change the allow remote access set to true, like this
<security allowRemoteAccess="true" />
Elmah is a pretty useful package that I recommend you install within your website. To get Elmah to work with Umbraco, you will have to jump through a few more hoops than a normal website. If you follow the steps correctly then the extra work should only take an extra 10-15 minutes. Happy Coding 🤘
