
In this tutorial, you will learn how to model content within Umbraco CMS v9. After following along with this guide, you will learn about the content modelling process. I will walk you through a complete end-to-end process of creating a page within the CMS. I will take an HTML template and model it within Umbraco. I will cover all the document types, code and configuration required to make it happen 🔥🔥🔥
The one caveat with this guide is the detail. To build a whole website can take weeks and months. It would be impossible to take a deep dive into every aspect required to build a complete page within a single blog post. This is why within this guide you will get a high-level overview of all the different parts required to build a page. Hopefully, by seeing a high-level overview, it will give you a useful path to help you build your first Umbraco website 💥
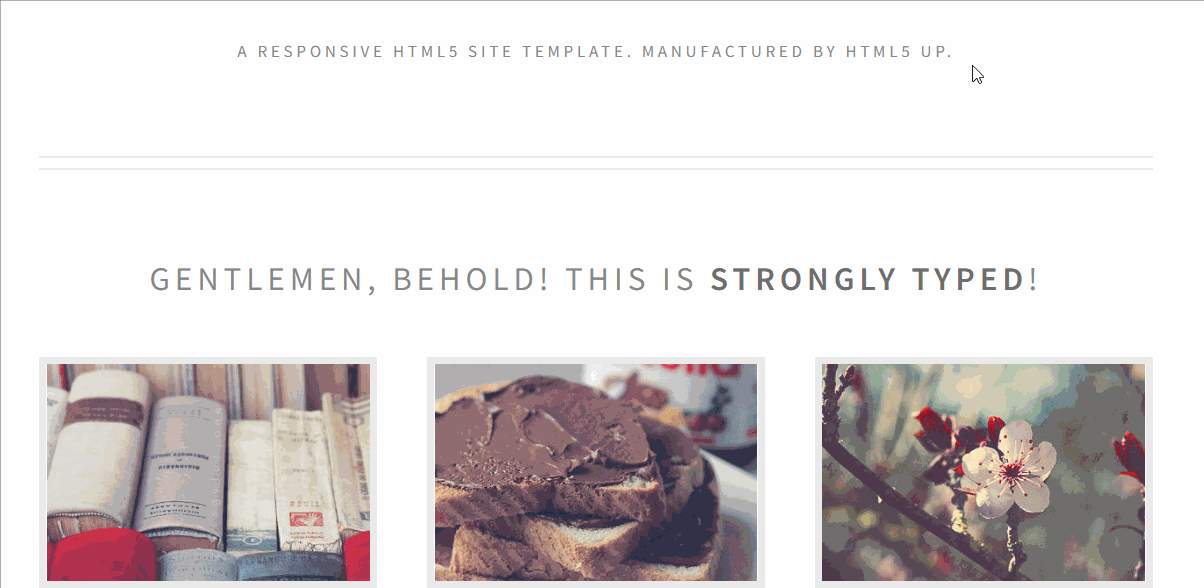
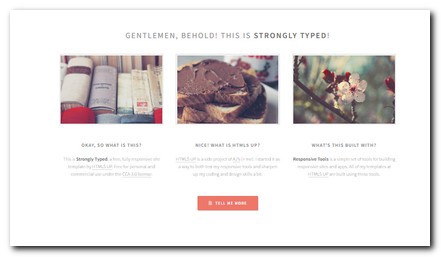
HTML Templates: In order to model content within Umbraco, we will need a design or template as a starting point. In this guide, I will use a free template from HTML 5 Up. Specifically, I will use the Strongly Typed template.
NOTE: In a lot of areas in this guide, I mention I will write about this in detail later. As I write these posts I will update this page so assume all references to future posts are still todos 😊
Layout Structure
To model a page template in Umbraco, you need to create something within the CMS called a document type. Taking the pages provided by the strongly-typed theme, at a minimum we will need a homepage document type. When modelling a page we want to avoid duplication. This is why you need to split the components of a page based on share features and page-specific features. Thinking about the elements found on a typical HTML page, you can then start to determine where each element needs to live within your codebase. Every webpage is typically split into four distinct parts:
- Head (Metadata)
- Header & Menu
- Content
- Footer
Content that is only rendered on the homepage should be modelled within the homepage document type and view. The head section, header, menu and footer need to be modelled and rendered on all pages. This is why it makes more sense to add these elements somewhere else so they can be re-used. These bits should be rendered within a global layout rather than a page view. Creating a layout in code Umbraco V9 is exactly the same as it was for V8. Layouts are just a view with a .cshtml that is referenced from a document-types view:
In a layout, you will usually add the page head, the header and the footer. The pages head section is kind of different compared to the header and footer. You will need to render some of the current page data in it, e.g. the page title. This raises the question of how do you access the current page data in a layout? On most Umbraco sites (like The Starter Kit) the master layout is typed using a base model of UmbracoViewPage. Developers tend to use this approach as it allows them to access current page data from within the master layout. Typing the layout with UmbracoViewPage allows this:
I do not like this approach as I think it creates more headaches than it solves. Adding a global type to a layout assumes every page on your site will be a Umbraco page, which is not always the case. Some could be vanilla MVC. If you agree with the Gang Of Four mantra of composition over inheritance, you will want to compose in components within a layout rather than use inheritance. One way to compose HTML within ASP.NET MVC was done using partials. Calling them directly or using Action. Partial(). In .NET Core, this is no longer a thing. You now need to use ViewComponents.
A call to a ViewComponent is the same as calling a page controller. When building a ViewComponent, it is highly likely you will want to inject APIs within these classes. This means you will need to know about dependency injection and Umbraco. I will cover dependency injection in Umbraco later. For newbies research, dependency injection and Umbraco composers. For the V8 users, it is worth noting the code to do dependency injection has changed in v9 so be aware!
To access CMS data in code, you will need to learn about IUmbracoContextAccessor and the UmbracoContext.
An example view component is shown below:
In your project, you will need to create a view component for the head, header and footer. Creating all of these components will require some additional knowledge. Lets us break down what you will need to research:
Header and Footer: To create the header and footer you will need to think about two things:
Menus: In the header, you will likely need to build a menu. How do you best model a menu in Umbraco? Some people query the children of the homepage and use an
IsVisibleproperty to hide items. I avoid using this pattern as I do not think it gives a good content editing experience. Instead, I create three menu related document types,Menu container,MenuandMenuItem. I create a separate area in the content tree (under the root node) to store all menu data. I like this as it allows for multiple menus and mega-menus to be created. Having one section in the CMS to edit menus also tends to create an easier to use the system. I will cover menu patterns in a later video 😊Global Settings: Umbraco has no out-of-the-box way to manage global settings. Any data that you need to model on the header or footer will need to live somewhere in the CMS. As they do not live on a single page, you need to pick where to store them. I recommend modelling settings within a settings document type. The parent of the settings page should be the root node.
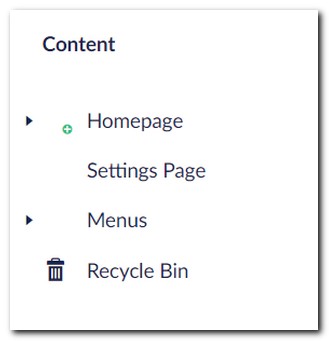
Following these two approaches, the top-level page structure in my Umbraco projects tends to look like this:
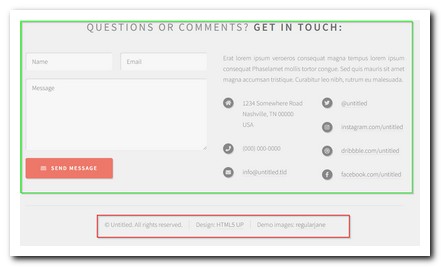
In terms of content modelling for the settings page document-type, I tend to create two tabs, one for header and one for footer related properties. To model this template I added a blocklist editor within the footer tab. I do this to allow for easier property maintenance later on. Within this example, I add a component that I created called 'Contact Us`. I model this by creating adding the contact us HTML into a new component:
The steps to create a Umbraco component are the same as creating a document type. The only difference is that you set a property on the document-type call Is an element:
I have skipped the property modelling for this component in this guide. To create forms in Umbraco you will need to learn about SurfaceControllers. I will cover this in a lot more detail in the future.
Umbraco Model Builder
On every CMS project, you will need to create document types that allow for pages to be built that look like the HTML, this process is known as content modelling. On the homepage within the Strongly Typed theme, we have quite a few things to model, these include:
Basic Content: This can be modelled with either a text string, a text-box or a rich text editor property. The difference between them is data entry using either single-line text, multi-line text or an MS word type editor. Use the editor if you want to allow content styling. e.g. text with bold, italics, hyperlinks, etc...
Components: The page contains a number of components. These components will likely want to be re-used on other pages. This is where the Umbraco Block List Editor property is really useful. Remember, creating a component is done by creating a normal document type and setting it as an element-type!
One issue with the way the default blocklist editor works is around coding patterns. I like to build my projects strictly following the MVC pattern. I personally consider adding code into a cshtml view as a code smell. Out-of-the-box, the block list editor will force you to write the logic in your components view files. By default, the editor will not call a controller and simply pass data into a view. In my project, I customised how the block list editor works. I do this by making a code tweak in a file called default.cshtml. This view can be found within the partial folder in views. I set my version to always call a controller rather than call a partial view directly. This change allows me to create a view model and do all data processing in a controller 💥. I will cover blocks, components and the block list editor in a later tutorial.
Content Modelling
The strongly typed theme, has a few things that we can turn into components. Below gives a breakdown:
Slide Container
I could call this lots of different things, features, promos, etc. The main thing is that it is composed of two parts:
The
Titleproperty is modelled using theText stringpropertyThe remaining section
Slide Areais split into components. This is modelled usingblock list editorproperty.
In this example, I have created a Slide Item component.
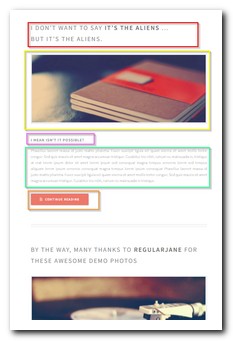
Slide Item
I modelled this component like this:
The orange section
Imageis modelled using theMedia PickerpropertyThe green section
Titleis modelled using theText stringpropertyThe purple section
Contentis modelled using theTextboxproperty
Blogs
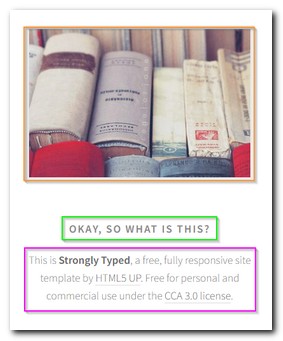
To render the blogs on the homepage you will need to create a new document type. For this example, I have created a blog listing document type and a blog item document type. In order to model this within the CMS you need to know about document-type hierarchies:
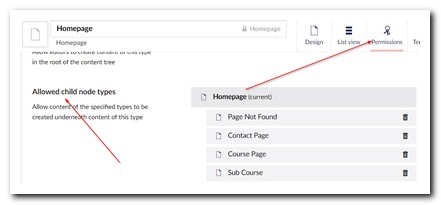
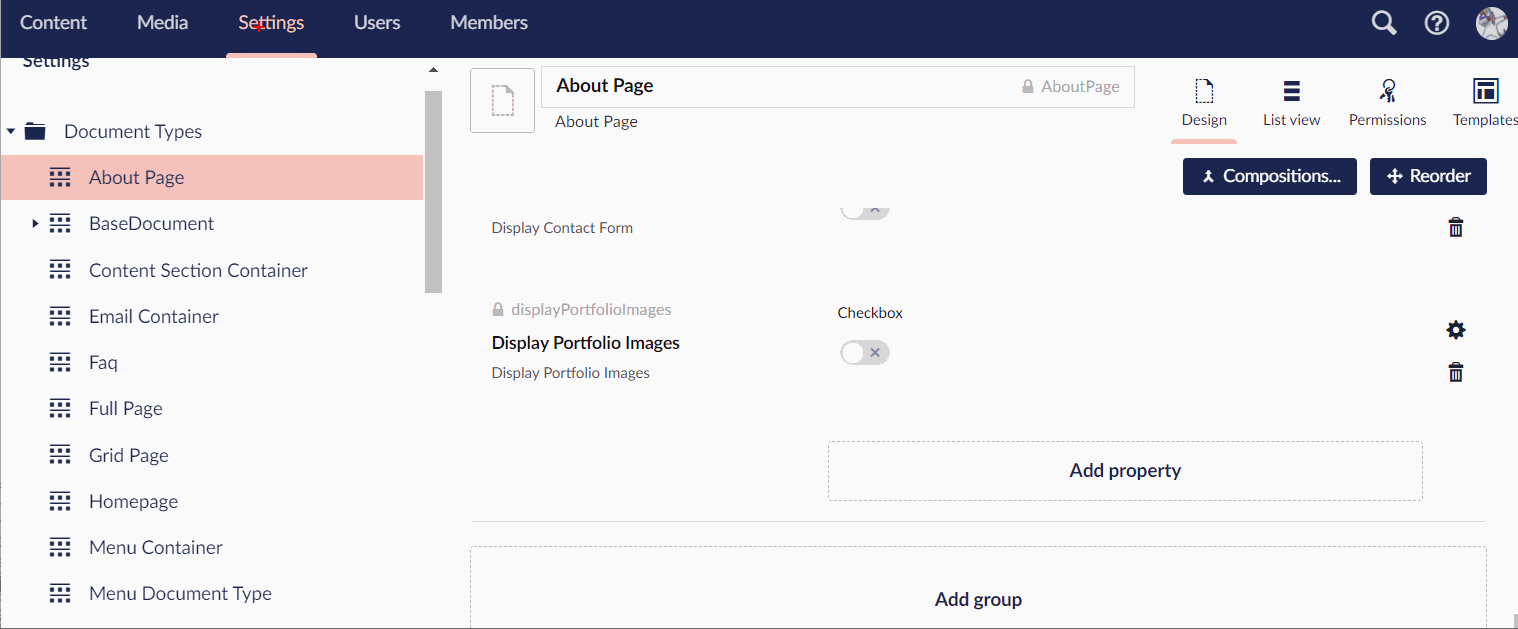
To create an easy to use backend for content editors, you will want to restrict what document types they can create and where. In the CMS it is possible to restrict which document types can be created under each other. To do this, open the document-type screen and go to the Permissions tab. To model this component we can break the design into these properties:
The red section
Titleis modelled using theTextstringpropertyThe purple section
SubTitleis modelled using theTextstringpropertyThe orange section
URLis modelled using theLink PickerpropertyThe yellow section
Imageis modelled using theMedia PickerpropertyThe green section
Contentis modelled using theMarkdownproperty
When it comes to content modelling, instead of the rich-text editor, you can also use the Markdown editor property. My preferred approach is to use the Markdown editor as I find it quicker to write content with fewer styling issues. When building a website, I recommend giving your content editors a Markdown introduction and then let them decide if it works for them.
Banner
A simpler component that only contains a single property:
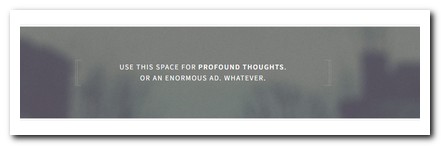
- The
Contentsection is modelled using theTextstringproperty
Rendering Pages With View Models
In Umbraco, you can use something called route-hijacking to ensure a controller gets called before your view is rendered. To do this create a class that inherits from 'RenderController' and make sure the controller name maps to the document-type alias. When passing data back to the view, you should use a view model. There are a few view model patterns that you can use. I use a slightly different technique to most, however, this approach has given me far fewer headaches over the year. I pass two objects into my view. One is the model generated by the Umbraco model builder. The second is a POCO that contains any extra data required within the view. In MVC we can only pass one model down from a controller to a view. This is why I use a pattern I made up called the ComposedViewModel. I will cover this in a future tutorial, this gives an idea of the code involved:
NOTE: You will also need to create a component version of this code as well!
That is the end of this high-level overview of how to model content and write the code to build it within Umbraco .NET Core. You access my starter kit here. It might be easier to clone the repo, install the database and go through the code yourself. Happy Coding 🤘
