
Within this article, you will learn everything that you need to know in order to create a feature flag using Optimizely Feature Experimentation 🔥🔥🔥
The Optimizely feature flagging tool has over 19 ready-made SDKs, including JavaScript, C#, Python, IOS, Android, Flutter, Java, PHP, and more. So basically regardless of the tech stack that you use, you should be able to fine an SDK for your needs
As there are lots of feature flagging tools out there, you might be wondering why Optimizely? For me personally, I think the two most compelling reasons are that flags can be used with zero-latency and that any flag you create can be converted into an AB test without any additional coding required!
How To Create A Server-Side Test With Optimizely Feature Experimentation
In this tutorial, I will show you how to set-up and create a feature flag on a JavaScript powered website. Also, if you prefer to figure things out by looking at code, I have created a working demo that you can use. That demo is available on my GitHub here.
The first task in creating a feature flag, is to install the Optimizely SDK. For this tutorial, I will use the JavaScript SDK, however, if you want to use a different language go to your package manager of choice, search for Optimizely and you will likely find the package. A useful thing to note is that all the SDKs work using the same naming conventions, so after you learn how to master one SDK you should find it easy to get going with any of the other ones. When it comes to JavaScript, if you use Angular, Vue JS, Svelte, you will need to install the vanilla JavaScript SDK. You can do this via NPM like this:
If your website make use of React, you can still use the JavaScript package (this is my preference), however, you can also install the React SDK. The React SDK is very similar to the JavaScript one. In fact it uses the JavaScript SDK under the hood, however, the benefit of the Reacted is that you get access to some higher order components and some hooks. These components do the same thing as the JavaScript version, its just coding sugar syntax, so the choice of which one to use will be based on your coding preferences, both will get the job done. To install the React SDK, you can use this command:
With your SDK of preference installed, your first step is to import some components within the file that you want to add create your feature flag.
The first of these components that you will need to use in your code is createInstance(). The createInstance() function is required to establish a connection back to the Optimizely CDN to get the latest copy of the datafile.
Understanding how the datafile architecture is a key part of understanding how Optimizely Feature Experimentation works. I recommend you watch the corresponding video to this article (link above) to learn how the data file works otherwise a lot of the benefits of this tool will be lost on you.
The code above involve you supplying an SDK that is generated inside of Optimizely to establish the required connection. It is important to note, that this is not the only way of using the Optimizely SDK. Instead of using the SDK key, alternatively, you can also pass in the data file object directly into the SDK. This approach involves you calling Optimizely yourself which will add in some latency to the request, however, it will mean that feature will update in real-time. Typically most teams will be OK waiting 5 minutes for a feature to update, however, it is nice that you have options.
The code above shows you how you can pass the datafile in directly. This code also shows you how you could add a datafile options object. I added the code here so you can see that it is possible to change how often the SDK call back to Optimizely, however, typically you would use these options when using the SDK key approach.
When you use the ReactSDK, its possible to wrap your whole app with the OptimizelyProvider component instead of writing the connection code manually. In essence this does the same job as writing the createInstance code yourself.
After the SDK has the datafile, you next step is to assign the context. The code to do this looks like this:
To do this yourself, take your optimizelyClient object and call createUserContext(). It is recommended to wrap this code in within the onReady() function. If the SDK is in the process of getting the datafile and you try to call createUserContext too early, the SDK will throw an exception. Wrapping your code like this means your code will work safely. If you are jsut doing feature flagging only and you do not care about experimentation or segmentation, the user ID you need to pass in here will not matter.
If you want to run an experiment later on or do a targeted rollout, this ID is important. When it comes to ID management, it will be up to you to manage the ID. Most people will have a sitewide ID, a analytics ID, etc.. that they can use here. After you have the SDK connection and defined a context, you are then free to do feature flagging. The code to check if a flag is turned on or off is shown below:
This code uses a feature flag that I created within the UI called ab_test. I set-up two feature variables with this flag called component_message and discount_amount. For your feature you may not need to pass data from the UI to your code, but this would be the way to do that. Alternatively, if you want to use the Reast SDK you write code like this instead:
Configuring A Feature Flag Within The Optimizely Feature Experimentation UI
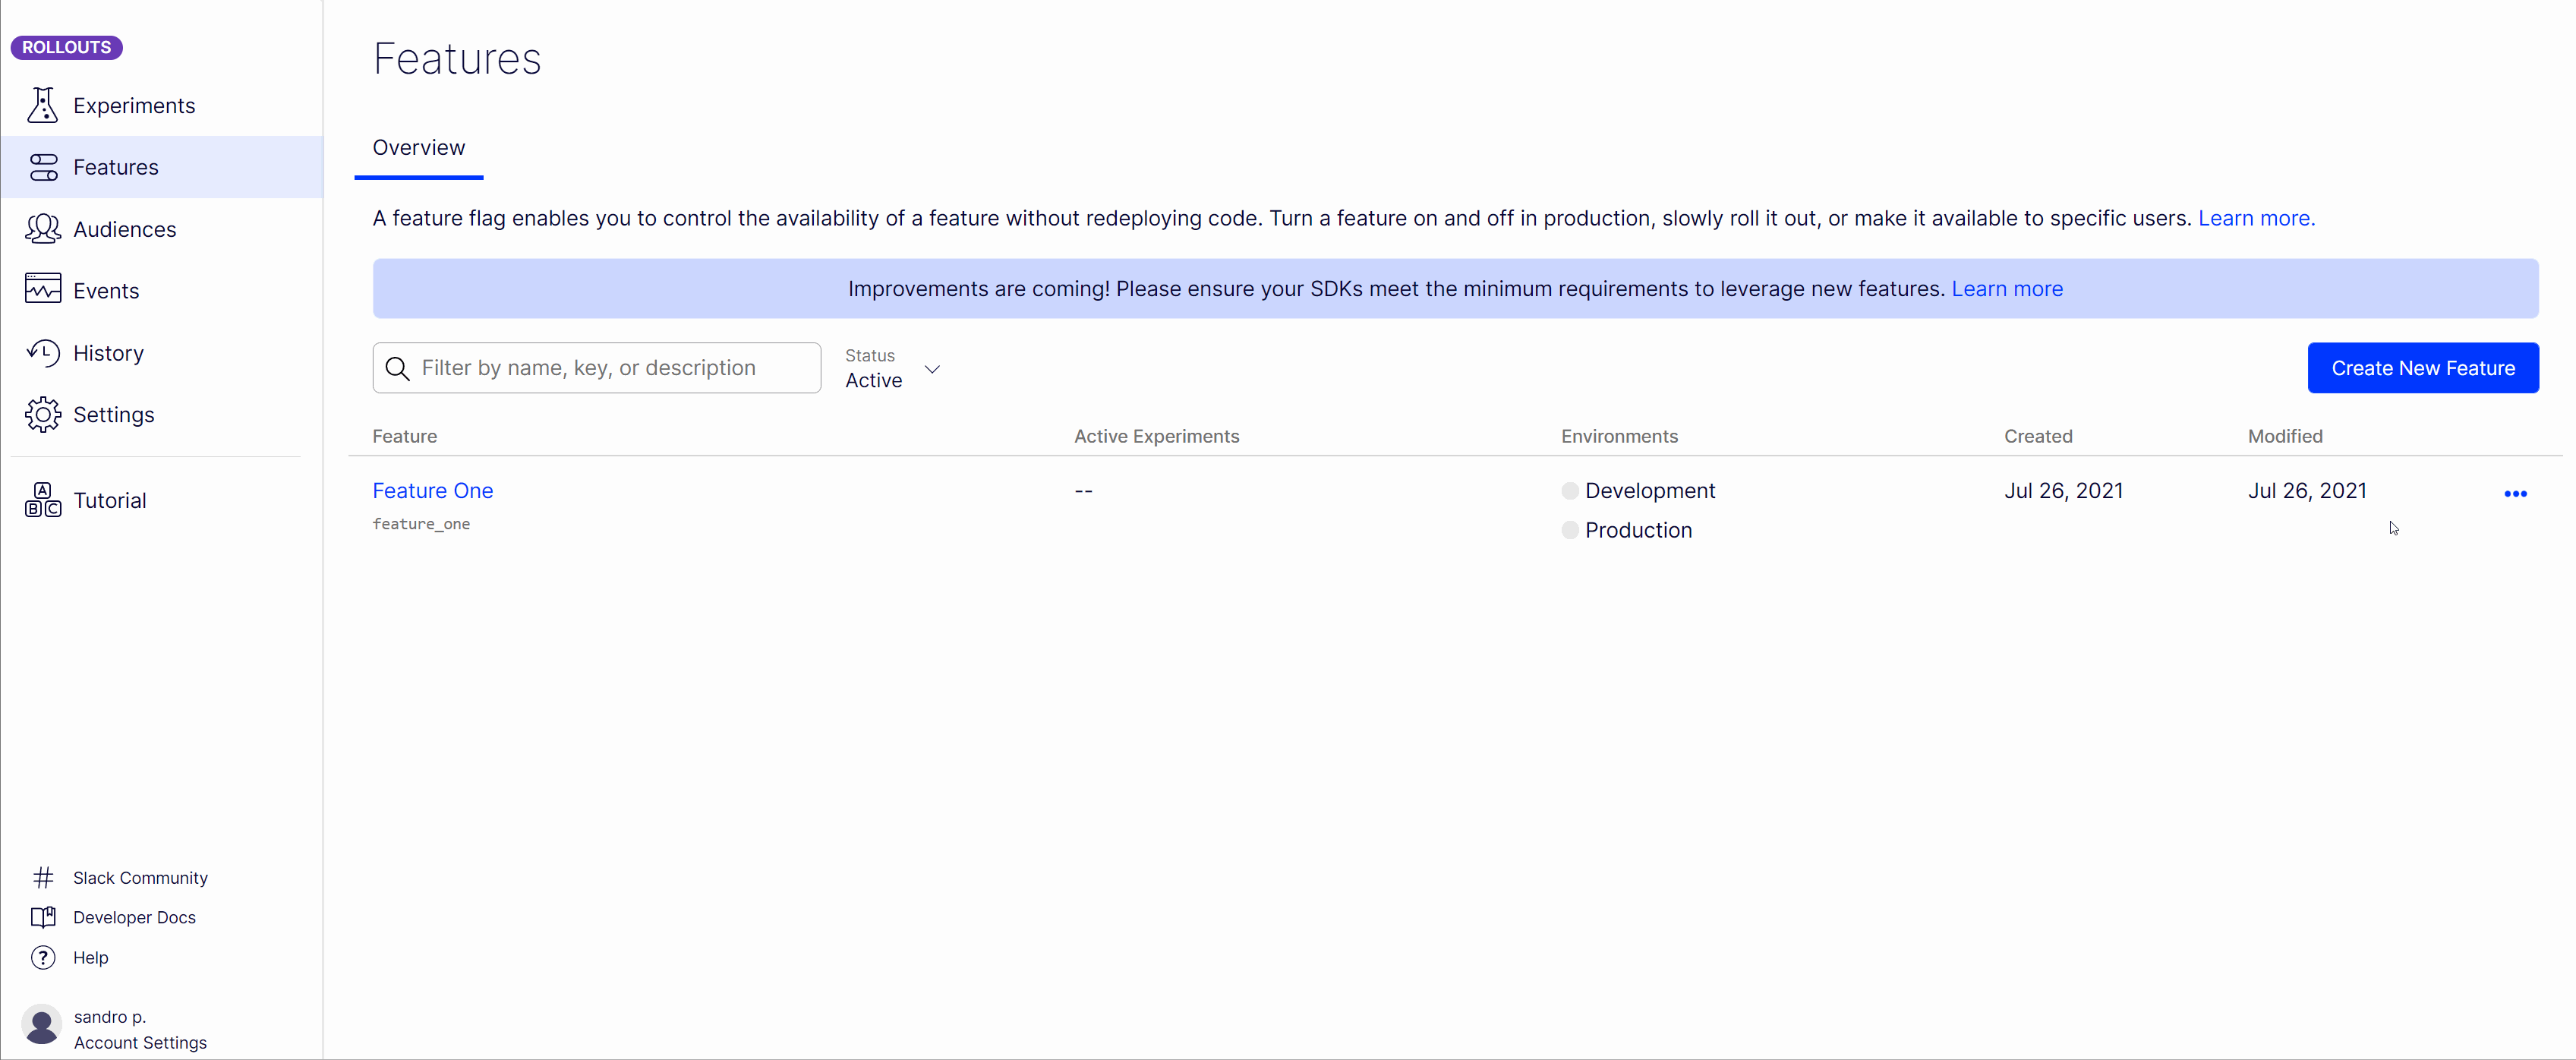
That covered all the code required, the final thing to mention is how you would create a flag within the UI. Creating a flag within the UI will typically be a developer task. After the flag has been created, a product owner can then log into the portal and have more control over how that feature behaves. They can determine when it will appear on a site, which segments will be able to see that feature and more. In the portal select the Features tab and click on the new Feature button:
With your feature created, it is now possible to use the kill switch at the top of the screen to turn your feature on or off. Alternatively, if you want to set-u pan AN tests you can as well by defining a rule.
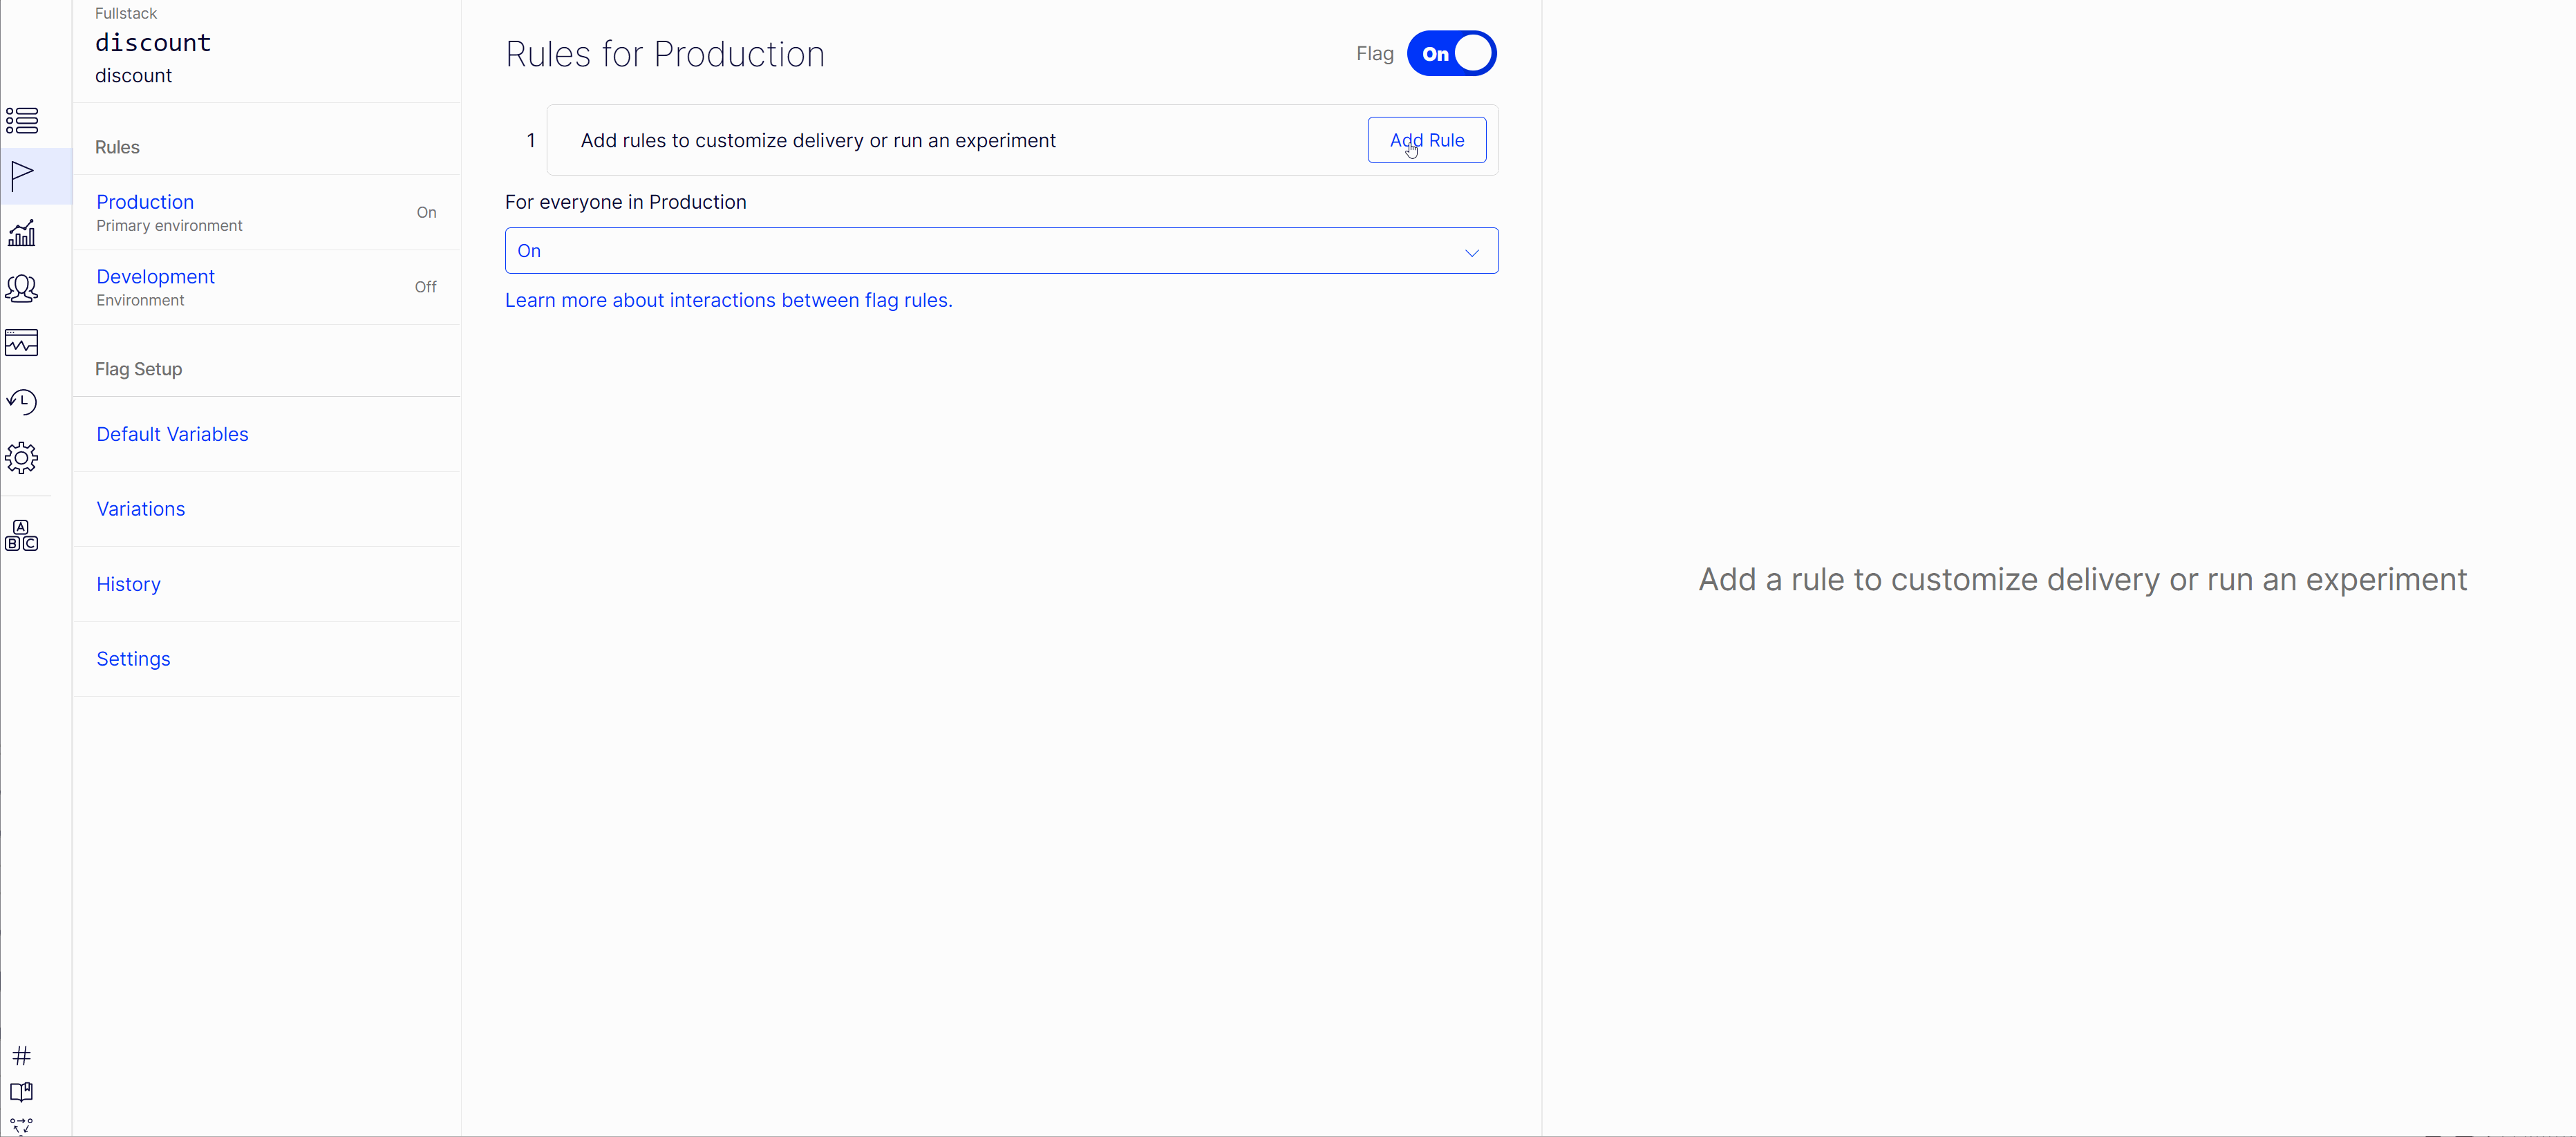
Within any flag you can add one or more rules. A rule could be either be a targeted rollout, e.g. rolling out a feature with segmentation, an AB test, or a multi-arm bandit test.
Within each rule, you can define traffic percentage of your audience that will see that feature. This could also be combined with segments, so you can define exactly who can see your feature and who won't. This ability is really useful whenever you need to launch a new feature, as you can do a small release to 10% of your customers and then test and monitor the feature works before rolling it out to everyone
Feature Variables And Feature Flags
It is also possible to pass dynamic configuration from the Optimizely portal into your code using a feature variable. Feature variables can be a really handy feature that can help you avoid making unneeded deployments when small configuration tweaks are needed. Dynamic configuration is done via Optimizely variables. Within the portal, open your feature flag project, select variables:
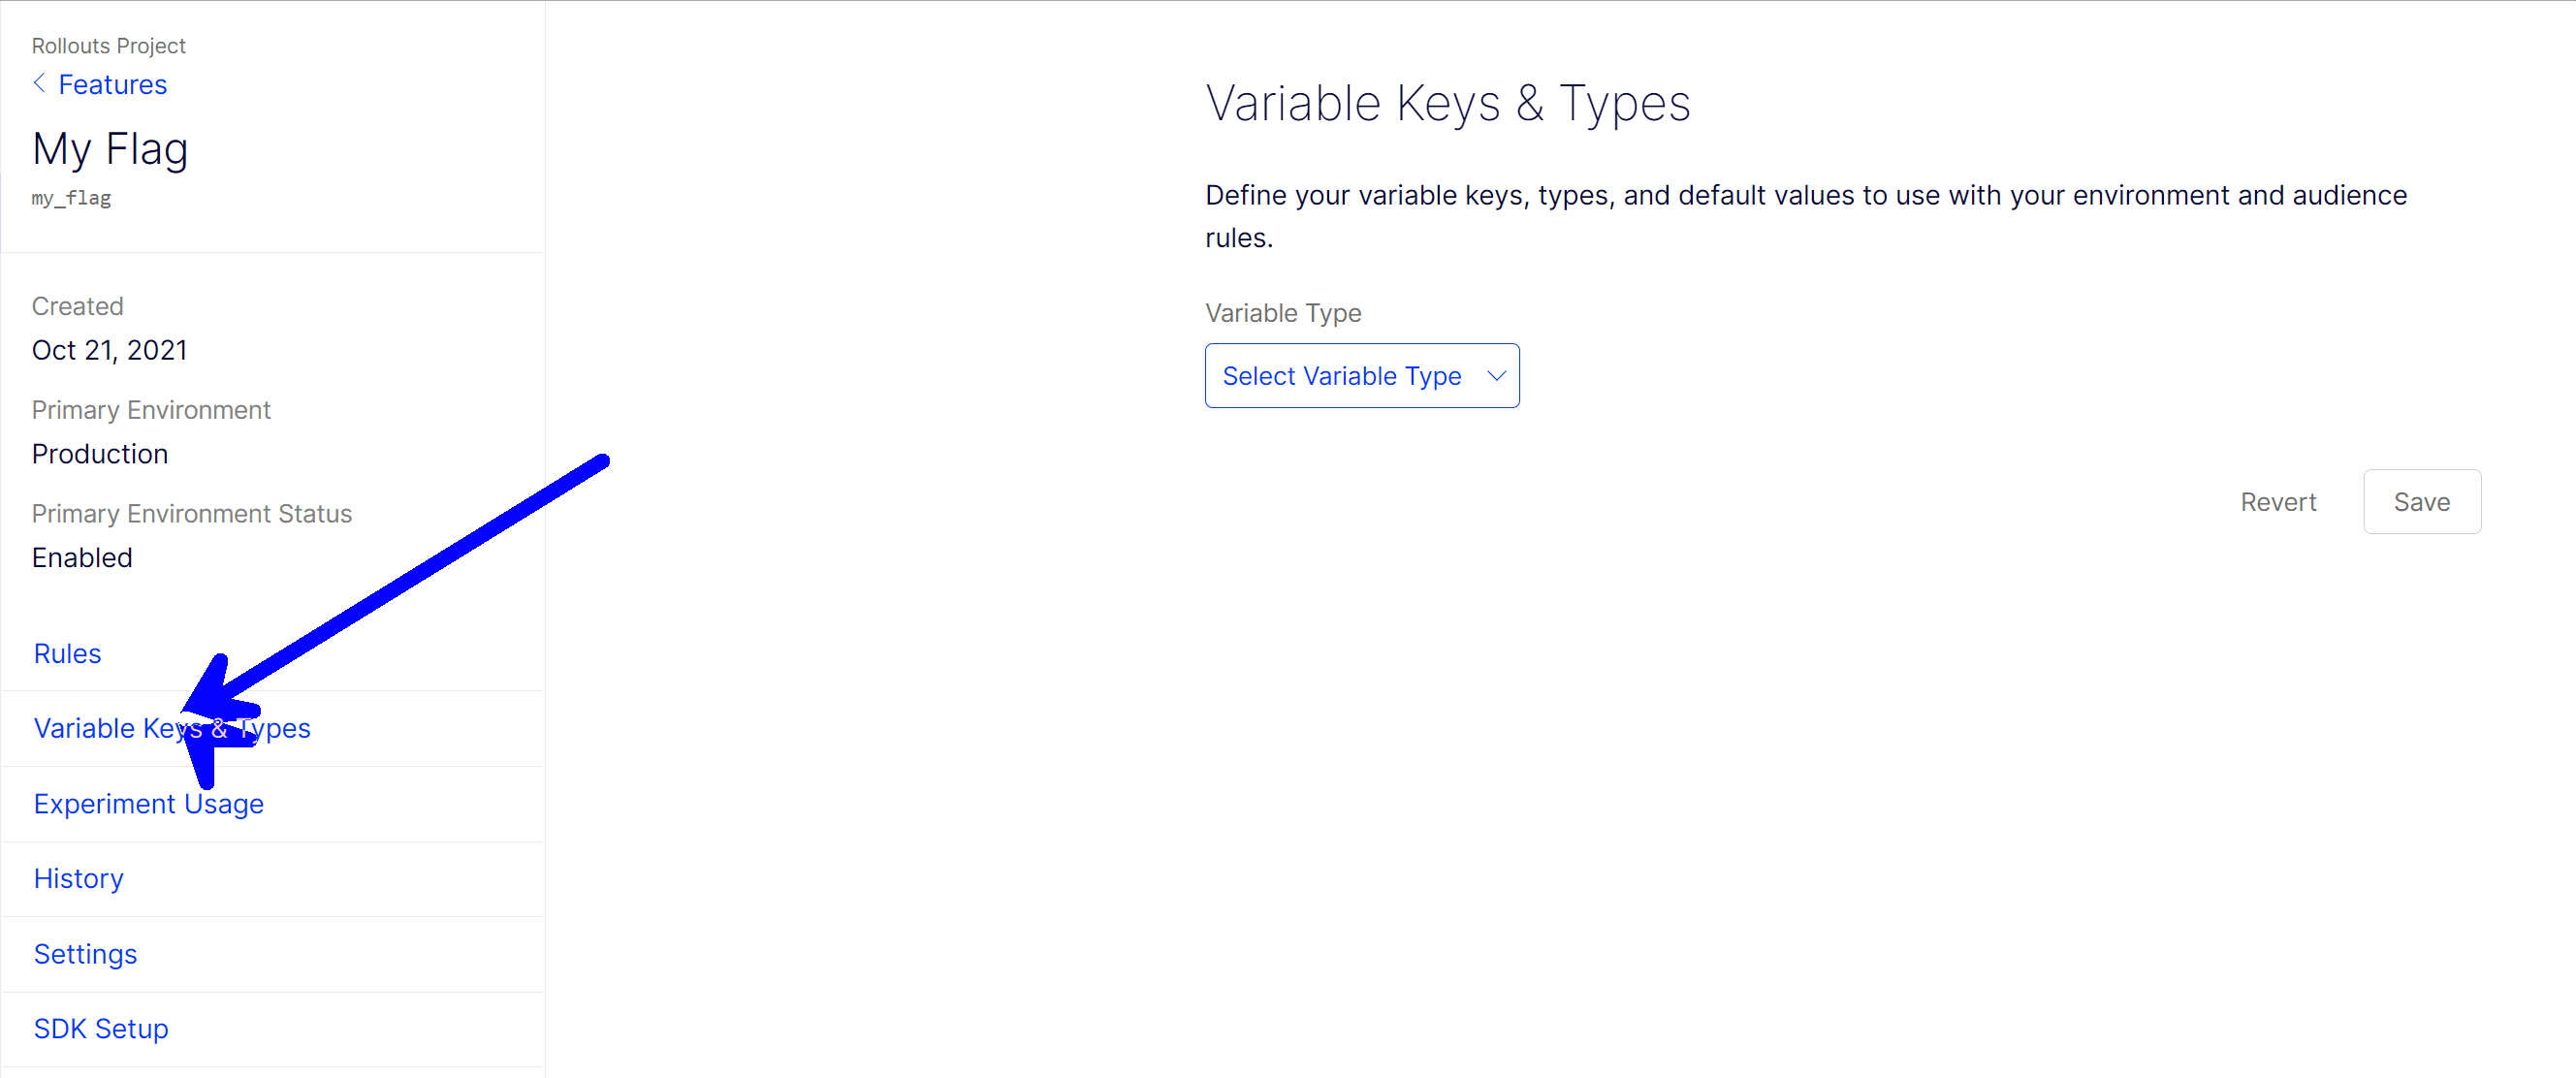
Variables can be either of type Boolean, Double, Integer, String or JSON. Within your ReactJs code you can then access that variable, like this:
JSON can be very handy if you want to pass lots of configurations as props down into your React components 😊😊😊. All you need to do in your React code is use JSON.parse or JSON.stringify like this:
Using JSON means you can dynamically pass as much configuration in your code as you like 💥
That is pretty much everything you need to create your first feature flag within Optimizely. The process is pretty simple and after you get your head around how to set everything up, you should be able to set-up basic tests with minimum effort. Happy Coding 🤘
