
In this tutorial, you will learn how to install Optimizely Web and set-up and a simple A/B test within your website. Optimizely Web is one of the worlds most established client-side experimentation tools that are available within the marketplace today. I have personally been using Optimizely Web on and off for about 6 years. During my 11 years of contracting, I worked with many organisations and Optimizely Web always seemed to be the de facto way for my clients to start building a culture of experimentation within their organisations. Basically, anything that you can think of doing within a browser using Javascript or CSS you can do within the Optimizely Web editor.
Installing Optimizely Web is simple. All you need to do is add a Javascript snippet into the head section within your application. The web snippet is available via the dashboard, available here. Before you dash off and try to log into the Optimizely portal, you will need a user account. Optimizely is an enterprise SaaS platform. This means you will need to purchase a license to use it. If you want a license (or a demo of the product) you can head over to the Optimizely website and make an enquiry here. Unfortunately, there are no free or developer licenses available. it is possible to get a short term demo license, however, you would need to talk to an Optimizely sales rep. Unless you have a valid account, you will not be able to continue with this tutorial 😞
Assuming you have an account, after logging into the portal, you can access the snippet from the Settings page:
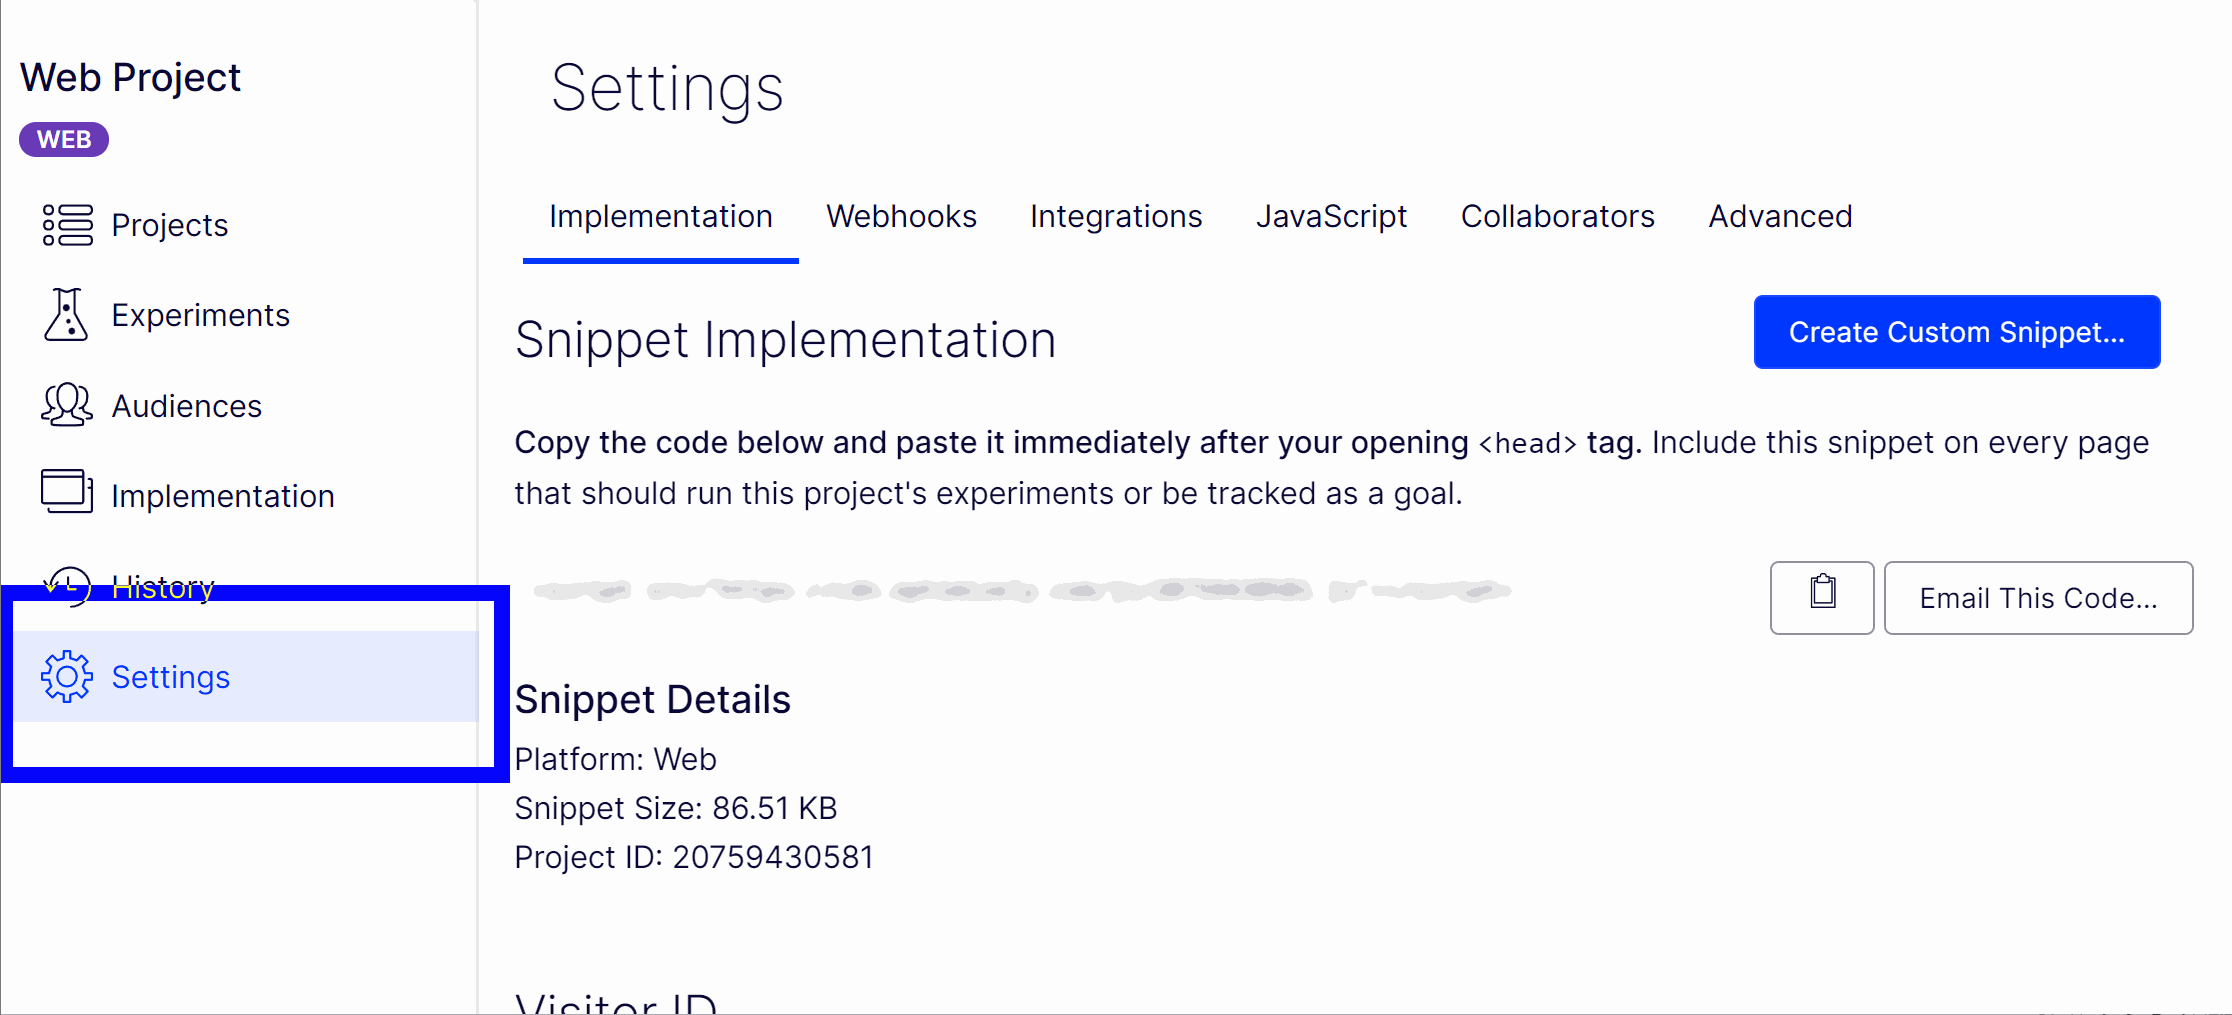
Copy this snippet and add it within the head section of your website. The Optimizely snippet is only around 50kb in size, so you do not need to worry about adding another tag which could negatively degrade your page performance. If performance really does matter and the thought of 50kb kills you, there is an Optimizely Edge option that can be used to inject the snippet before the page is loaded. The snippet will be injected within the edge node part of the request.
After installing the snippet, you are good to go with creating an experiment. Your first task will be to create a project. The project will be the bucket where you can create your experiments. The common practice is to name the project after your website. The reason why you need a project is that Optimizely Web does not restrict on how many tests that you can run at the same time. One of Optimizely Webs main objectives is to allow teams to increase the velocity of their experiments. This is one of the main differentiators between some of the free tools on the market.
Optimizely web allows you to perform four main types of experiments, these are A/B testing, personalisation testing, multi-variate testing and multi-armed bandit testing. For this tutorial, we will just focus on creating an A/B test. To create a new experiment go to the experiments screen:
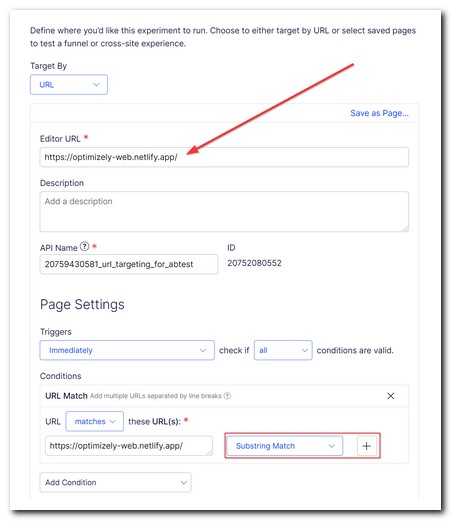
From this screen, click on the Create New button in the top right-hand corner and select A/B test from the options. From the modal screen that pops up, you need to add a name, and a target. The target is the page (or pages) that will trigger the experiment. Triggers can be simple or complex, depending on your needs. You can build complex rules if you need, however, most people tend to either target on a single page or a group of similar pages. Targeting multiple pages can be done using the SubString filter. For example, in a retail site, you might want to run an experiment on all product detail pages. It would be very painful and time-consuming to include every single URL on a commerce site with thousands of products. This is where the SubString filter can be really useful. Imagine you wanted to target all pages that had shoes, you could create this filter, http:www.website.com/shoes. This would then match on any URL that contained that SubString, so http:www.website.com/shoes/black-shoe, and http:www.website.com/shoes/nike-trainer would both trigger the experiment. Optimizely also allows you to create templates for these triggers, so you do not need to create a new trigger every time you set up a new experiment.
With the experiment created it is time to do something interesting. Configuring an experiment is done by creating a variation. Within a variation, you will change the look and feel of your webpage to test that your hypothesis is correct. You do this by modifying the HTML on the variation in some way. Even though you can simply write JS and CSS directly, the Optimizely web editor was mainly designed to be used by non-technical people.
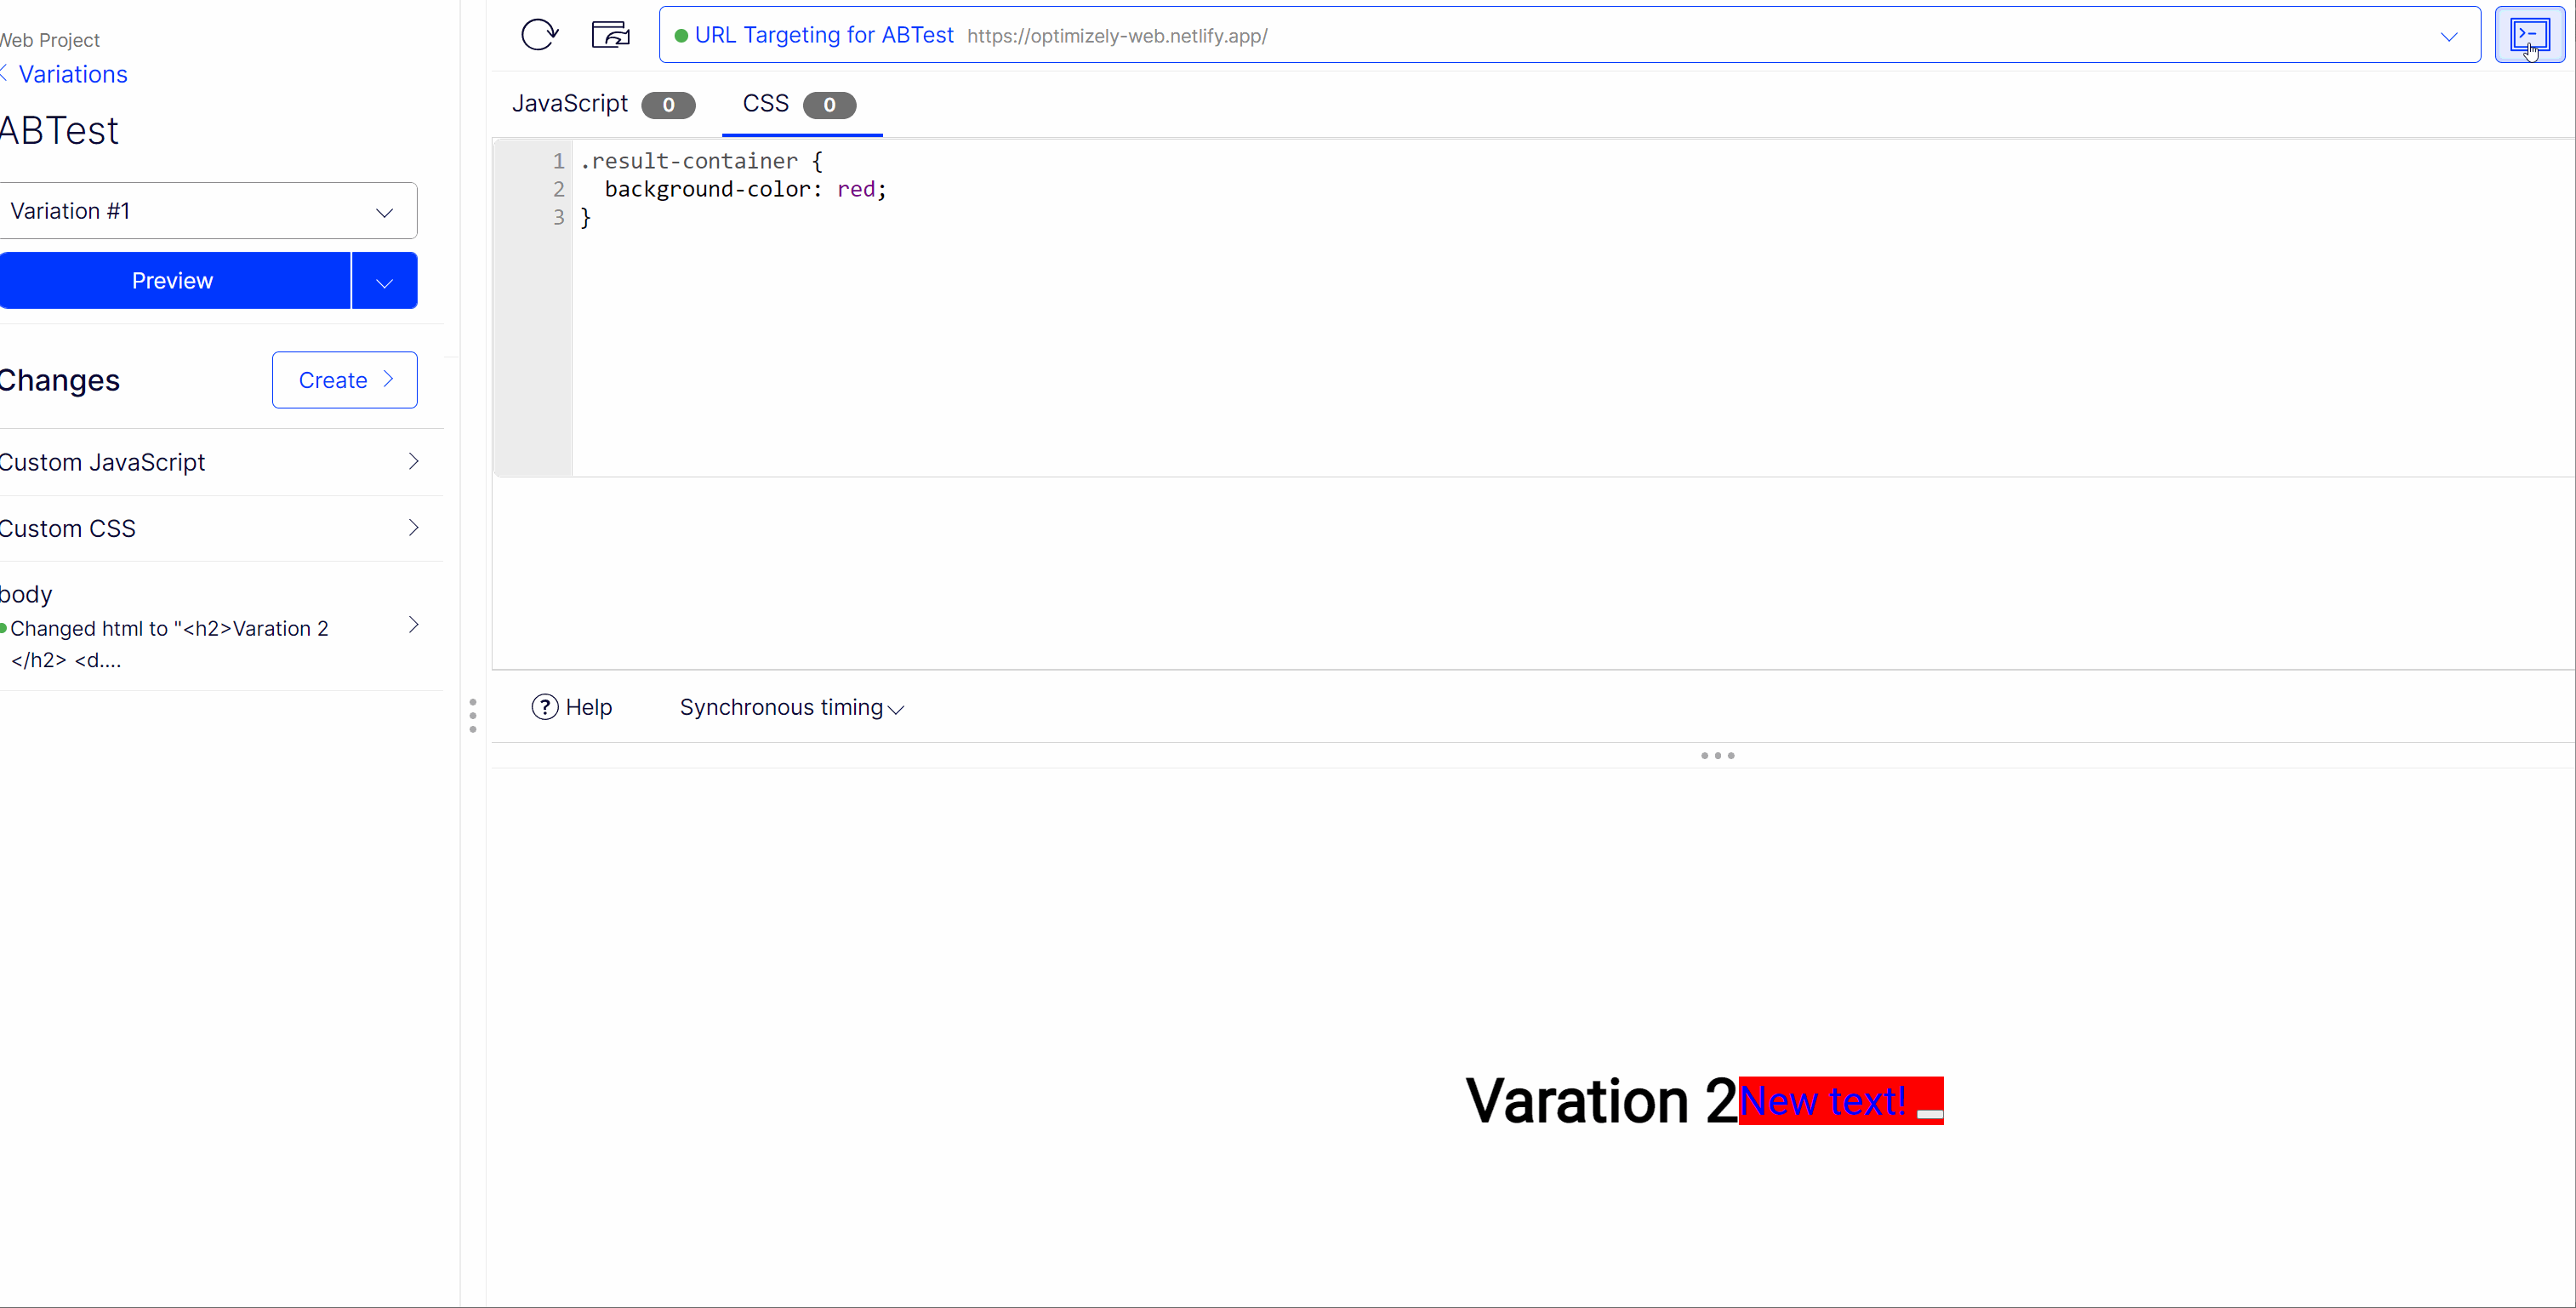
The Optimizely web editor was designed for marketers and non-tech folks to be able to create experiments easily. Anything that you expect to do in a normal online text editor (think CMS or MS Word) you can easily do within the Optimizely web editor. When editing your web page, you will see a live representation of that page. When you hover the mouse over the page you will see certain areas highlighted in blue. These blue areas are the areas that you can target and edit.
In the editor, you will have the ability to set the position of an element on the page, hide an element, change the colour, text size, or typography of any bit of content. You can manually modify the HTML or you can update text within the inline editor. Another cool feature is the ability to add tracking information and even define when the changes should be made during the page life-cycle incompletions to any other changes you want to make.
Traffic Allocation
When running a test you will want to decide who can see that experiment. By default, all your experiments will be visible to every site visitor. Obviously, you might not want to risk rolling out an experiment to every single one of your customers at the same time. And this is where traffic allocation comes into effect. Say you want to roll out a complex experiment and you want to test that the experiment does not impact a vital user journey before you roll the experiment out to the entirety of your customer base. No problem. Simply change the traffic allocation from 100% traffic to the level you feel comfortable with.
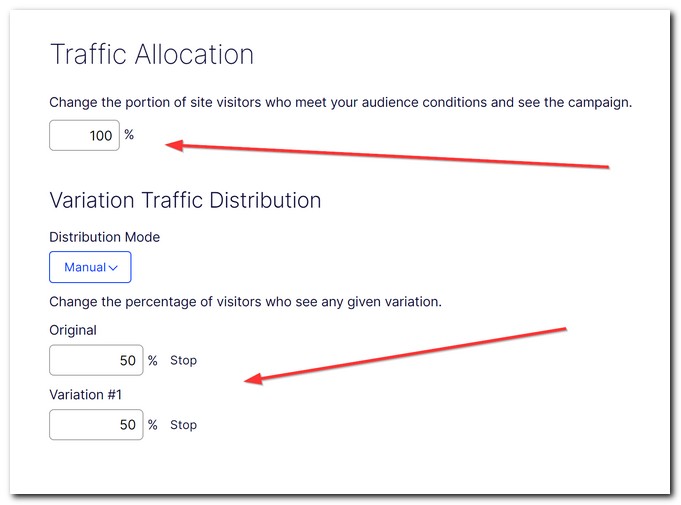
Asides from setting how many people will be bucketed into an experiment, you can also decide on the A/B split. Unless you have a good reason not to, you will want to drive the traffic to your variations equally. In order to prove your hypothesis is correct, you need a fair test. Not having consistent traffic will likely corrupt the validity of your experiment. An example where you might not want a 50/50 split is when you are testing against more than one variation. If you had three variations, a 33% split makes more sense in order to keep that same consistency in traffic levels. Another possible reason to use this feature is if you wanted to dark launch, or canary release an experiment. You could use this feature to then soft-launch an experiment 🧑🔬.
Audiences
You may also want to add a layer of personalisation to your experiments. You may only want a certain type of customer to interact with your experiment. For example, say you sent a mail campaign that contained a discount code link. You may want to restrict an experiment to the customer who clicked the link. People not on the email would see a normal homepage. People who clicked on the link might see a promotional campaign that drove them to a landing page. By only showing an experiment to a small subset of your customer base, you can be a lot more fine-grained when validating your theories!
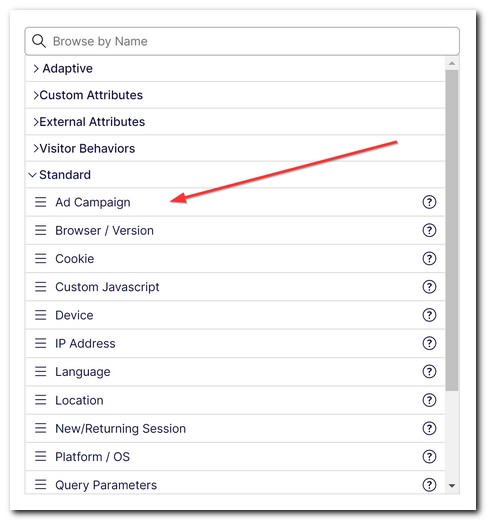
Creating this type of split is done by creating an audience. Out-of-the-box, Optimizely web comes with loads of pre-baked ways to target your audience. The tool uses a simple drag-and-drop UI, so you can create simple or complex targeting rules easily. It is also possible to extend these attributes if you have some need that is not covered out of the box. You can create custom attributes within this screen to target customers based on data from within your experiments. If you want to target customers by data that is stored in a third-party data storage location, that is also not a problem as you can create custom external attributes. Finally, you can also target based on a page they have visited, or, an interaction that they might have triggered on the site.
Metrics
The point of running experiments is to prove something. The aim is to come up with a hypothesis on something that will improve the site (normal CRO or AVO) and then measure how your customers interact with your experiment to prove if your hunch was correct. Measuring if an experiment is working, can only be done when you set a goal for your experiment. Most success goals will be tracked by some form of user action, like a user clicking on the add to bag button, or clicking on the checkout button. You can also inverse the rules. So an experiment is successful if a user does not jump off the site when they land on a certain page.
All this goal setting is simple in Optimizely Web. Simply click on the metrics tab to get going. You can use either page, event, or, global revenue metrics to define what success means for your experiment. After setting a metric you are good to launch your experiment!
Launching Your Experiment
The time has finally come to launch your experiment. As long as you have a variation and a metric you should be good to publish it. Publishing is done by a button in the top left-hand side of the page:
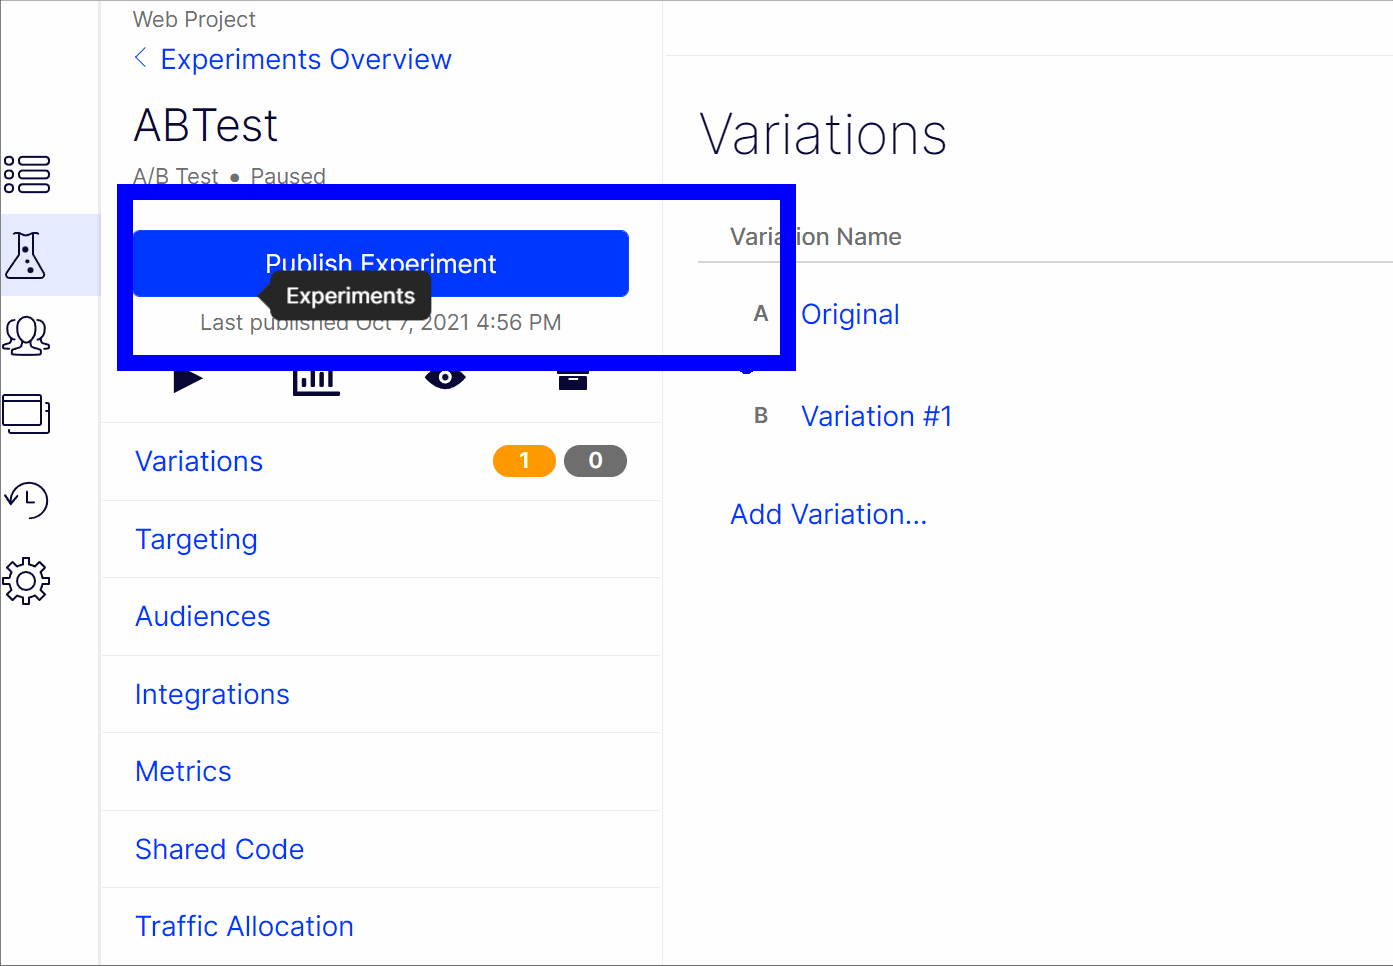
When publishing an experiment, you will see a little Uploading to CDN notification. Your experiment will not be live until that notification goes away (usually about 60 seconds). To test that your experiment is working will require clearing your cookies. When you view a page that has an experiment running on it, you will be bucket into a variation. No matter how many times you hit refresh you will see the same variation.
The bucketing occurs via a cookie. This is why I recommend installing a Chrome extension called Clear Cookie and Reload when testing. Keep clicking on the extensions button until you see all the variations you except. Job done 🔥🔥🔥
As you can see, getting up and running with an A/B test using Optimizely Web is very simple. Even though the interface is clean and minimal, there are lots of features that allow you to run some pretty clever experiments within a web browser. If you like this content, leave me a comment. Happy Coding 🤘
