In today's guide, I'm going to walk you through the process of creating a demo website powered with Umbraco cloud. The process is very easy and should only take you about 10 minutes. First, you'll need to sign-up for an account over at Umbraco, here.
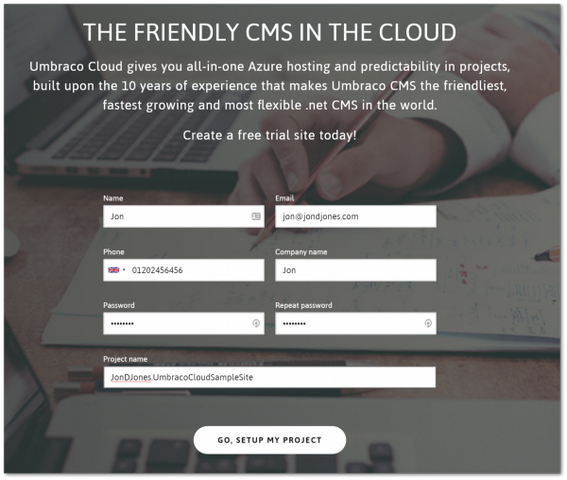
Add in your details, NO CREDIT CARD REQUIRED, click Go, Setup My Project and you will have a Umbraco Cloud account created for you!
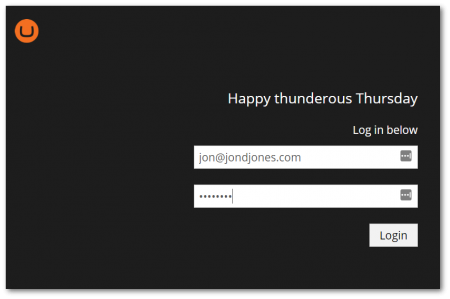
Next, sign in using the email and password you created above. You should now be logged into your Umbraco websites backend that is hosted in the cloud. It really couldn't be much simpler!
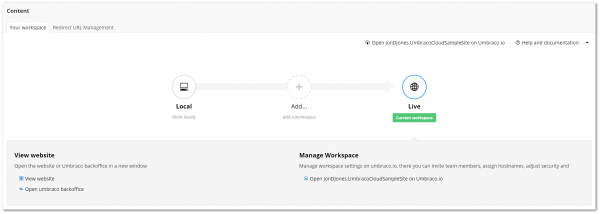
After you log in, the first thing you'll see is a new dashboard. This dashboard allows you to manage your Umbraco Cloud account. The first thing you'll probably want to do is download your project from GIT so you can start developing against it on your own PC.
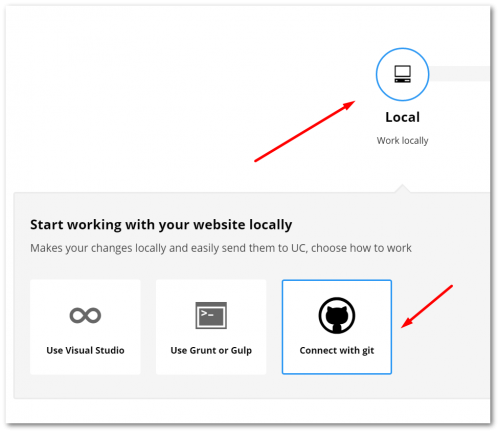
To access your project, click the 'Local' icon and you'll be presented with three options, 'Use Visual Studio', 'Use Grunt or Gulp', or 'Connect with GIT'. As I use GIT a lot and it's pretty easy to use, this is the option I'd recommend for you.

When you click on the 'GIT' option, you'll be given a URL to your GIT repository. If you haven't used GIT before, then I suggest you download SourceTree as it's much easier to get started with GIT using a GUI tool, compared to the command prompt. I won't cover the details of how to clone a GIT repository, however, by cloning, you'll get your Cloud files downloaded to your PC
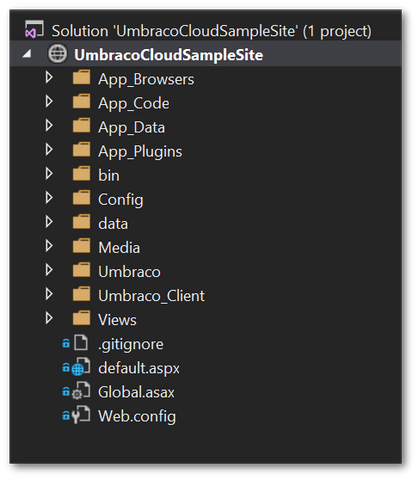
After cloning your files, you will get access to the webroot and a solution file. Open the solution file using Visual Studio to start your local development. Make your changes and then push them back up to the cloud via GIT. When you push your changes back into the Cloud, it will trigger an automatic deployment Your files will be published!
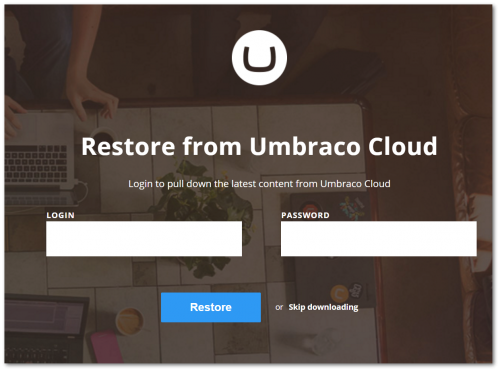
Another really cool thing will happen the first time you try and run your website locally; you'll be asked if you want to download the content stored within the live website to your local database. Enter your email and password in the relevant boxes and all your content will sync up. This feature is really powerful and miles ahead of some of the other CMS systems available. In this manner, you or a content editor can work offline and upload content easily 🔥🔥🔥.
Installing My Cloud Takeaway
As you can see installing Umbraco is easier than ever. I've been building.NET websites for over 11 years and the simplicity to get a website up and running nowadays is pretty amazing. Years ago, you needed to have a good knowledge of Windows Server, IIS and SQL just to get a site up and running. You would also need to set up your own source code repository manually. Downloading and uploading your code may have involved writing your own custom Ci/Cd pipeline. Nowadays, it doesn't take this specialist technical knowledge to get up and running with Umbraco. You can get a sample Umbraco Cloud account set-up in minutes! Umbraco Cloud has a few more features, but the aim of this guide is to demonstrate how simple and easy it is, which I am now hoping you understand. Happy Coding 🤘
