In this tutorial, you will learn how to install the Umbraco database and configure a SQL server hosted within Azure. This is the second tutorial in my series of configuring Azure with Umbraco CMS. In Part 1 you learnt how to set up an Azure web app to host your Umbraco website. We also covered how to use Visual Studio to perform a web publish to copy your files into Azure. The next step is to now populate the Umbraco database. This article assumes that you have got your website up and running locally and that you want to copy your local database into Azure.
SQL Azure Overview
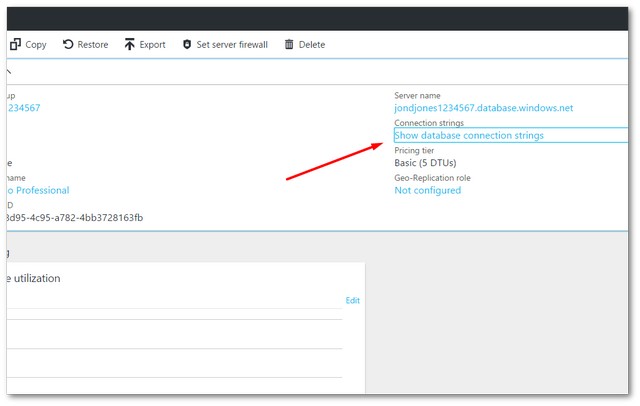
First, you will need to create a new SQL server instance within Azure. I won't provide the instructions on how to create a SQL database in Azure here. If you are unsure how to do this, have a quick Google and there are plenty of instructions. We will just focus on Umbraco specific bits here! After doing that, you will need to get the connection string details from within Azure and add them to your application. The easiest way to do this is to create a web.release.config in your application and add a transform on the connectionString section. To find out what the production connection string is, open the SQL instance in Azure and click on the link shown below:
 I
I
Clicking on the connection string link will show you the details you need to add to your connection string.
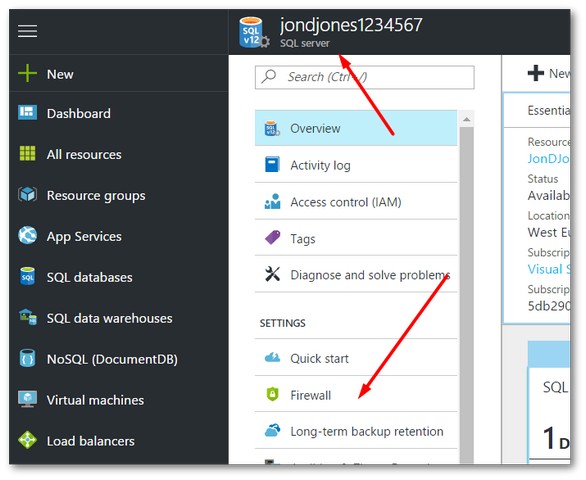
Logging into Azure whenever you need to query and check something within SQL is a bit of a faff. I find the easiest and most efficient way of managing an Azure database is to remotely connect to the Azure database using SQL Server Management Studio from your PC. To allow your local SSMS to talk to Azure you will need to register your local PCs IP address within the Azure SQL servers Firewall. This can be done by opening up your SQL instance within the Azure portal, and clicking Firewall.
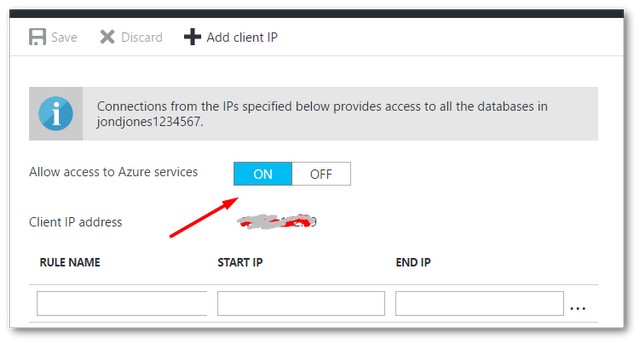
Make sure Enable access to Azure services is enabled. If you do not know your IP address, you can use WhatsMyIp to find it. This should be all the configuration you need to know about to allow your PC to access that database via SQL manager. Once connected, you can upload your local database into Azure 😍😍😍
Uploading Your SQL Database Locally Into Azure
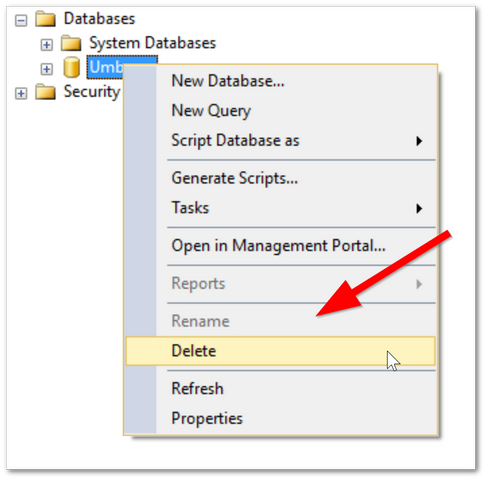
You now have an Azure SQL database, you have the production connection string details configured within your application and you have SSMS configured to connect to it. It is time to upload your SQL database using SQL manager. My first task is to usually clear out any blank or old databases within the SQL server. If you do not have any old databases, skip this step, otherwise, you can clear things out by right-clicking on each unneeded database and selecting Delete, Simples!:
Next, we will upload the database from your PC that you will want to use as your live database. This can be done using the deploy option as seen below:
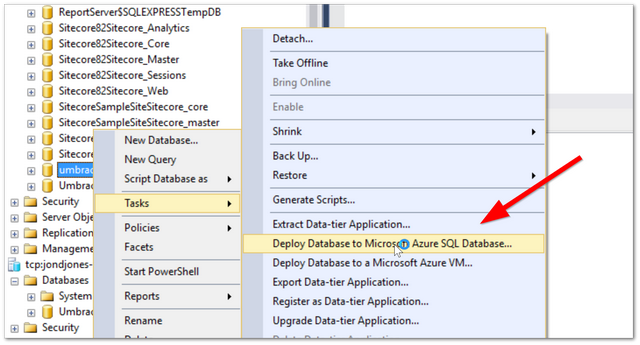
I'm assuming you have the Umbraco database you want to use on your PC. Locate your local database within SQL manager, right-click on the database you want to copy and select Tasks ➡Deploy Database to Microsoft Azure Database
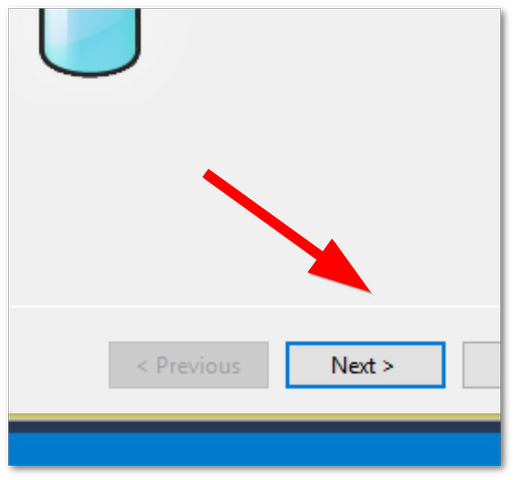
In the dialogue that will pop up, click 'Next'.
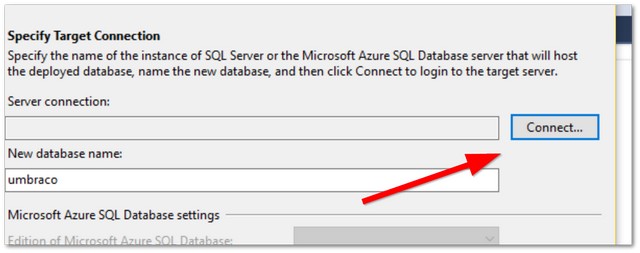
Set the database name within the New database name field. Next, you need to connect to your Azure instance, clicking the Connect button.
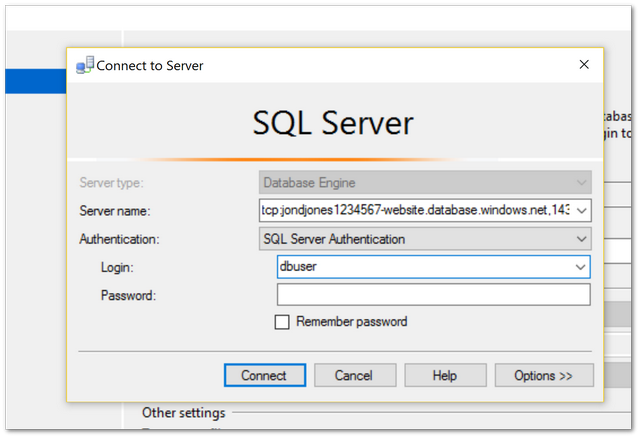
Add in your remote Azure SQL details and click Connect.
If you have added the details correctly things should look nice. If you bump into errors check the log-in details and check your local IP is unblocked in the SQL firewall. Click Finish and your database will be uploaded from your PC into Azure. As long as your connection string within your web application is pointing to your Azure database, you should now have a working website!
Backing Up Your Umbraco Azure Database
Before you leave, it might be good to talk about backing up your database from Azure. The easiest and cheapest way to do this is to manually create a database and store it in source control alongside your code. You can schedule Azure SQL to back up to Azure storage, however, this will cost money. If you want to do the cheap option, you can back the database up by running SQL manager locally. You will need to export the Azure database as a bacpac file. To do this connect to the Azure SQL database from SSMS:
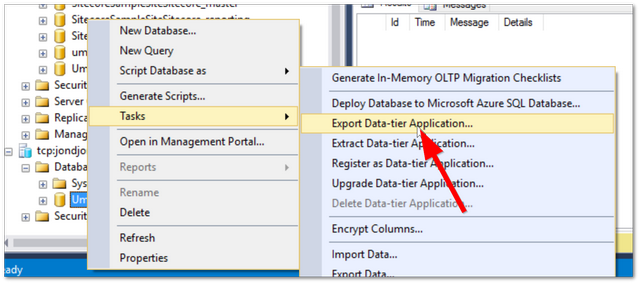
Within SQL manager, connect to Azure, right-click on your database, click Tasks ➡ Export Data-tier Application
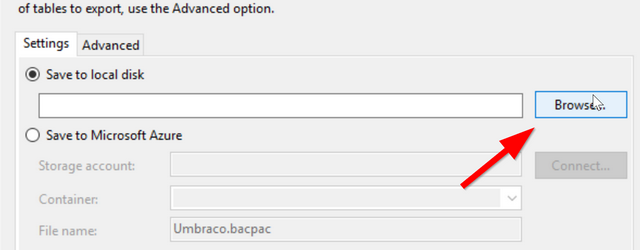
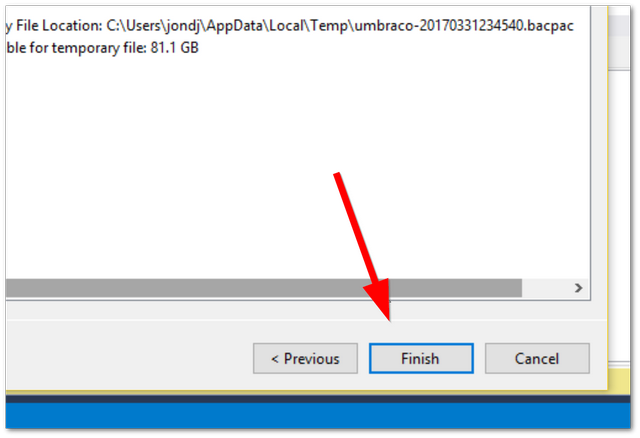
Pick a location on your PC where you want the backup file to be saved.

Click Finish sit back and relax... your Azure Umbraco database should now back up successfully! Happy Coding 🤘
