In this tutorial, you will learn about the features that the Umbraco cloud portal offers. The Umbraco cloud portal is where you will manage your cloud website. The portal can be thought of as the area to manage the webserver manager, web application firewall, account and user management area. Like Umbraco, the portal is pretty straightforward to get to grips with. Within a few minutes, I am confident you will become a portal power user 🔌💡⚡️.
First, you can access the portal from this URL /project/<PROJECT_NAME. For example, if your websites name is jondjones. The portal URL would be www.s1.umbraco.io/project/jondjones and the live websites URL would be jondjones.s1.umbraco.io. After logging in your will see the main portal screen:

After loading the portal, you will be presented with the screen above. From the main portal page, you can set your website in debug mode, you can perform an IIS Reset, clone the project etc... Also.. notice the big blue button at the bottom right. This is an instant chat feature that lets you talk to Umbraco Cloud support.
From the menu, you have access to these options:
Manage Environments: Do you need to create an additional QA environment or developer environment? This is the area where you can purchase additional environments. As soon as you add a new environment, any deployments from local machines can be pushed on it. Each environment will be separate, with its own URL and files. Having multiple environments will allow a team of people to work on the site at the same time.
Add Member: Create or edit user accounts. From this screen, you can give access to other developers or content editors.
Settings: From settings, you also have access to the following features:
- Edit teams: Manage the permission for the people who have access to the project.- Connection details: Get access to your SQL server settings. Add your local IP in here, to enabled remote working:
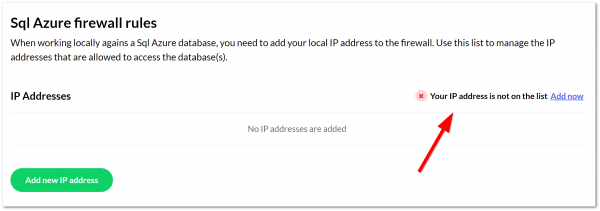
This process is really simple.. just click Add Now and Umbraco Cloud will figure out your local IP for you and add it for you 💥!
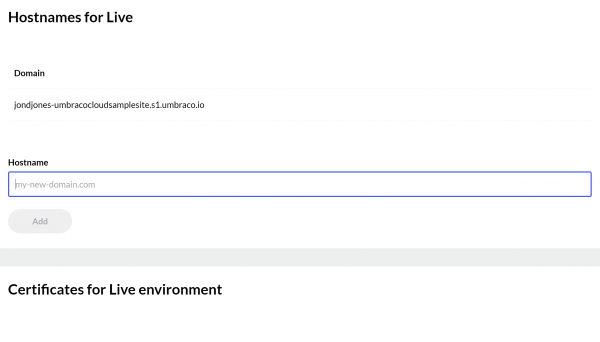
- Manage Domains: This is where you add the sites hostnames and SSL certificates:
Manage IP Whitelist: This is where you manage who can get access to your backend and portal. Locking the backend down by IP is a good security practice and one you should use!
Delete project: I'm sure you can figure this one out yourself... avoid using this!
That concludes the options available in the cloud platform. Happy Coding 🤘
