In today's tutorial, you will learn how to host a Umbraco website within Azure. Recently, I decided to convert this website from WordPress into Umbraco. As part of the migration, I also moved the hosting into Azure. Over the years, Azure pricing has become more reasonable and combined with the ease of set-up, it seemed like a no-brainer to migrate the site into Azure. You may be wondering how much this will cost? With all costs included, my set-up costs me about £2 a day which is pretty cheap 💰.
In this guide, I'm going to assume you created your Umbraco application the traditional way, within Visual Studio and you are now in a position to upload a working website into the cloud. This page might look quite long, but the steps are pretty easy.

Your first step is to head over to the Azure portal and log in, https://portal.azure.com. After logging in for the first time, you will see a pretty overwhelming dashboard. After a few hours of using Azure, it gets pretty familiar, pretty quickly! I decided to host my site within a Web App, using Azure SQL to host my database. Web apps are a lot cheaper in terms of hosting, compared to running your own dedicated virtual server. To get your Umbraco site up and running in a web app you will need a few things:
A Resource Group
An App Service Plan
A SQL Server
A web app, to upload your Umbraco files into
An Azure DB, to host your Umbraco database
Next, you will need to create a resource group:
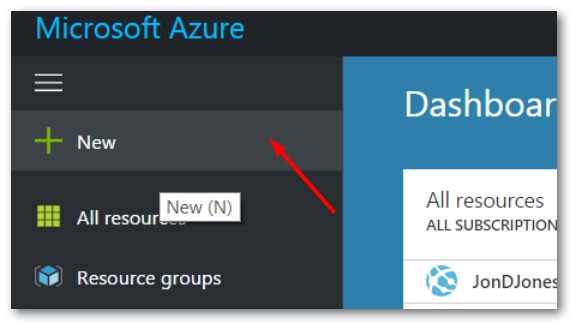
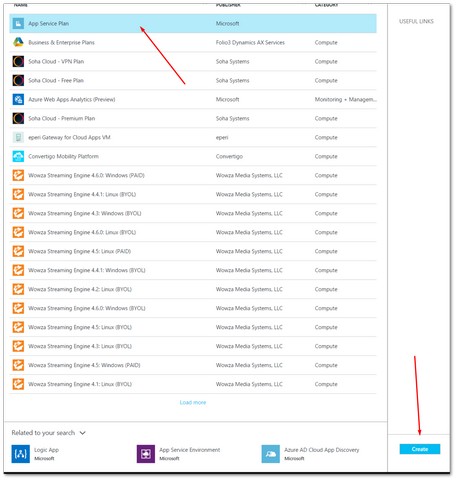
To create the resource, in the portal click the New button on the top left side:
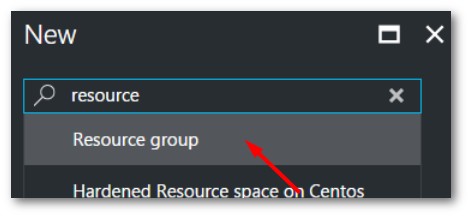
In the search box, type in resource group and select it.
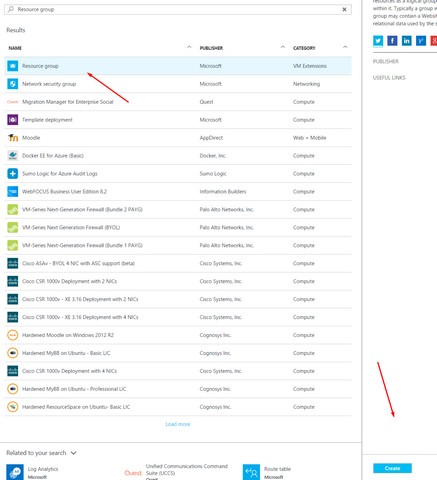
Find the resource group in the list and click Create:
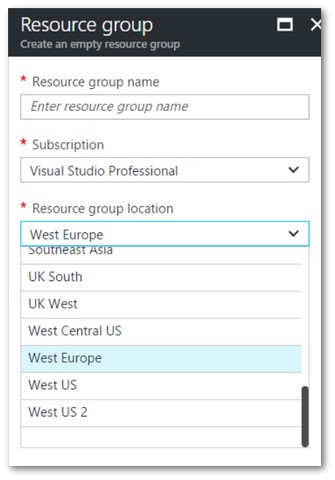
The resource group can be thought of as a container. The container is used to associate the sites web apps and SQL database. This allows for easy management and financial tracking. The resource group defines where in the world your apps will be created. After you create your apps you can't change the location easily, so you need to make sure you set this up correctly the first time around.
Note: ⚠️ You need to have your SQL database and your web app in the same resource group and geographic location, otherwise, your website's performance will be terrible. I used different resource groups the first time I set up Umbraco with Azure by accident and it took about 2 minutes for Umbraco to load a pretty simple page. If you run into massive performance issues when setting this up, double-check the location of each resource 🤩.
Next, you will need to create an 'App Service plan'. The app service plan will determine the number of resources your app will have. The more resources the quicker the site will work. It will also cost you more money! In the main dashboard, click on the 'New' button and search for 'App Service plan'
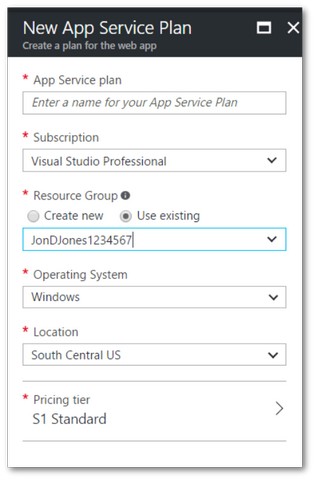
When creating a plan you will be asked for these details:
App Service Plan ➡ This is an internal name and doesn't really matter what you call it as no one will see it.
Resource Group ➡ Use the resource group you created above
Location ➡ Important, this must be the same as a resource group
Pricing ➡ I used the standard tier S. This tier works well for the basic Umbraco brochureware website. What you choose will be up to you, your site and its traffic!

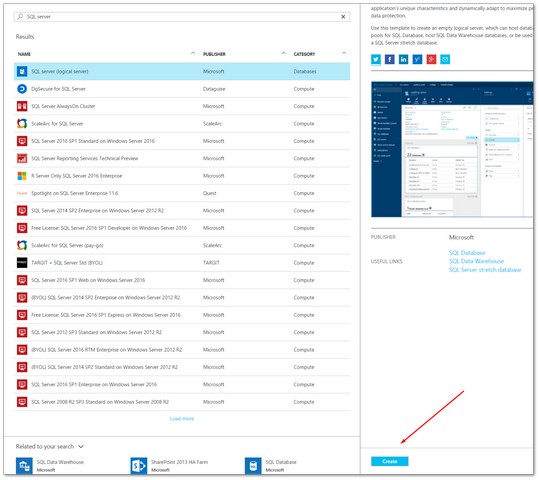
Now we have a web app to host the site files, we need a SQL server. Again, in the portal, click 'New' and search for SQL server
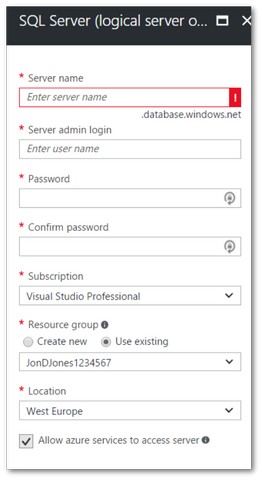
Add in your SQL details. You will need to add a name, an admin log-in and a password. You will need to use these details within your Umbraco connection string. Again, choose the resource group you created in step one and then make sure you choose the same geographic location.
After you have a resource group, an app plan, and a SQL server configured, we can do the rest in Visual Studio!
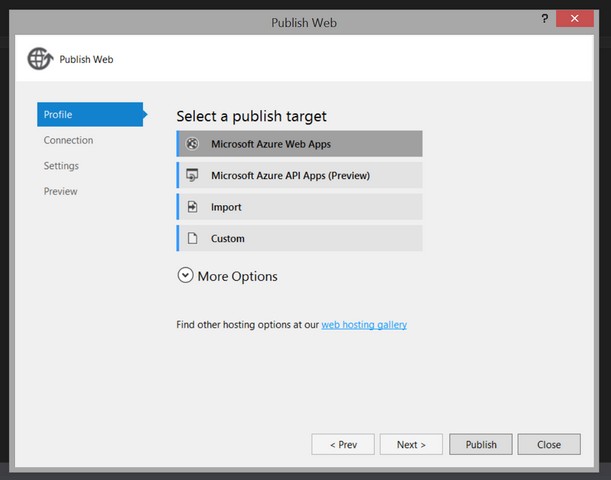
In Visual Studio, open up your Umbraco project, right-click on the website and select 'Publish'. When the Visual Studio Publish dialogue opens, select the Azure Web Apps option.
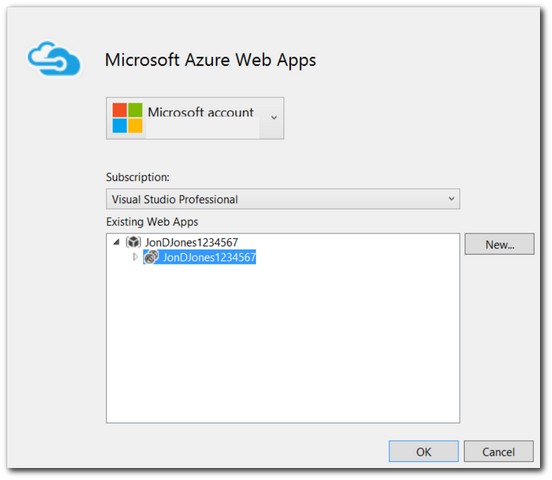
Log into your Azure account, and select the 'New' button on the right.
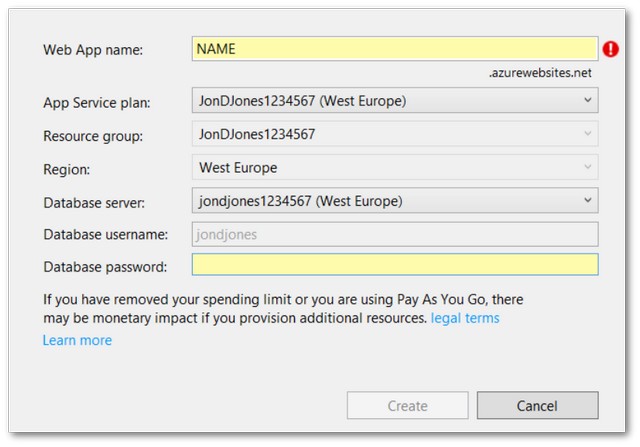
You can now create the web app from within Visual Studio. It is possible to create the web app in Azure, however, I find creating it this way to be the quickest and easiest. Give your web app a name, like Umbraco Website, select the resource group, the app service plan and the SQL server password you created above. Click create and Azure will create a database and website for you. When the app has been created, click the final Publish button within Visual Studio to upload your files. If configured correctly the site should now load. If it doesn't, you obviously need to make sure you have the right connection details in your web.config. I won't cover configuration transforms in this guide, however, that's an essential step, make sure your web.release.config file contains the Azure SQL connection details.
Warning Ok, so far you have created the web apps you need to host your application in the cloud within Azure and you have copied your web files into Azure. You will still need to upload your database into Azure. The first time you use the Visual Studio publish, it will create a blank database for you, but, obviously this is no good. To learn how to upload your database read part two, How To Setup Umbraco With Azure - Part Two - Uploading A Database.
You have now taken step one in creating your site within Azure. Happy Coding 🤘
