In this tutorial, you will learn how to set up a content editing workflow within the Episerver CMS editor. Publishing content on a companies website can be a delicate matter. Badly written prose, using the wrong tone, incorrect legal advice, or bad grammar can damage a companies reputation. To reduce the chance of bad copy making it onto the companies website, a content editing workflow can be implemented. The workflow might involve the compliance team approving all content before it goes live, or maybe a manager simply needs to sense check content. Trying to implement a workflow on trust is not viable for many companies. Government and finance are two sectors that require approval.
If you are using Episerver 10.1 and above, implementing a content workflow is very easy. Let us walk through how to create a content approval process within Episerver so you can create one yourself ♥︎💣. To implement a site-wide content approval process, you will need to apply a workflow onto the homepage node and then recurse the rule to all children. To do this, log into the Episerver editor:
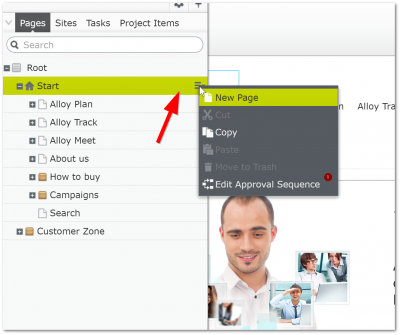
From within the right-hand 'Navigation Panel', click on the home page, then click on the home page's burger menu. In the context menu that appears, click on the 'Edit Approval Sequence' option. The 'Approval Sequence' dialogue should now load. This screen is where you will define the content approval steps that a page must go through before it can be published to the live site. In this simple example, I'm only going to add a single approver... me! Adding individual users is not the best practice. When it comes to content approval, I suggest you favour groups, not users. As people come and go within an organisation, applying permissions on a pe ruser basis is a pain. It is also easy to make mistakes. Applying group-level policies is much easier. You can apply all the group approval permissions into the page tree once. You can then manage group access via the admin interface without worrying about having to touch the page tree again. Common group names that I have used include 'Compliance' and 'Legal'.

Within the 'Approval Sequence' dialogue, the first thing you need to do is make sure that the Approval Sequence checkout is enabled. As seen in the image above.
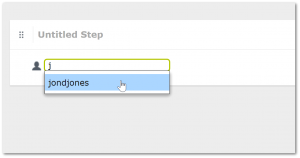
Next, you will need to create an approval step. I am adding a user account as an approver, however, you should use a group!
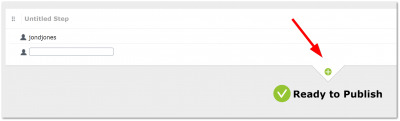
You might need more than one person (or group) to approve content before it can be published. The content approval process lets you add as many Steps as you want. By adding a new step you can add new approvers. Although steps are really simple, they add a lot of power.
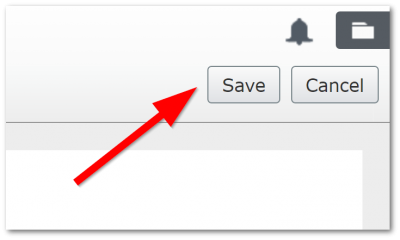
Once you are happy with your approval sequence, press the 'Save' button located on the top right-hand side of the screen. That's all it takes to set up content approval in Episerver 💥🔥👟🌶🚀🌋💉🥊🎋.
Seeing Content Approval In Action As An Editor
Now we have our approval sequence set up, let's have a look at content approval in action. Assuming you have followed the steps above, log into the CMS with a non-approver and go to any page within your site. Make a content change and try to publish it by clicking on the big Publish button:
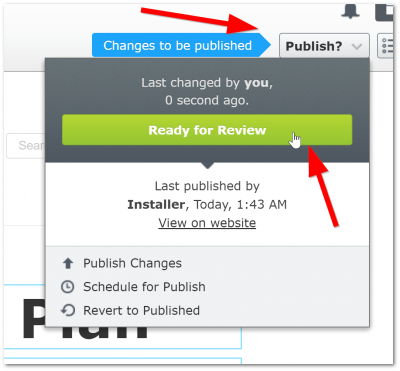
On the top right-hand side, where you normally see the Publish button, you will now see a Ready for review button. Clicking on this button will trigger the content approval steps. The approval process works sequentially, so the first step will trigger first and the second will only start after the first approver agrees to the changes. As a content editor, that is all you have to do for now. If everyone approves your changes the approver will be published the page. If you have feedback, the next time you visit the page you will be able to edit it again.
Seeing Content Approval In Action As An Approver
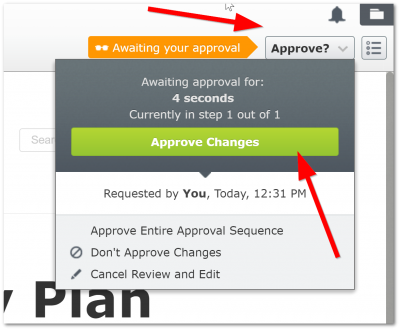
Let's say you're now an approver, there are a number of ways you might be notified that you have content ready to review. A developer can set up an email to send, an instant messenger alert, or a Slack channel push. All these things will require custom development, so if you have a particular requirement ask them! Out of the box, the only way a content approver will know they have content ready to approve is by logging into the Episerver editor. When they visit a page that needs approval, in the top right-hand side, instead of seeing the big blue 'Ready To Publish' message, they will see an 'Awaiting Your Approval' message, as seen below:
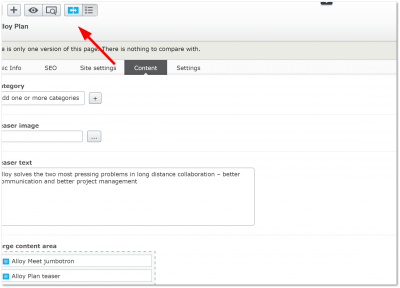
How you review content changes is up to you, however, I would recommend using the 'Compare Revisions' feature to quickly see changes. When you are happy with everything, click the 'Ready To Publish' button.
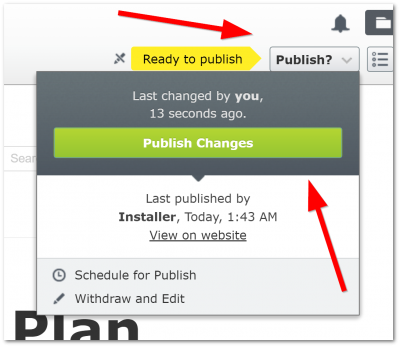
Note It is only after a page has been through the full content approval workflow, you will see a yellow 'Ready To Publish' button, otherwise the appraiser will also see the Ready for review option.
Content approval may look simple, however, it is really powerful. Out-of-the-box, anyone with Episerver admin privileges can set up a content approval workflow. If you need more advanced features, like email notifications then your developers can do this with minimal work. Content approval is a big step forward compared to the old workflow systems, which were difficult to understand, set-up and customise. Happy Coding 🤘
